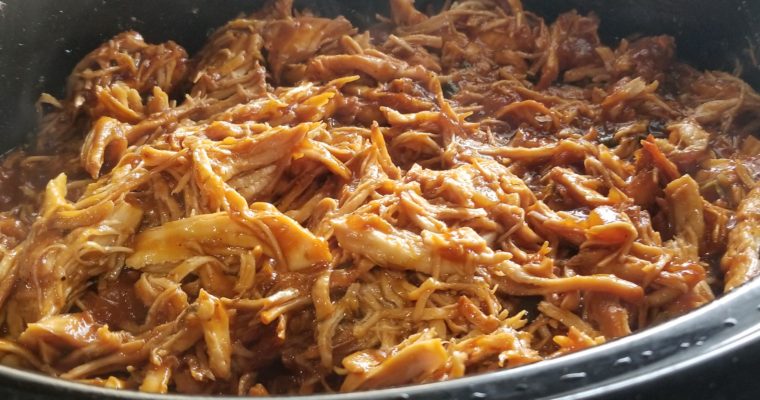
Hawaiian BBQ Slow Cooker Chicken
This is an easy recipe that you can just throw all together in a slow cooker and 3 or so hours later it is done. You can serve each chicken piece whole with a side of rice, or make it into a sandwich. I shredded…

Enjoying life with family & friends through food
This is an easy recipe that you can just throw all together in a slow cooker and 3 or so hours later it is done. You can serve each chicken piece whole with a side of rice, or make it into a sandwich. I shredded…
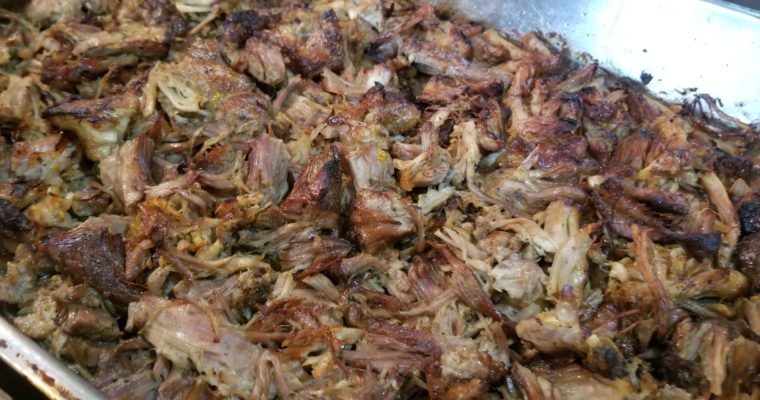
If you like pork then you will love this recipe. This roasted pork butt can be used just as it is when you take it out of the oven or it can be shredded/pulled to make BBQ pulled pork, or crisp it up in the…
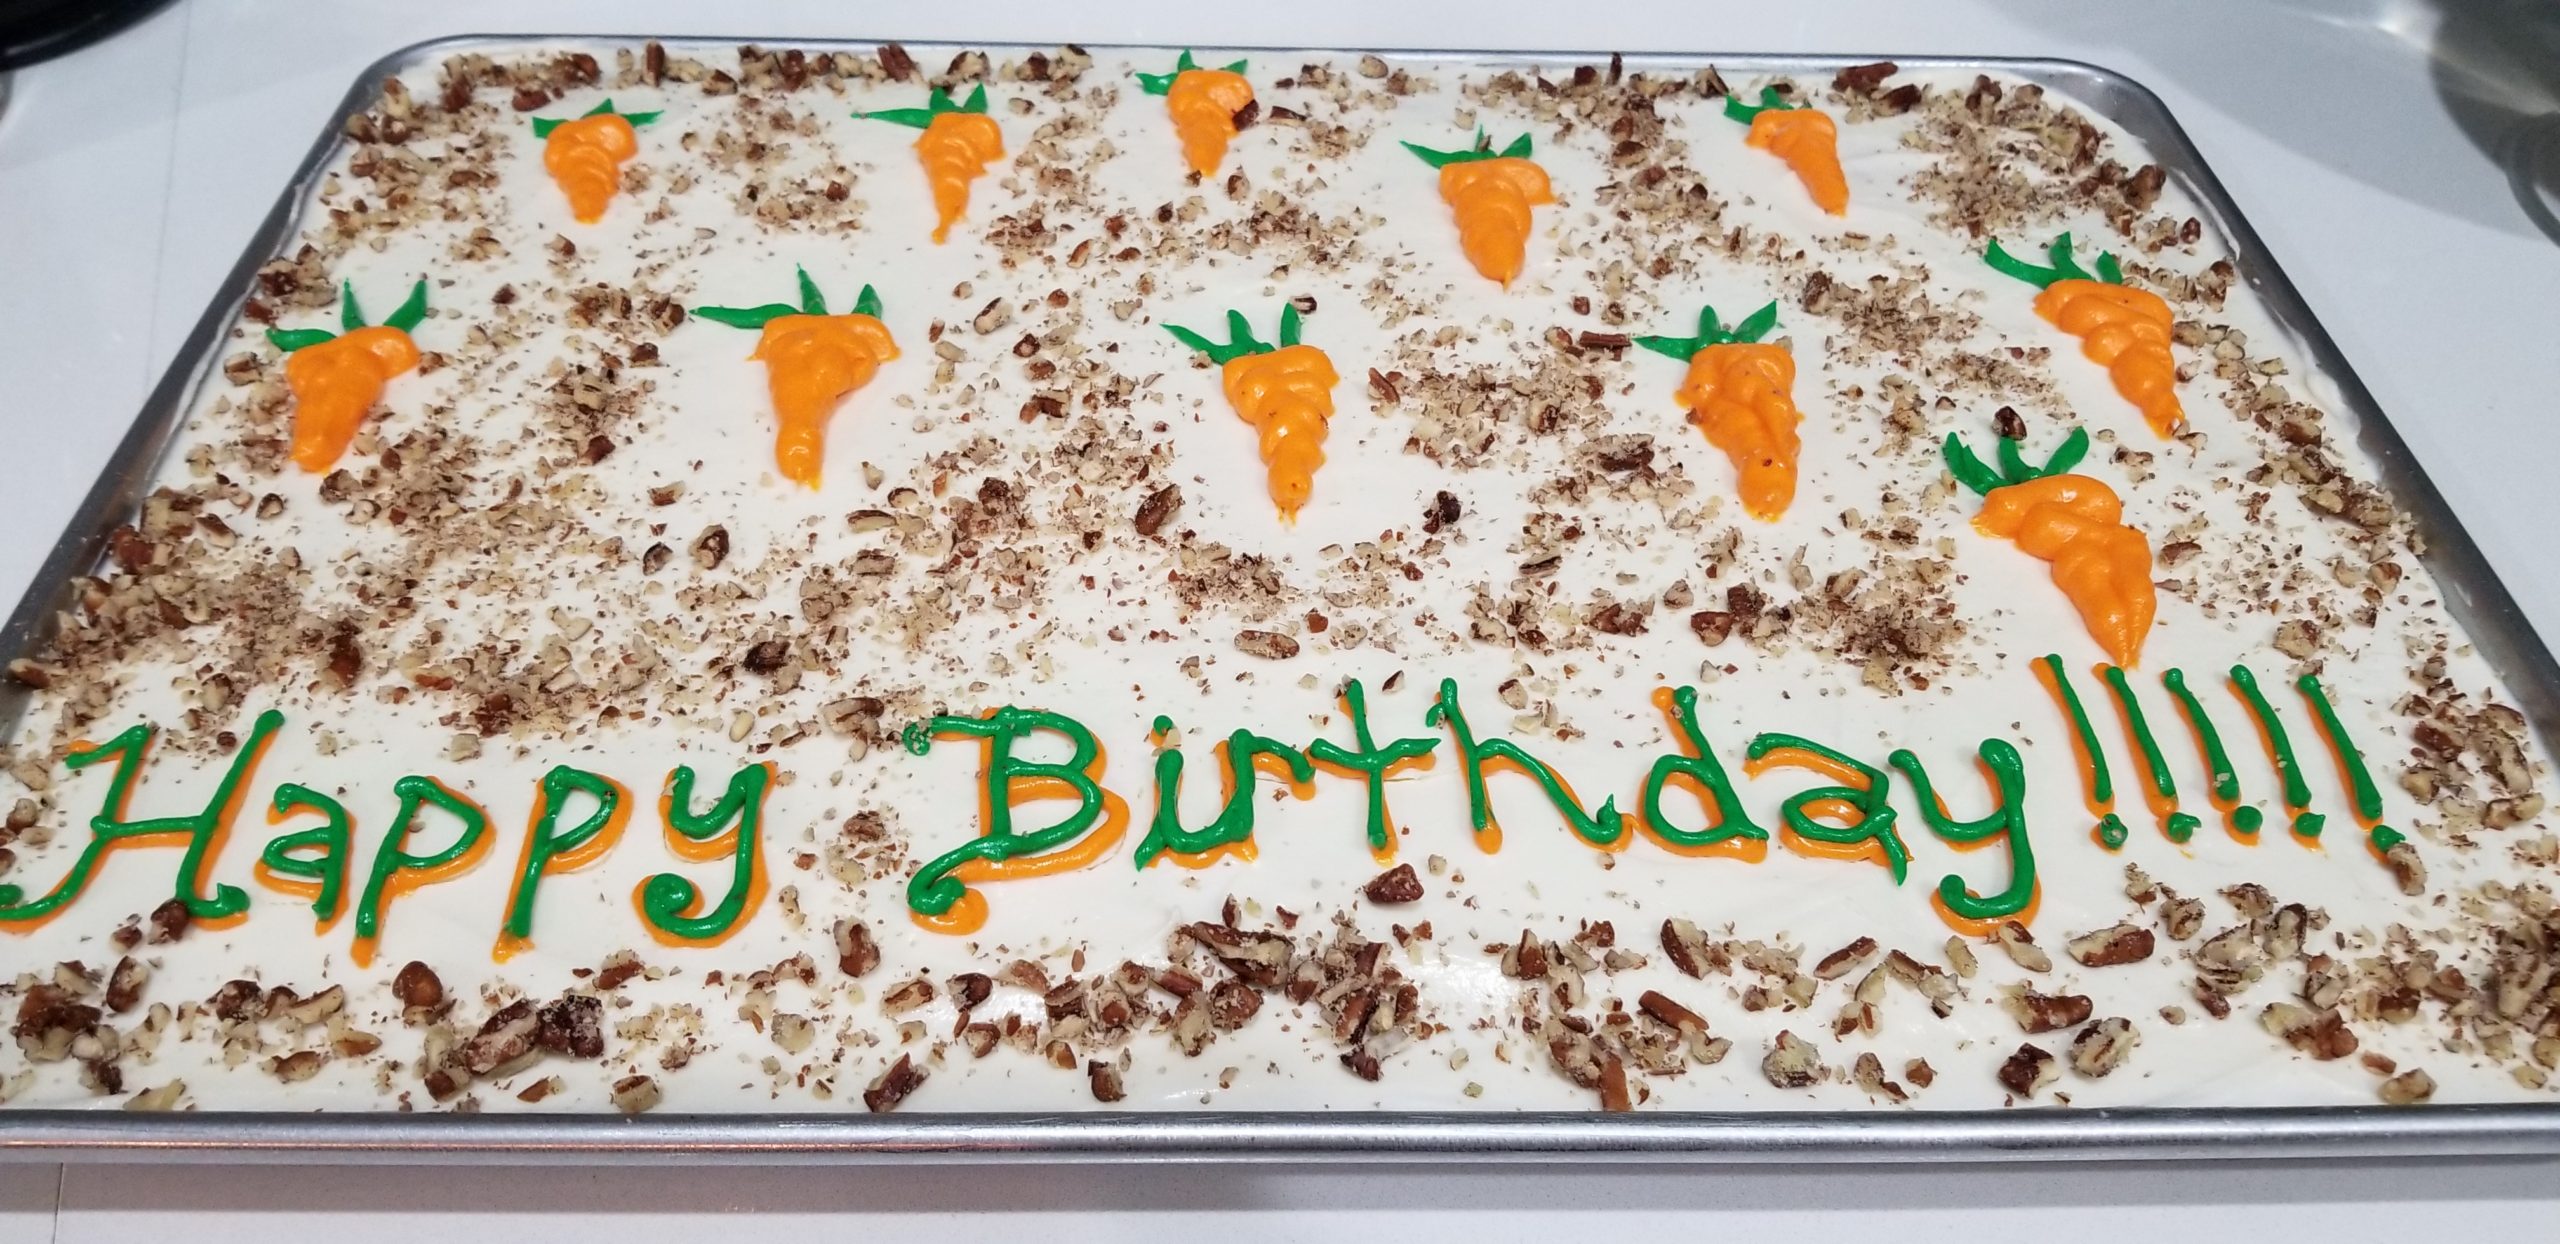
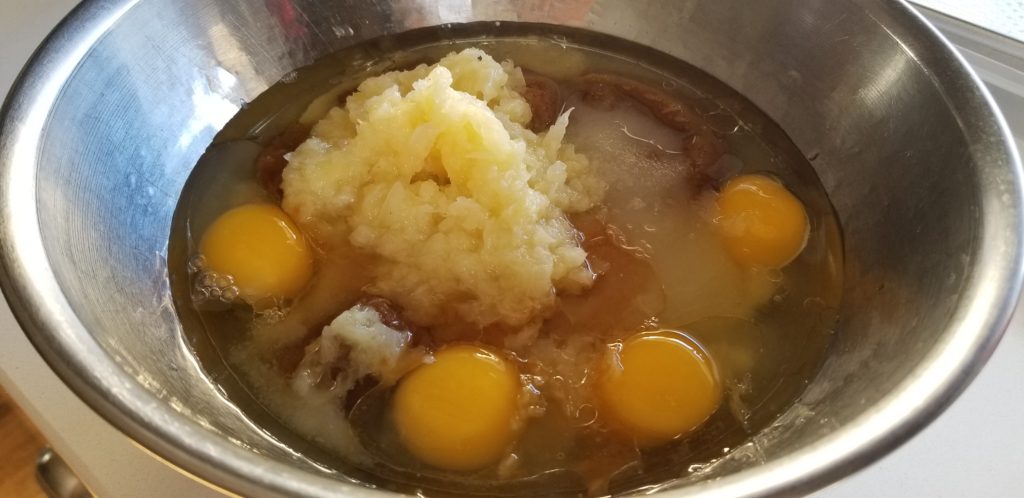
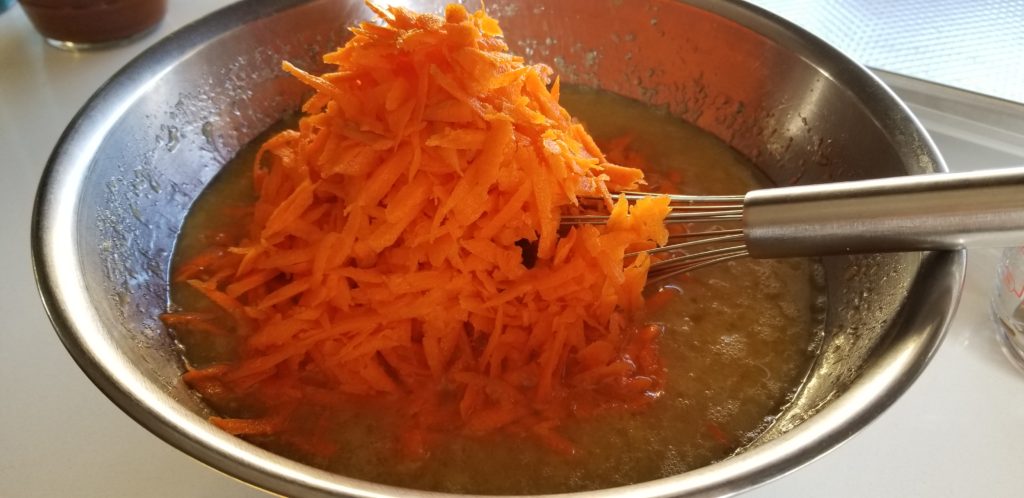
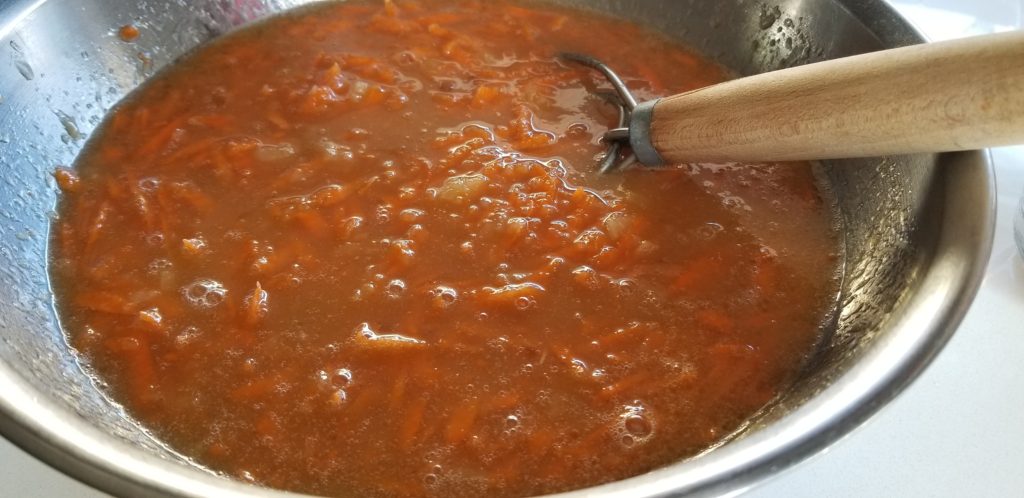
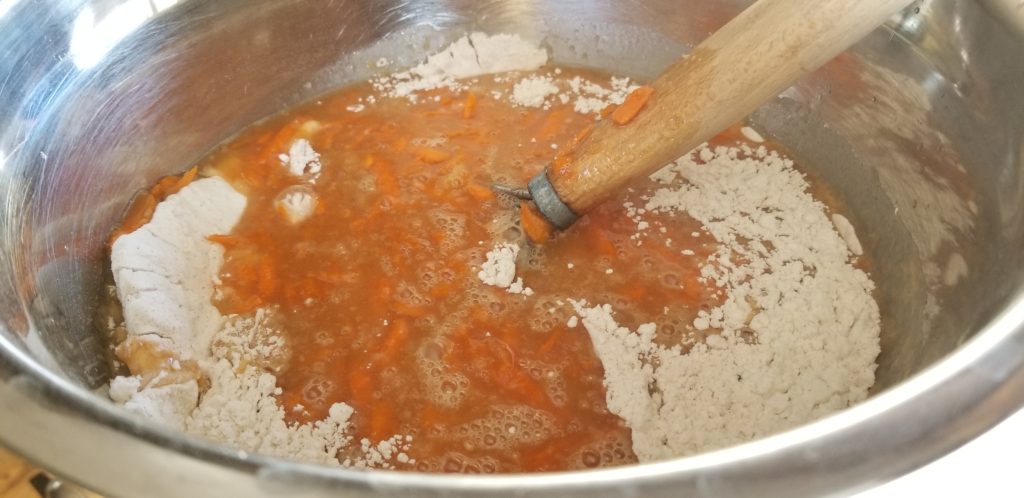
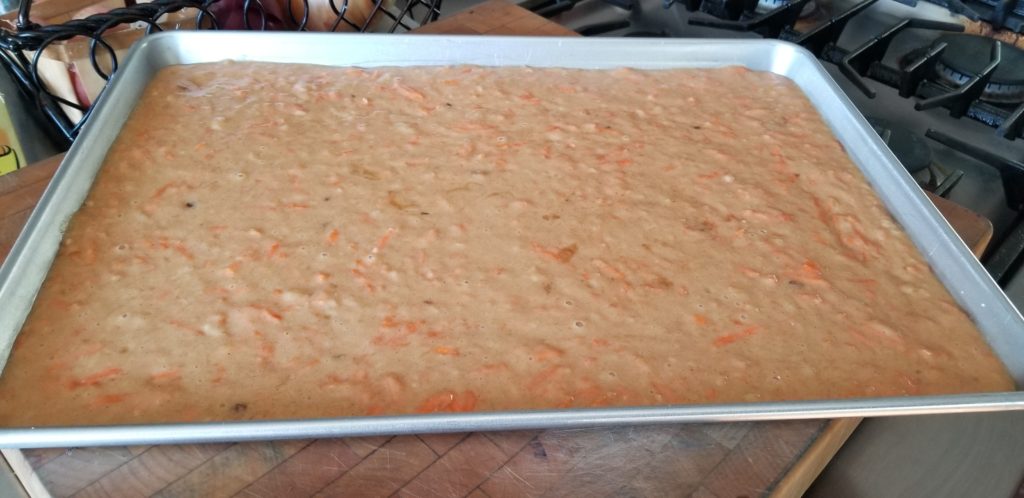
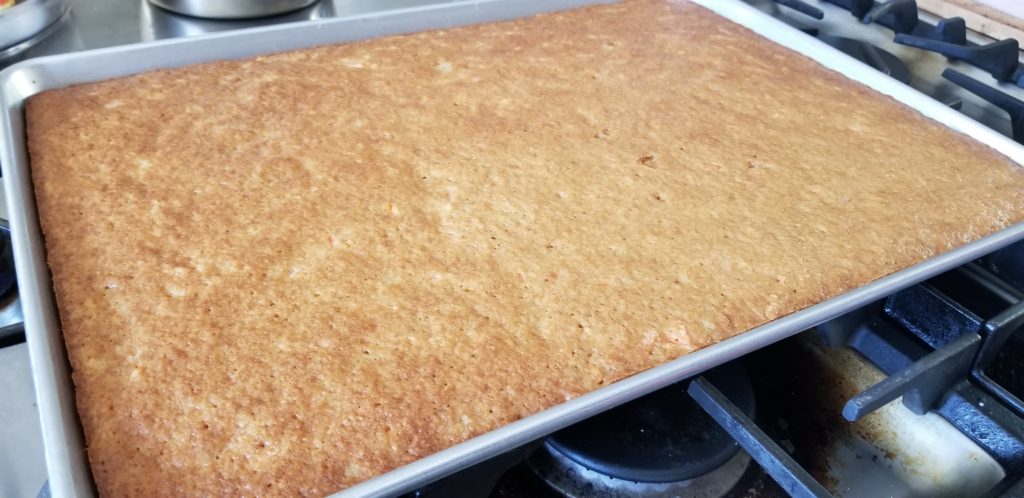
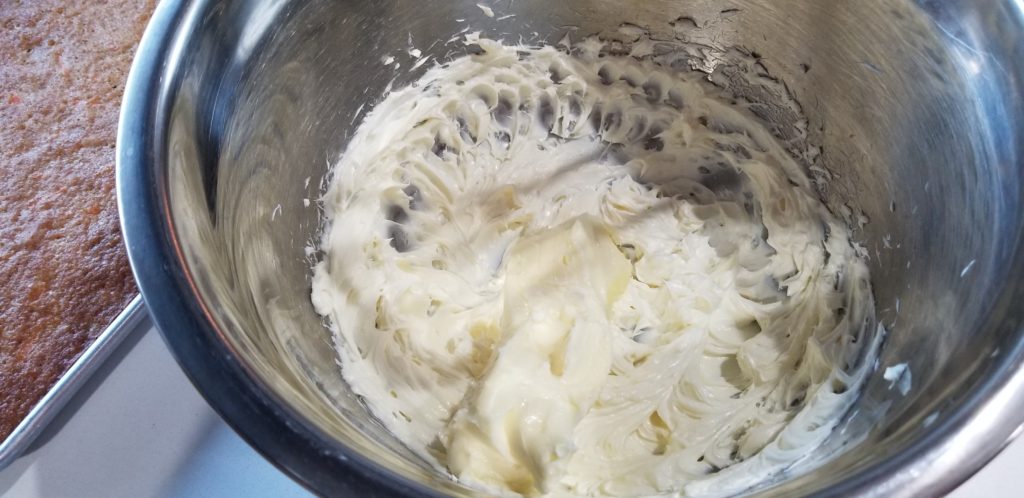
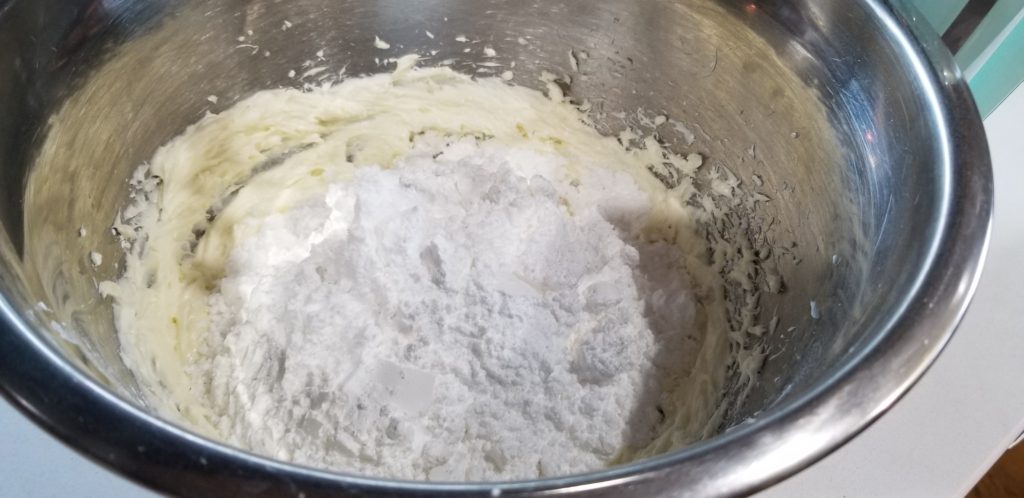
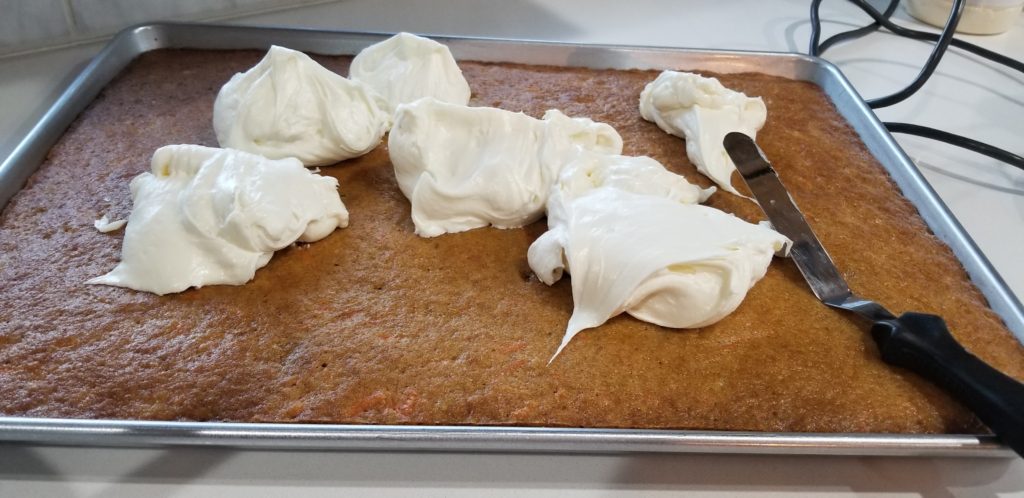
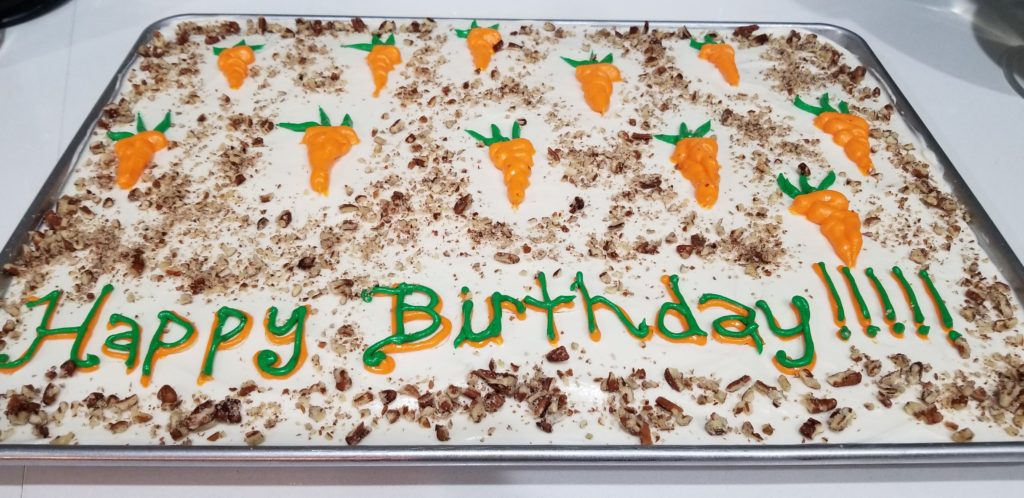
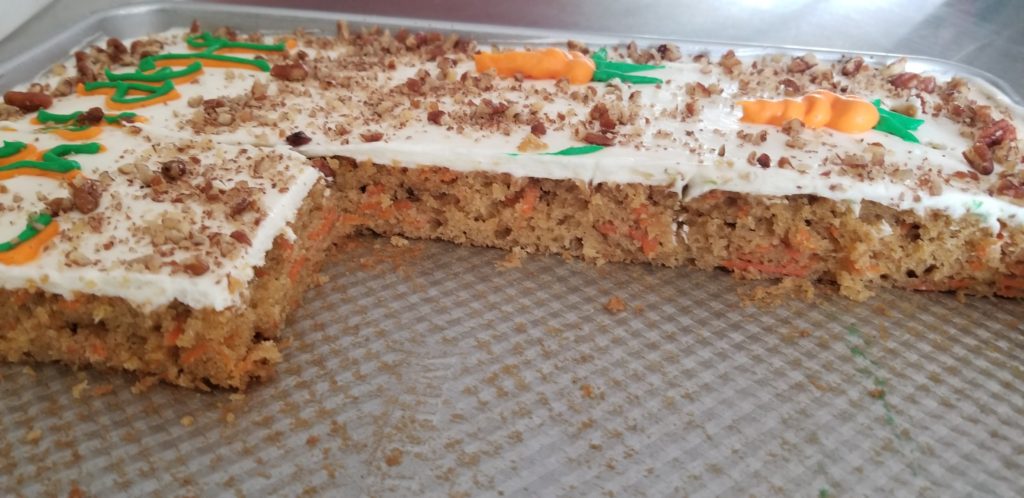
This carrot sheet cake is delicious! Whenever I make it I wonder why I don’t make it more often, since it’s so easy! Both the cake and frosting have the perfect balance of sweetness and great to make for a party since you can get 24 large pieces out of it or 32 more sensible pieces. Also, this cake is a little healthier than other cakes, since it includes shredded carrots and crushed pineapple 🙂 .
Fall is the perfect time for carrot cake and makes a great dessert choice for Thanksgiving. When you bake the cake it makes your whole house smell so good, with all the fall spices such as cinnamon, ginger, and nutmeg. It’s also a great dessert for Easter…add a few bunny decorations to it too to make it perfect for Spring!
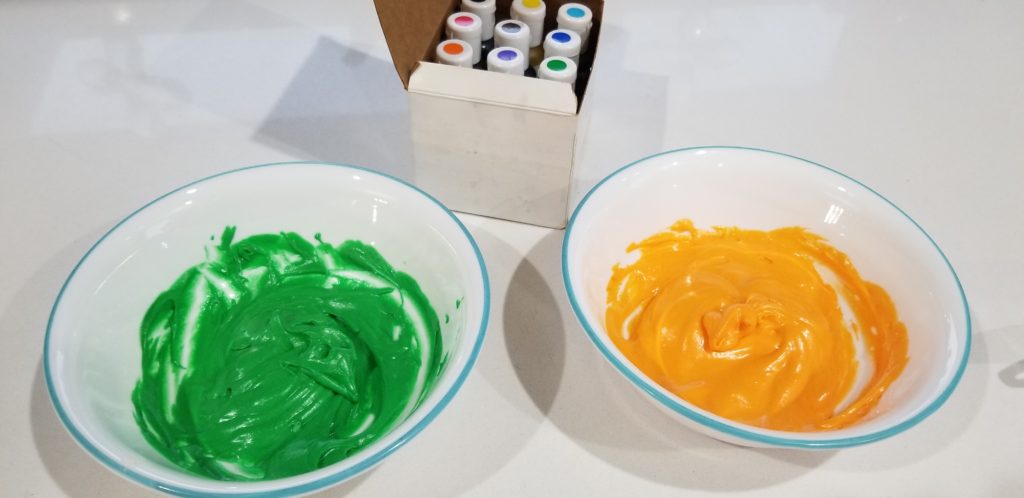
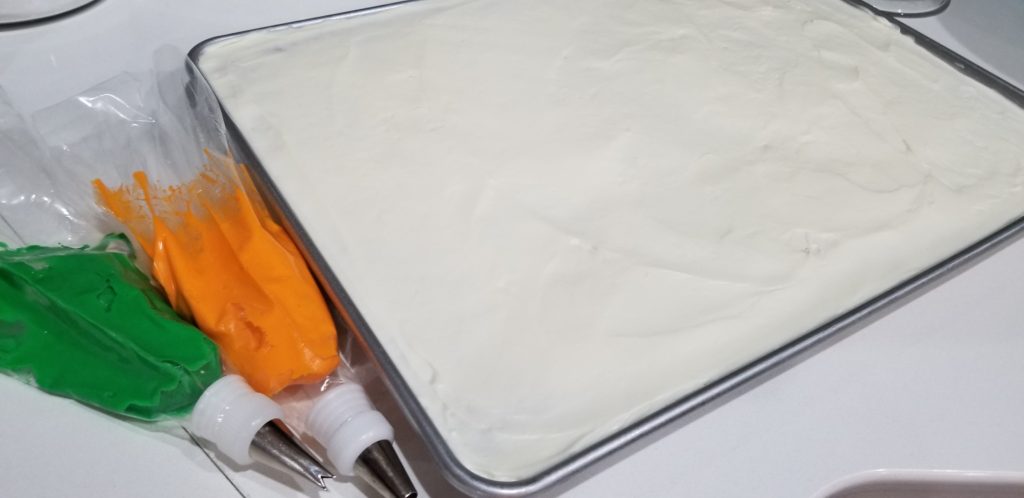
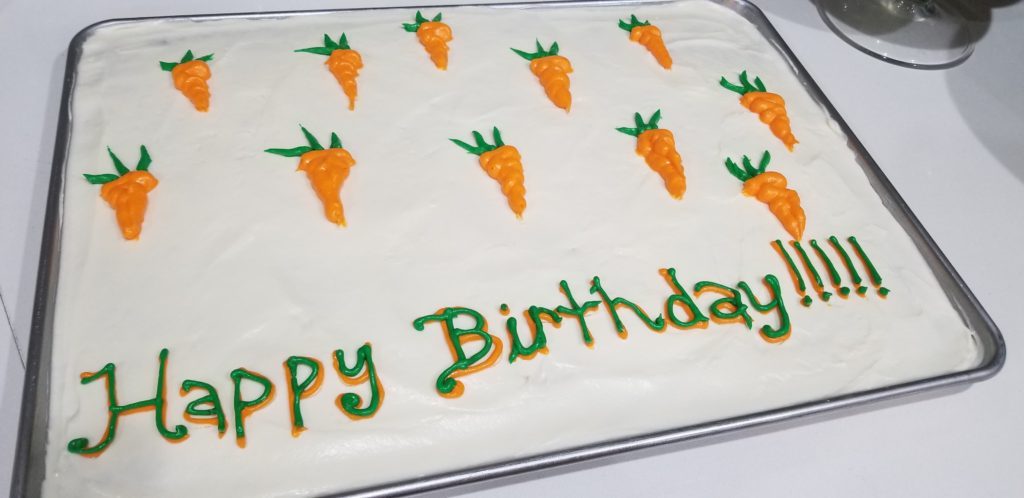
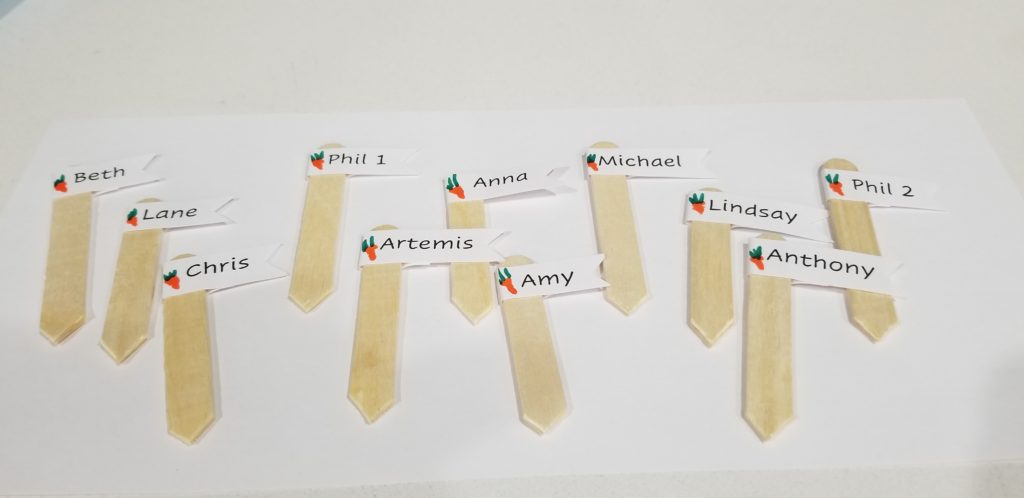
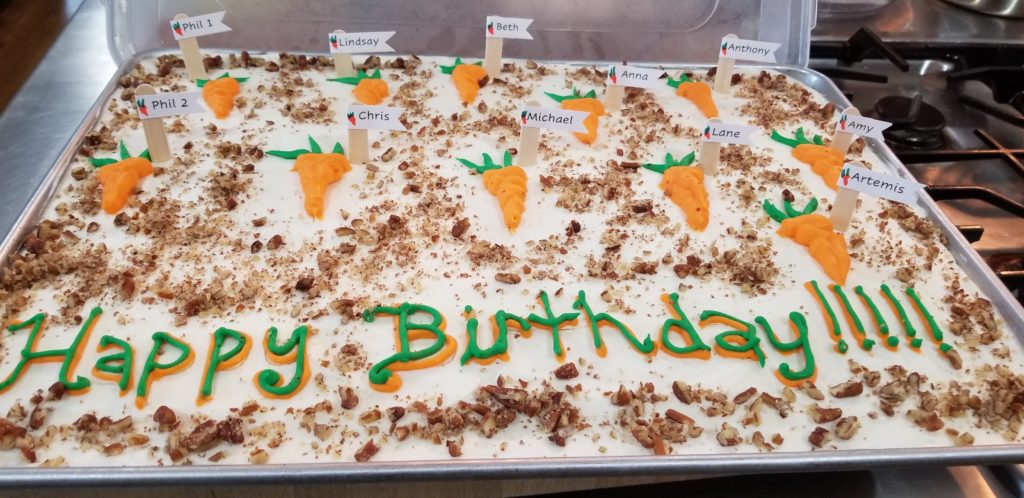
You can decorate this cake however you like. I used it as a group birthday cake this go around so I decorated with little carrots for each of the birthday people, to show it’s a carrot cake, and then added garden tags to each carrot with the birthday persons name on it.
You will need:
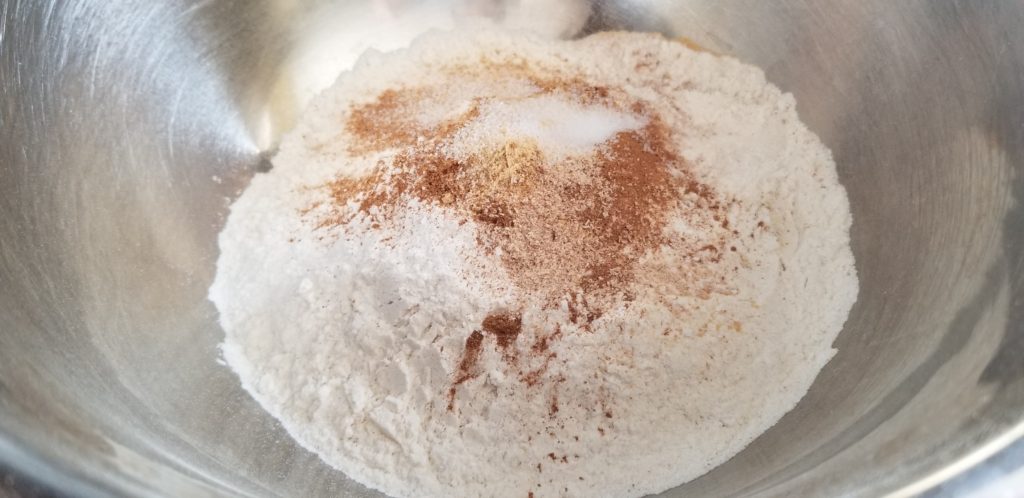
For the carrot cake:
For the cream cheese frosting:
Steps:
Kali Orexi!


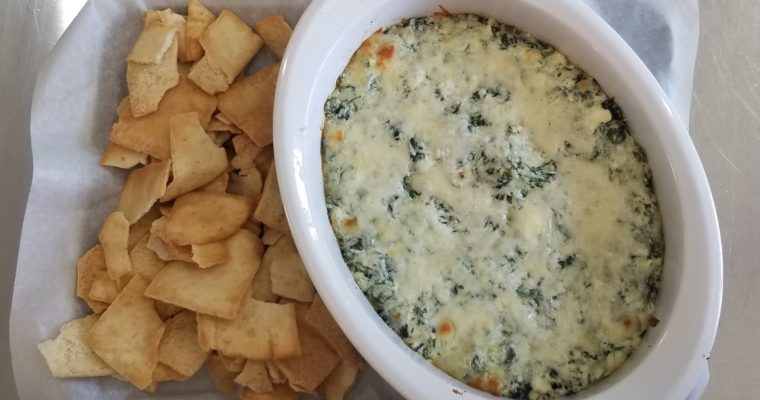
If you and your family like spanakopita then this dip is for you. Great for a family get together or watching the game with friends (football or otherwise 🙂 ). I got this idea when I was making spanakopita and had a couple of cups…
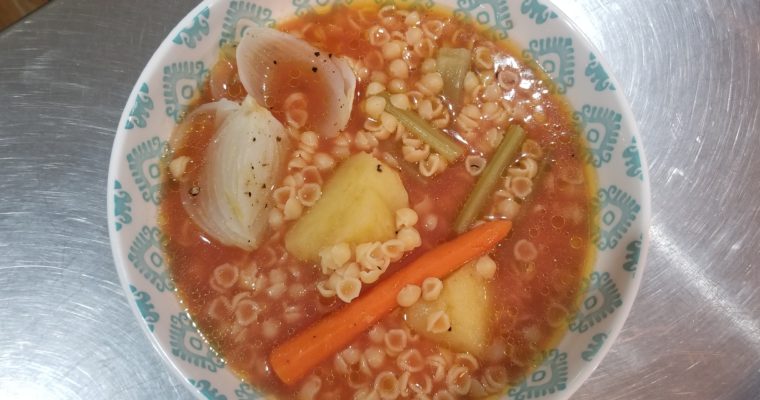
If you are craving a light and tasty soup that will leave you satisfied, yet not feeling like you overate, this soup fits the bill! Nice healthy ingredients such as potatoes, carrots, celery, and onions are are in this soup and just a little bit…
This post has been a long time coming. Around the 4th of July this year I had a wonderful opportunity to experience making authentic tamales with my sisters friend and co-worker, Monica. My sister was telling me of her weekend plans of friends getting together and helping out with making tamales and I asked her to ask the hostess if I can come too…yes, I basically invited myself 🙂 . Of course she was happy to have me…the more the merrier, right? Well, at least the more hands the more tamales, and the faster it goes!
I’ve ALWAYS wanted to learn how to make tamales (because I LOVE them so much), so there was nothing better than hanging out and socializing with some fun ladies and men, having a drink, and making these yummy bundles of joy…because we DID get to eat as many as we wanted after we were finished! Plus, she sent some home with us AND she had some left over masa dough so she gave it to me to take home and experiment with different fillings…which I did!
A little history lesson, because I was curious and thought I’d let you know what I found out…Tamales originated from Mesoamerica, as early as 8000 to 5000 B.C. then spread to Mexico, Guatemala and the rest of Latin America. The word “tamale” comes from the Nahuatl word “Tamal”, one of the Aztec’s primary language during their empire.
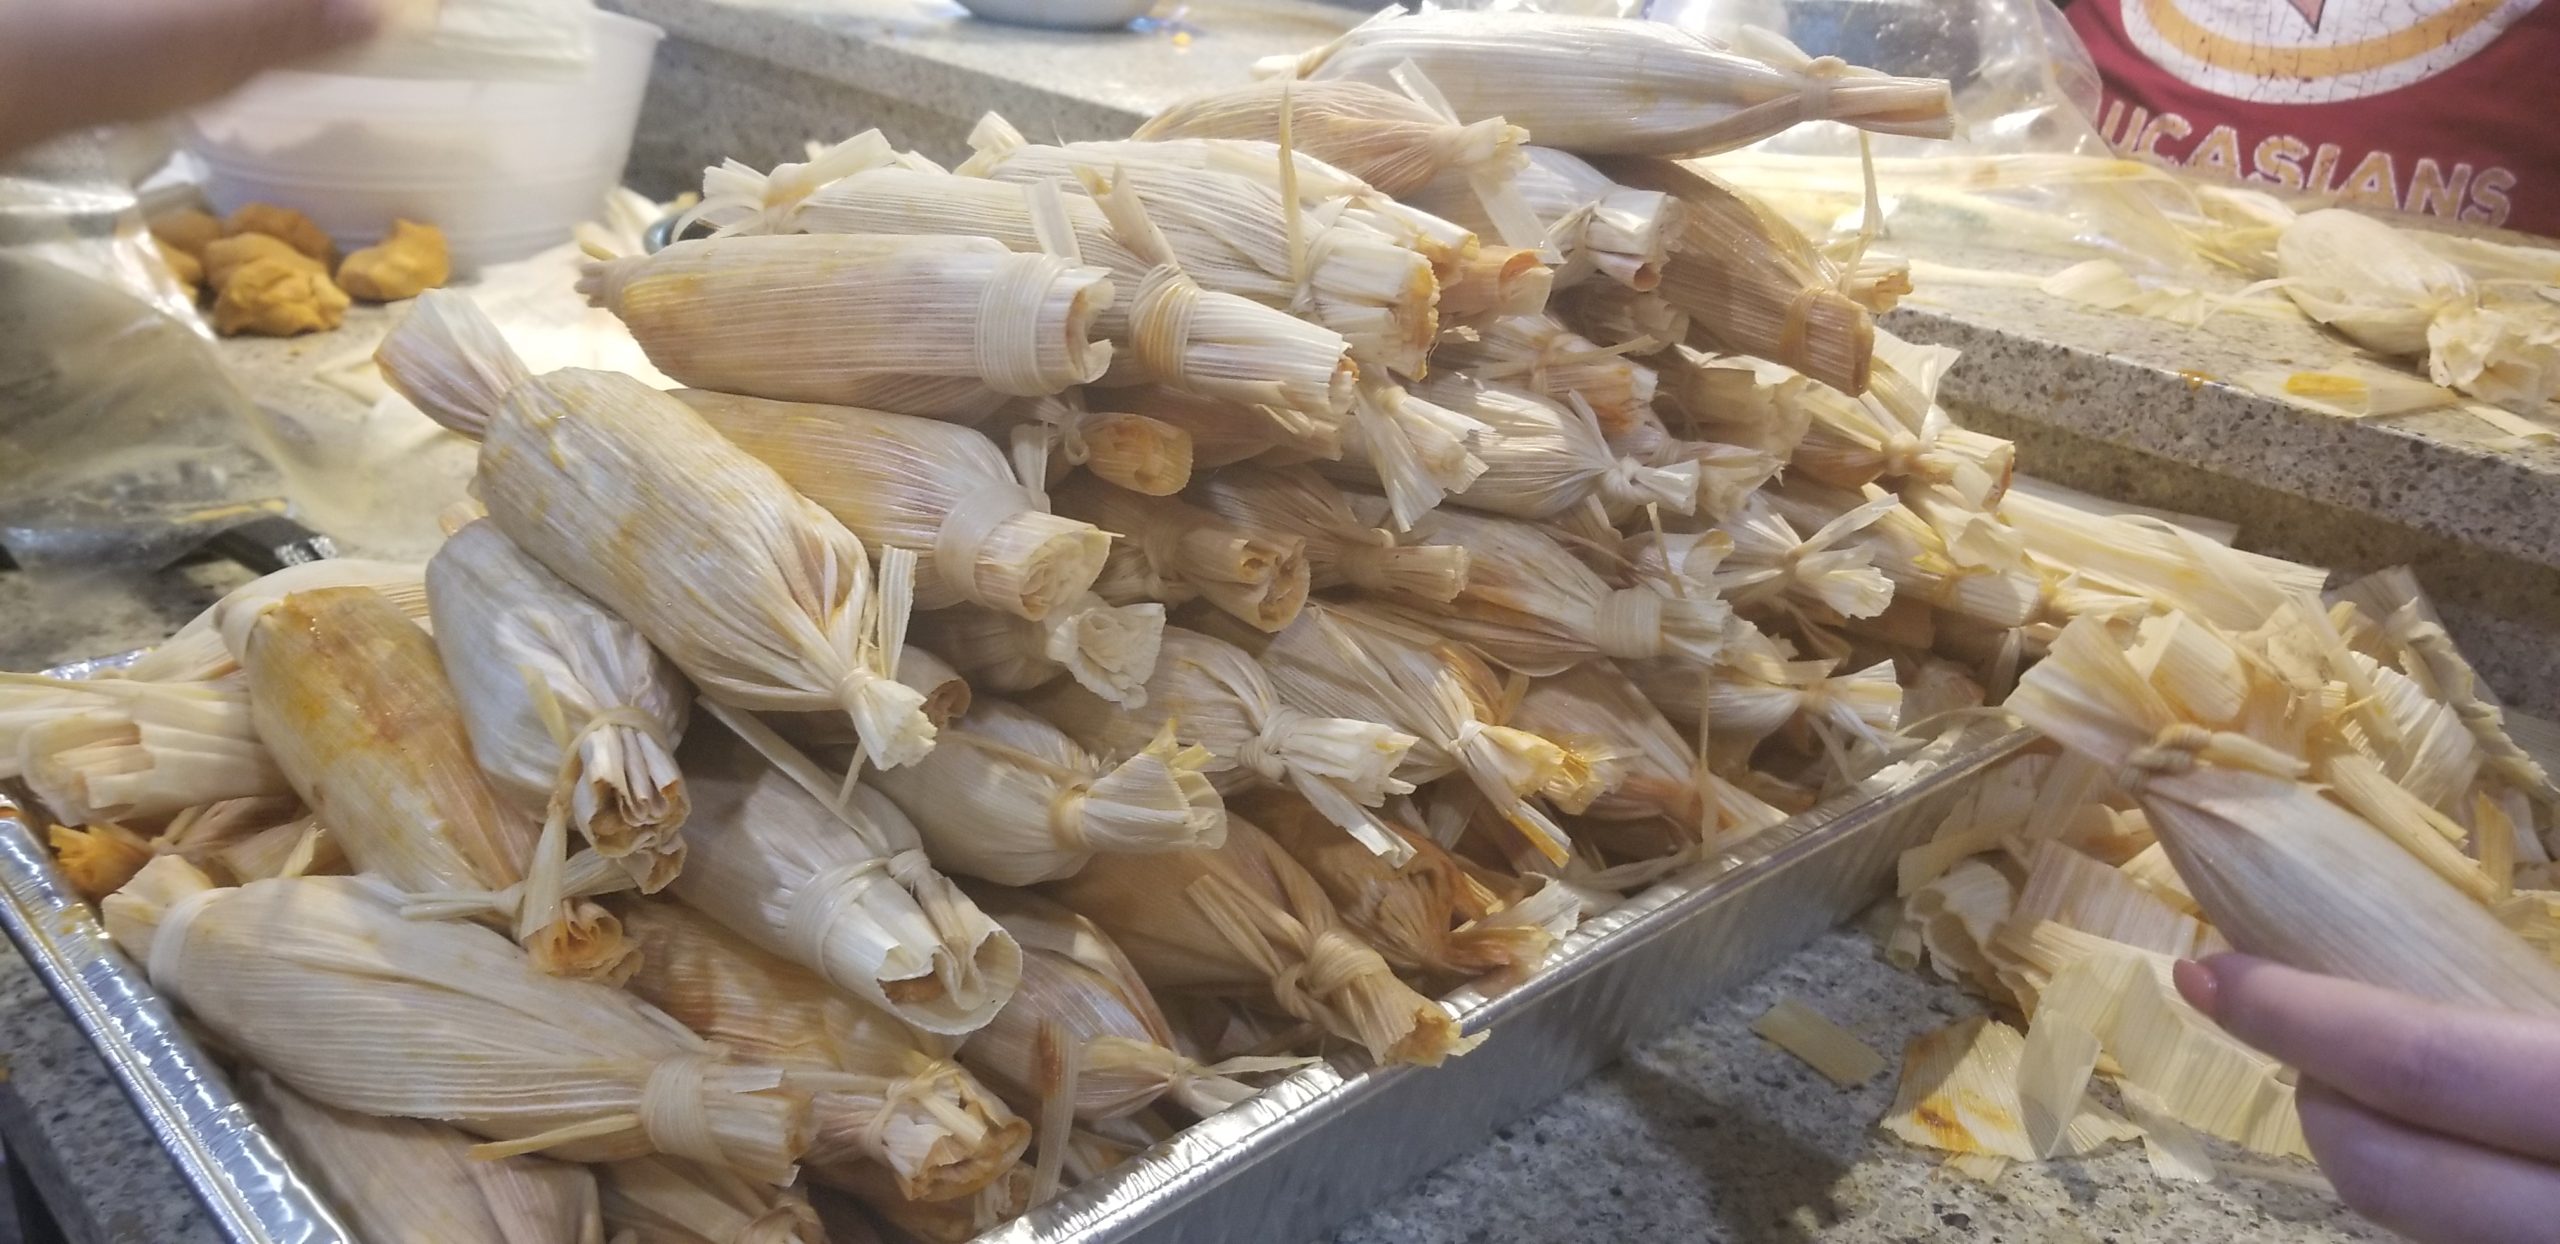
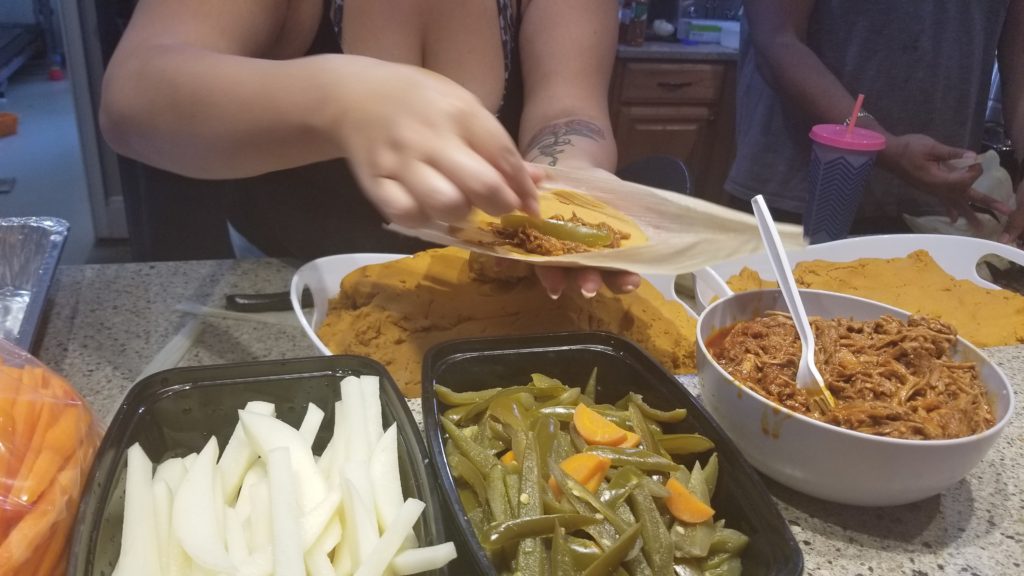
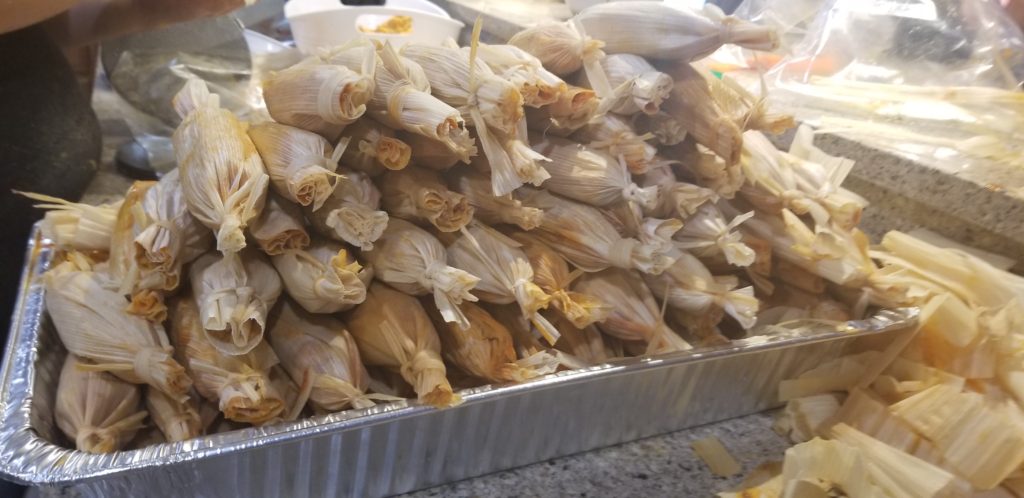
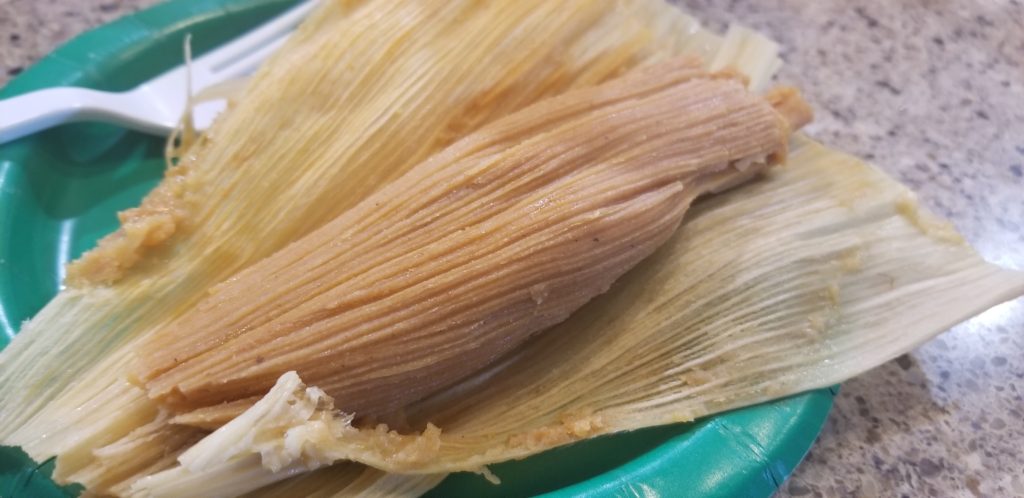
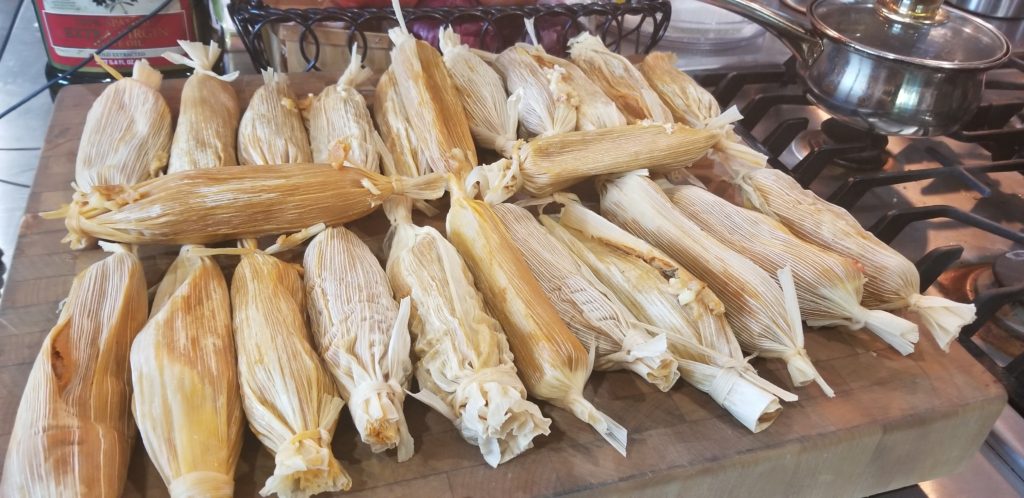
Anyway, back to my experience…we basically watched Monica make the masa dough and then we set up an assembly line where one person made the masa rounds with a tortilla press, another filled it with a couple of ingredients, then onto the next couple of ingredients. At the end of the line they wrapped them in the dried, and slightly rehydrated, corn husks and tied them on each end…what cute little bundles! And there you have yourself a tamale…well actually about 200+ when we were all done!
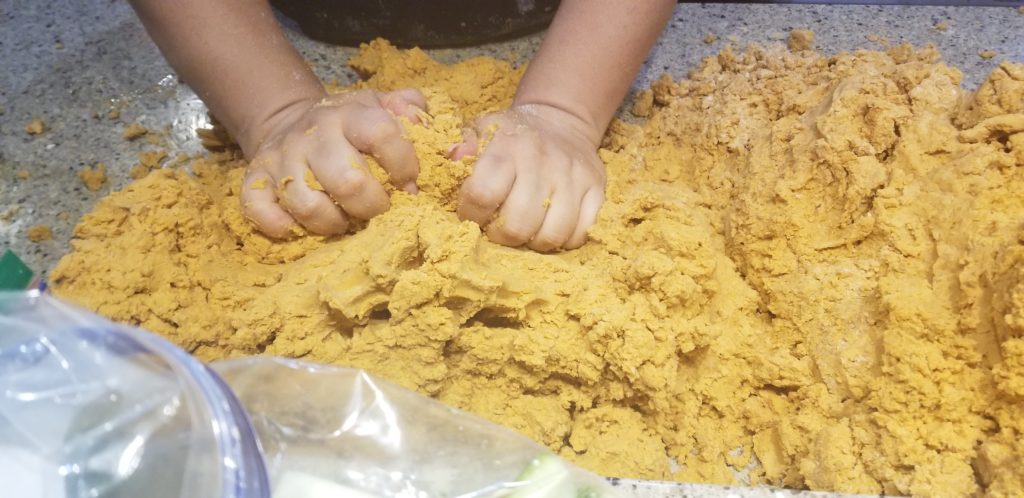
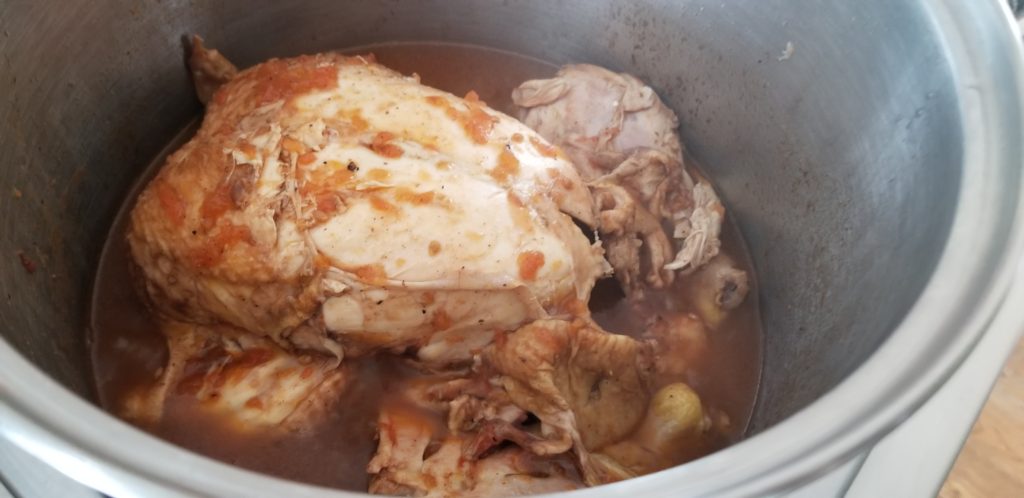
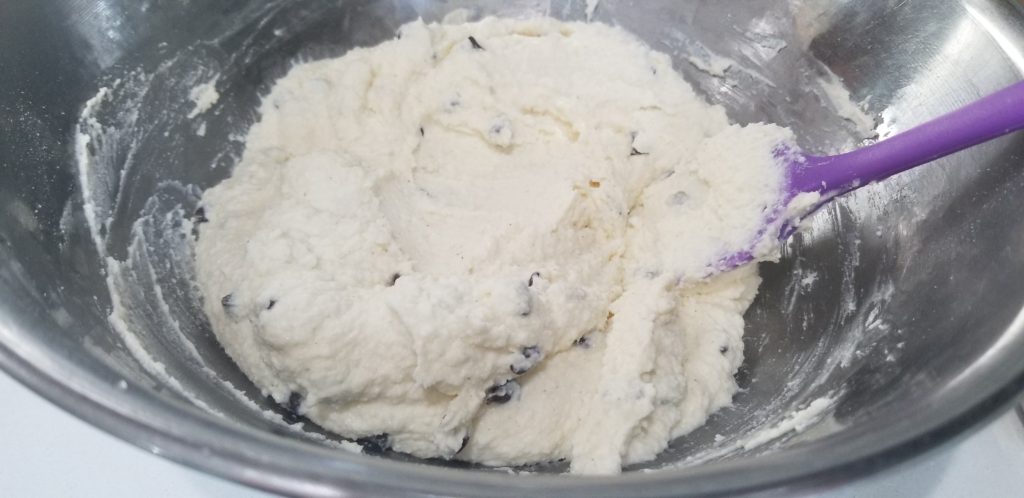
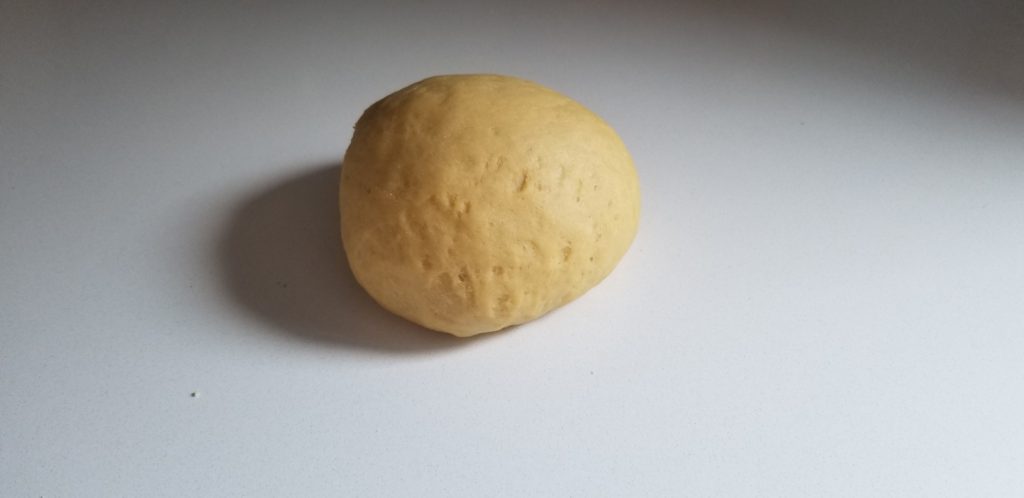
When we got there the pork filling was already done (oh, the smell was so good when we entered the house, and the taste was AMAZING…of course I asked to taste it…I am a cook, that is what I do…eat…all the time) so I didn’t get to see how she made it but I did see her make the masa dough. I was writing frantically, so many details, so I may not remember everything exactly how it happened but the dough is forgiving. Even if you put a little more or less of this and that it should still turn out great! Also you kind of go by how the dough feels so you may need a little or more of something then the measurements below suggest.
Let me try and deconstruct the components and how they were made (at least how I remember them being made or what I remember Monica telling me).
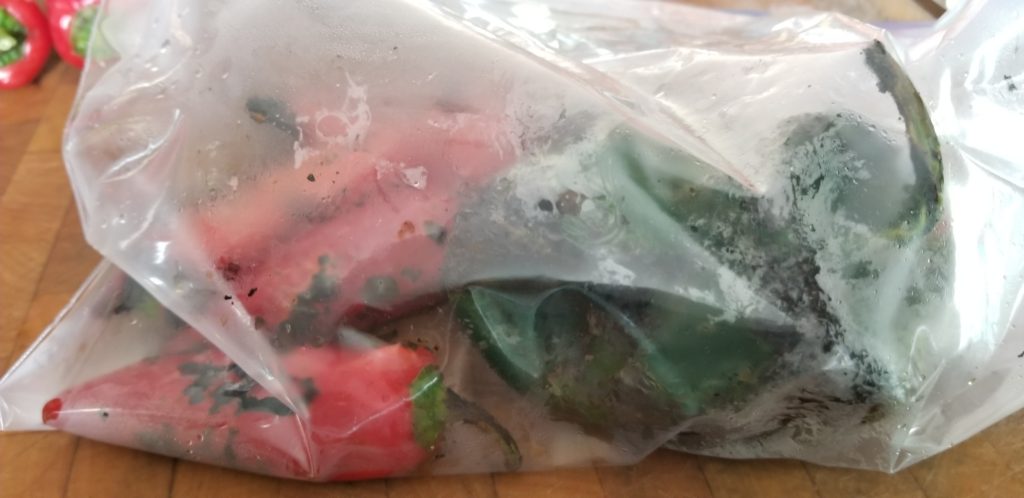
Chili Pepper Sauce
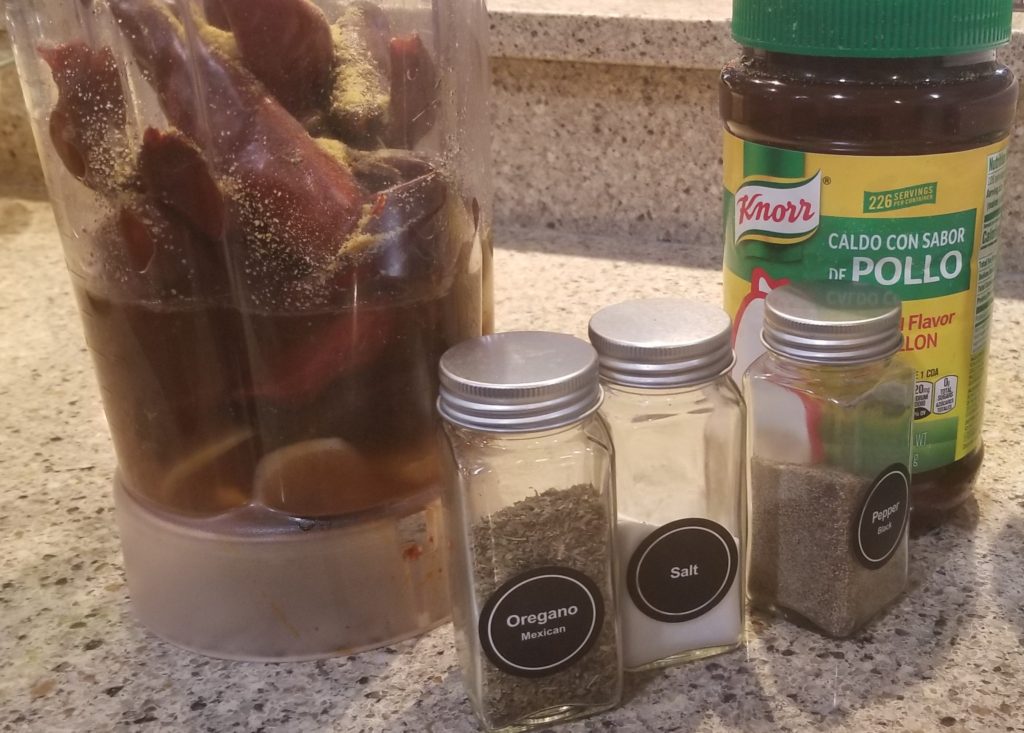
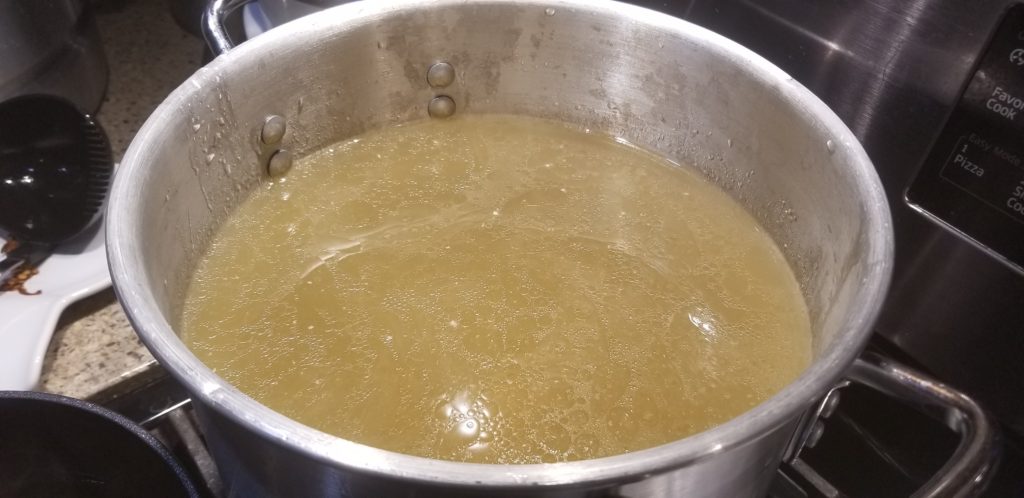
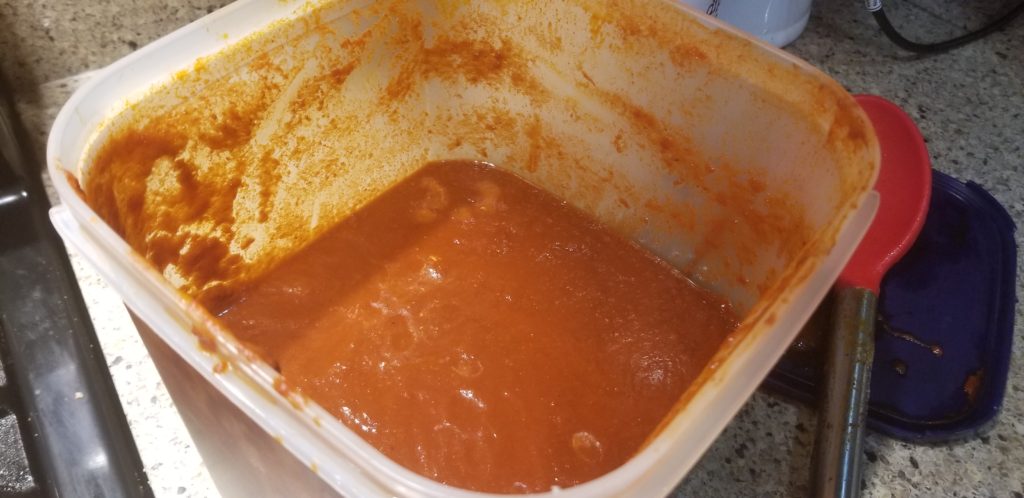
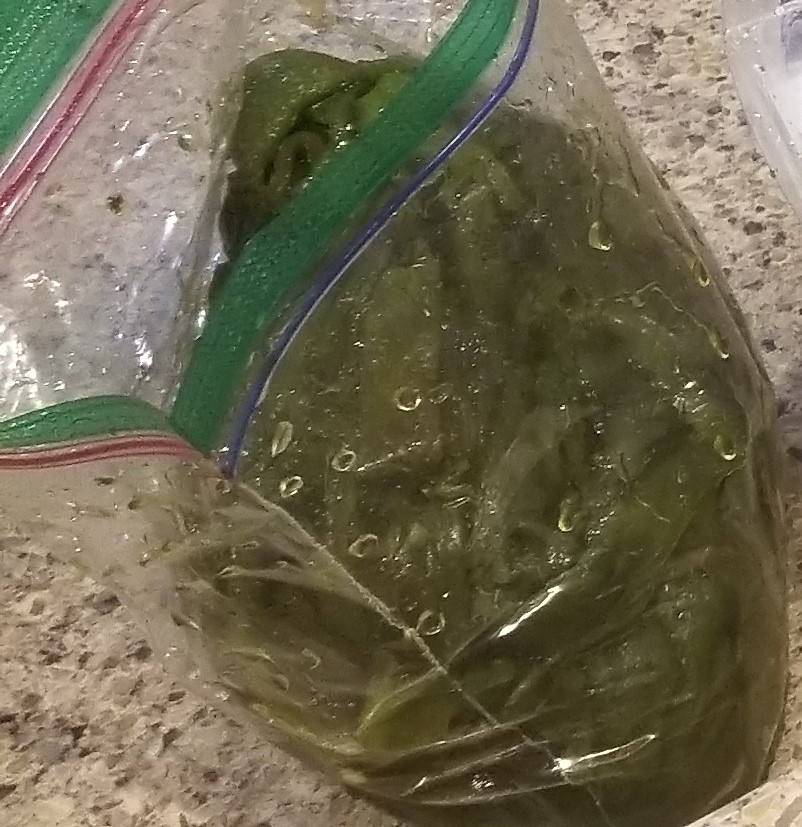
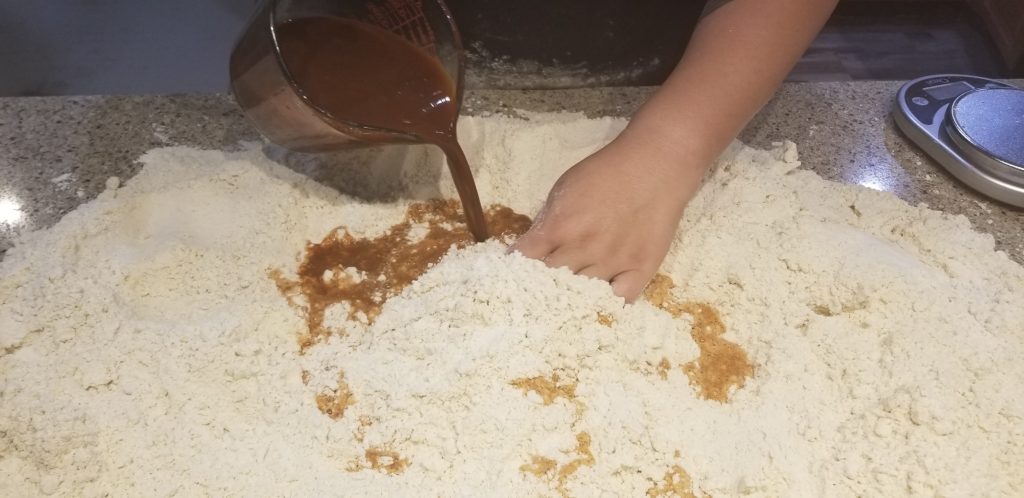
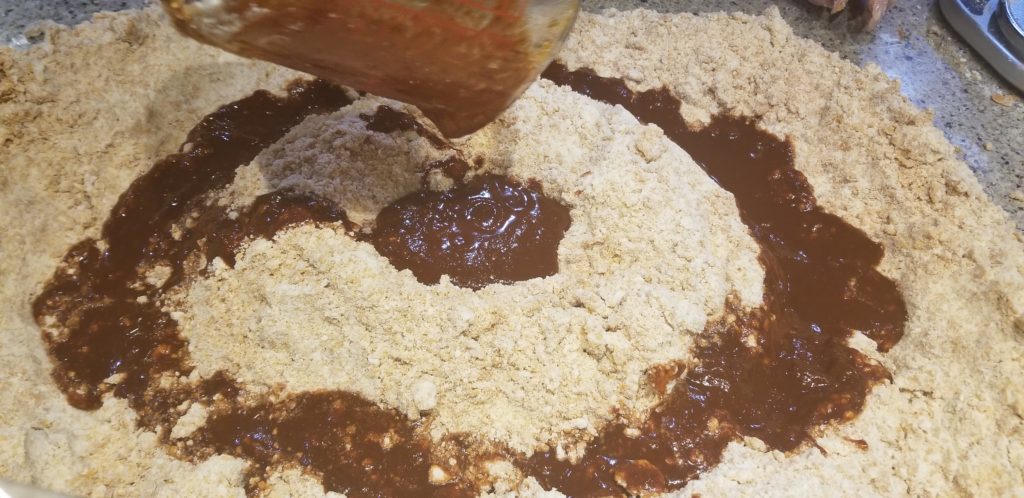
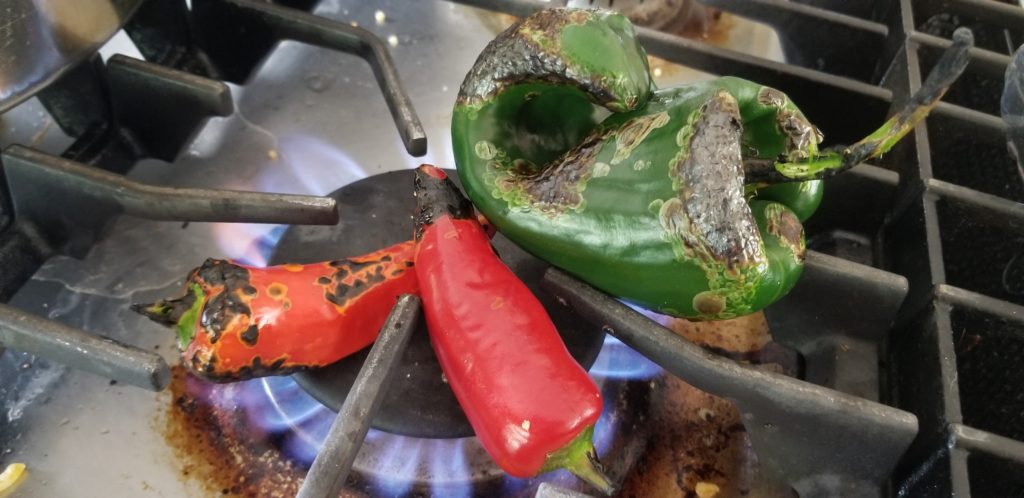
The chili pepper sauce was made with ancho and guajillo chilies, garlic and onions. You rehydrate the chilis in hot water, or broth from cooking your pork (if using meat), then add some coarsely chopped garlic and onions, salt, pepper, dried oregano, and chicken bouillon granules and blend it, with seeds and all, until it becomes a smooth sauce and then strain…which will leave back any seeds or big chunks.
Fillings
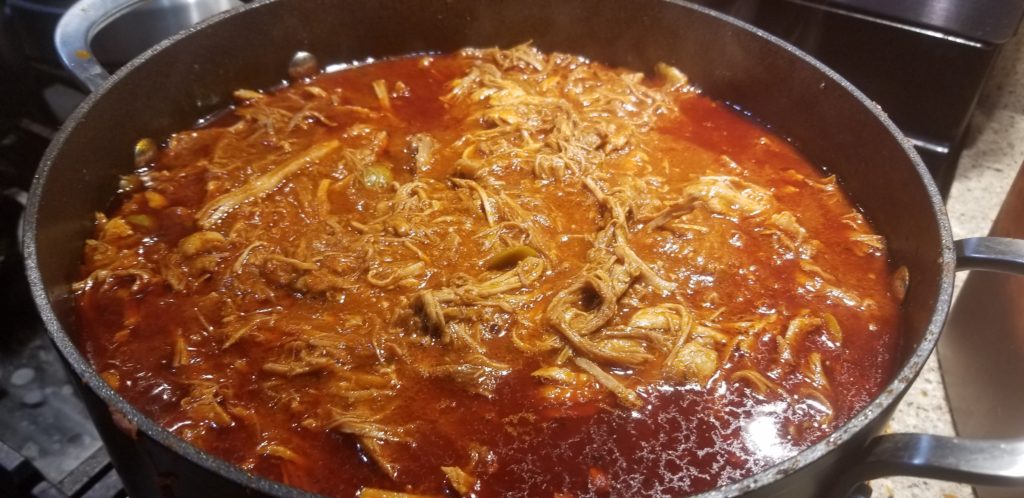
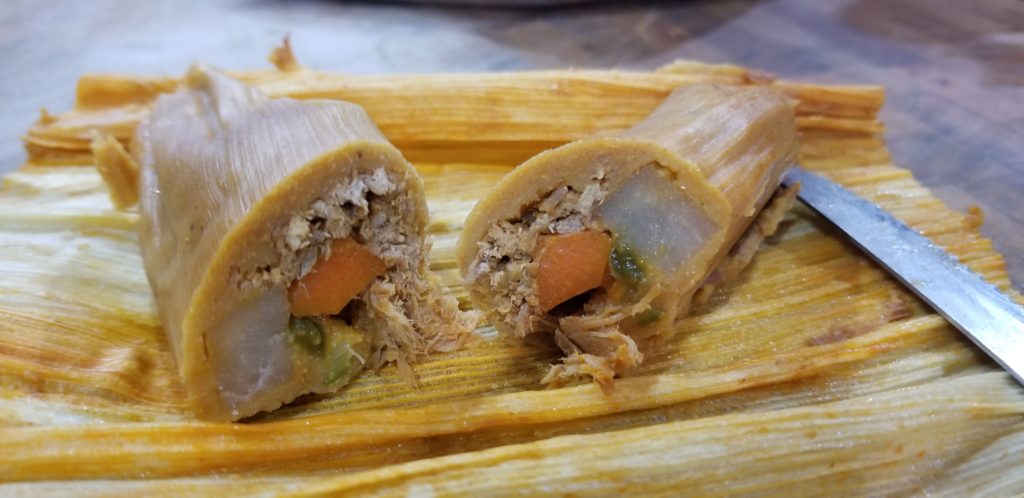
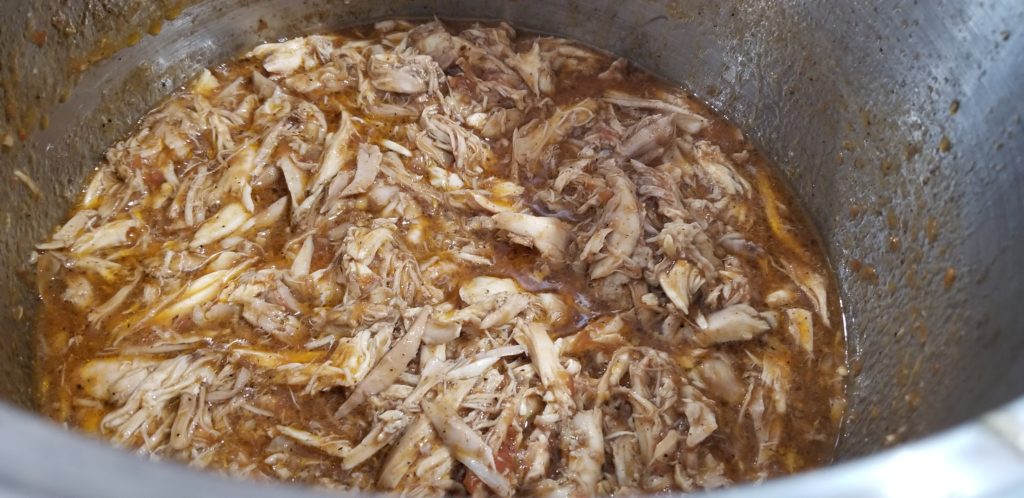
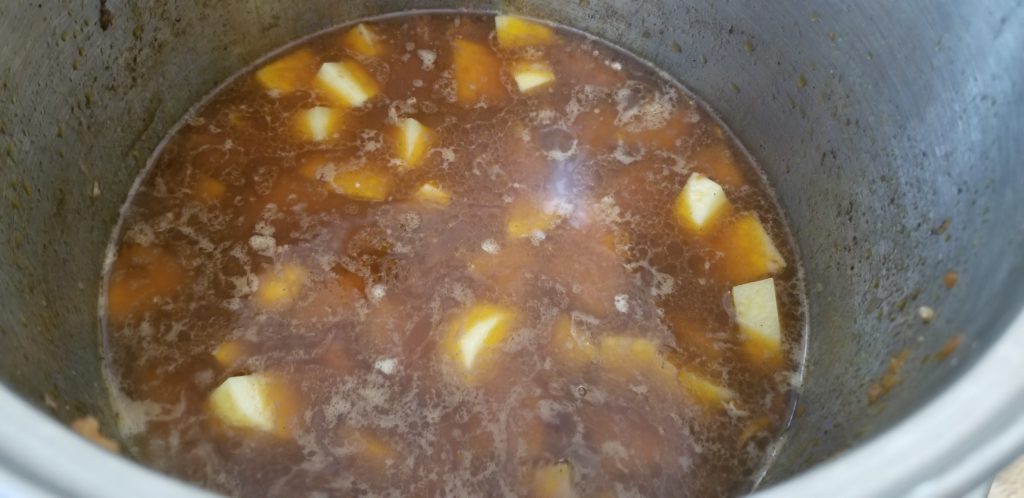
Pork: I don’t have the exact measurements and ingredients for the pork filling Monica made, but I asked questions and got the main ingredients and some steps, I deduced some things on my own 🙂 . Basically, you cook bone-in cuts of pork meat in enough liquid to cover the pieces for about an hour, or until slightly tender. Remove the bones from the meat and put the meat (slightly break up the chunks) in another pot along with some of the chili pepper sauce you made, some of the pork liquid, chicken bouillon powder, Spanish olives, salt, pepper, and one blended medium to large fresh tomato (you can blend this in with a batch of the chili pepper sauce to add to pork), and simmer for another hour. If your house smells wonderful then the recipe is good 🙂 .
Some other ingredients we used with the pork filled tamales were:
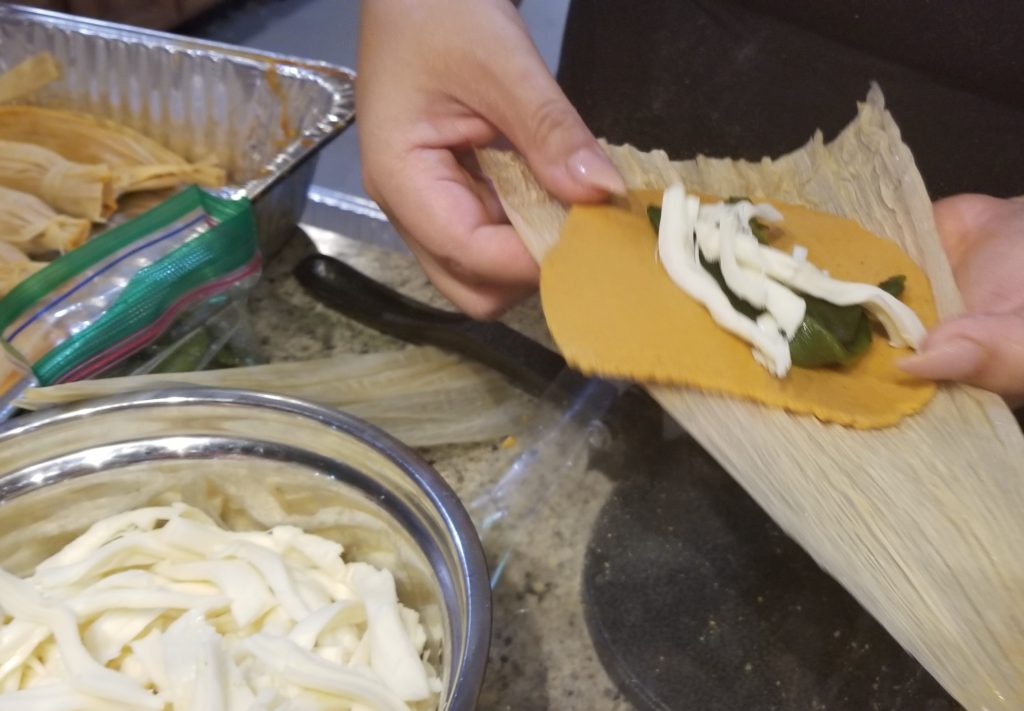
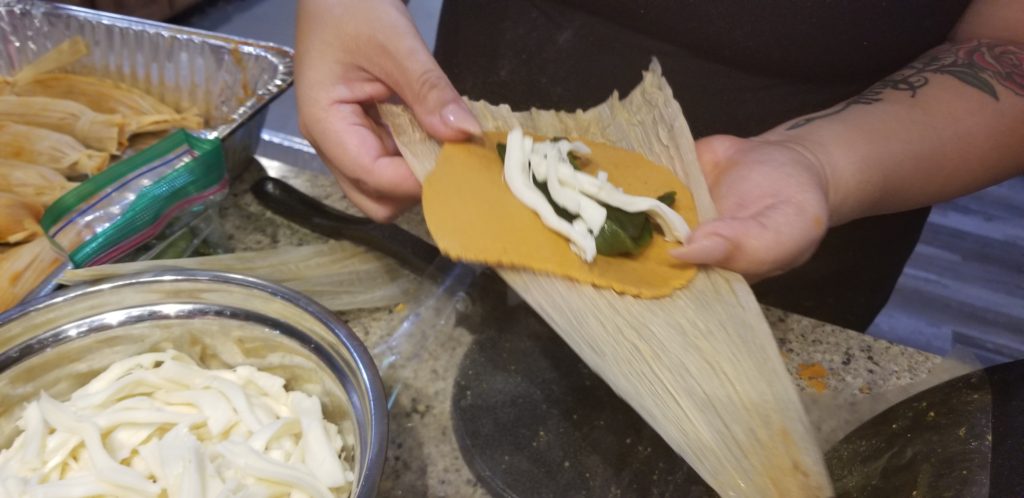
Cheese & Veggie: A second filling that was used was a simple cheese and roasted poblano filling. The cheese used was Oaxaca cheese. Oaxaca cheese basically has the flavor of Monterey jack cheese but the texture of Mozzarella. She uses this cheese instead of Monterey because it doesn’t melt as easy, therefore doesn’t ooze out of the tamales when steamed. Of course I LOVE Monterey jack and the fact that it is creamy when melted so I tried one of my versions with Monterey at home, and she was right, a lot of it oozed out, but it was still soo good!
Masa Dough
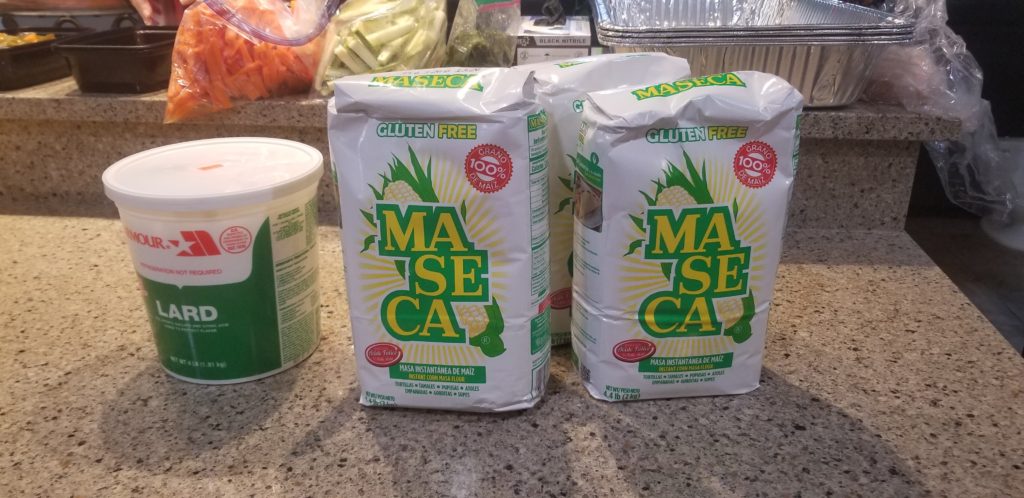
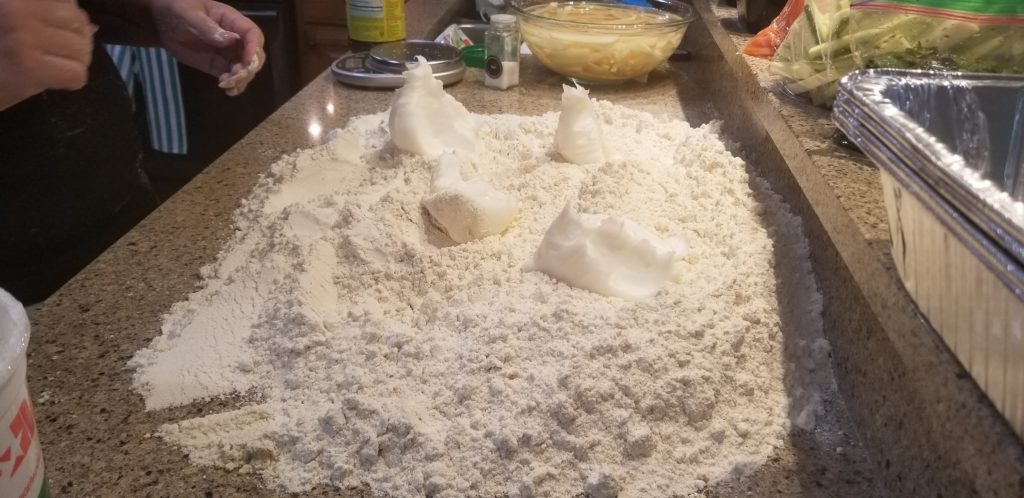
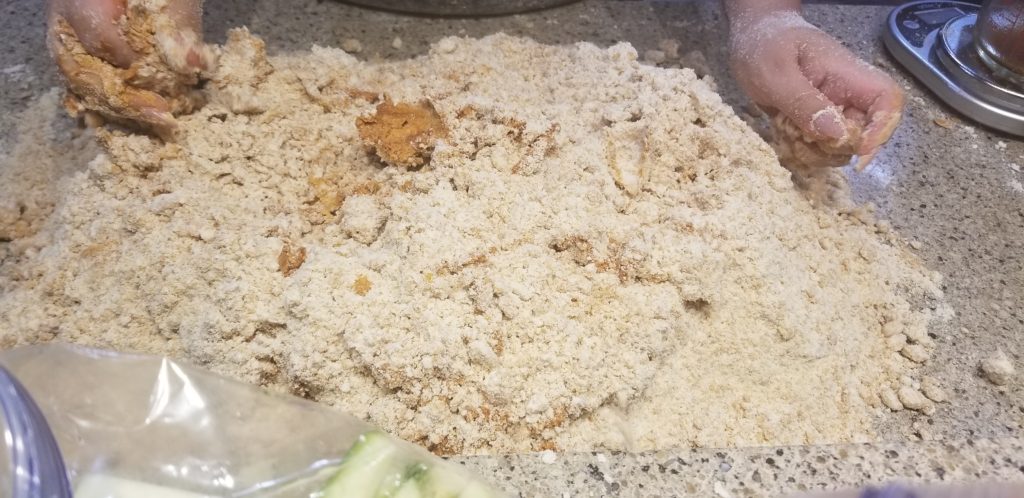
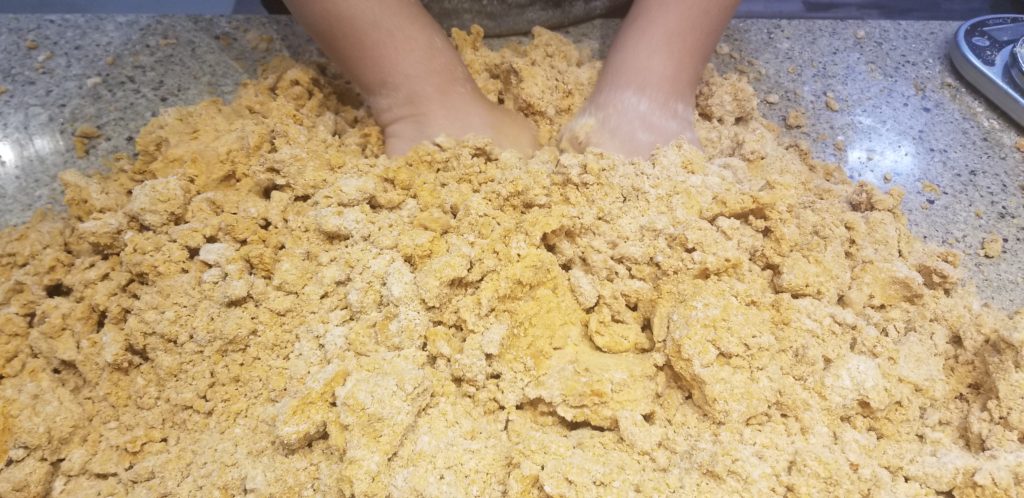
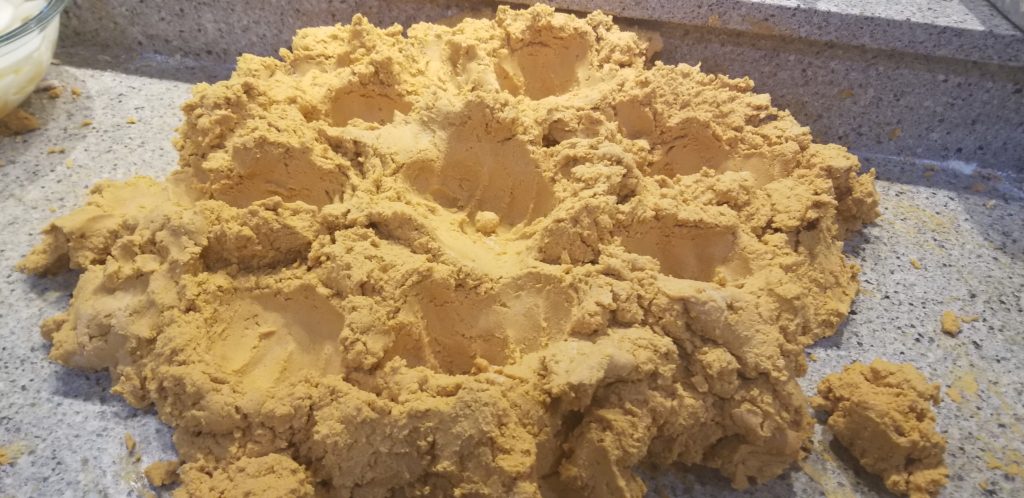
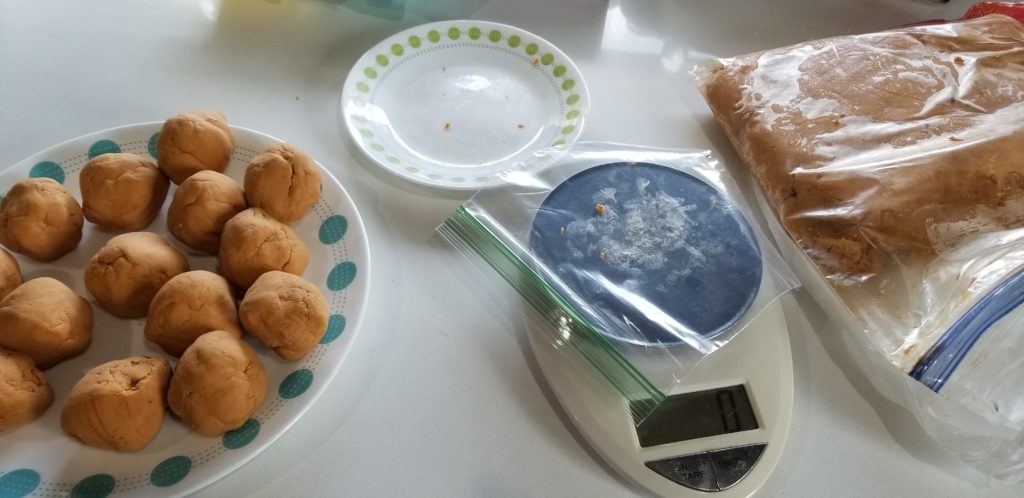
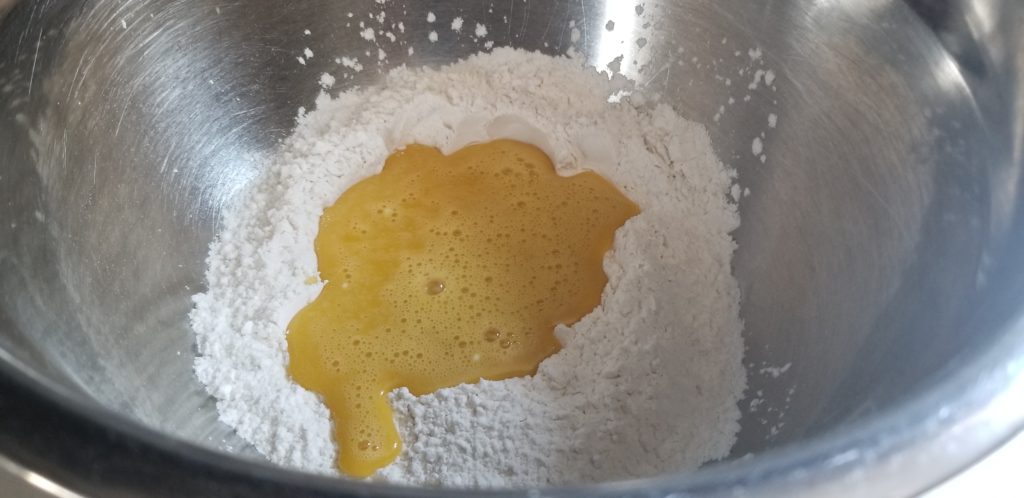
The masa dough she made used a ratio of about 8 ounces of lard to 2 pounds of masa. Of course you don’t need to use lard, you can use vegetable shortening or butter, but Monica says it just turns out better with lard…everything is better with some fat! You also add about 2 tablespoons of chicken bouillon, 1 tablespoon of salt, 4 cups of the pepper sauce mixed with 2 cup of the pork broth (the pepper sauce gives it a nice color) to the 2 pounds of masa flour (give or take, depending on how think you want the dough to be). If you are pressing the dough before filling it should probably be a little firmer than if you are spreading. I updated some of these ratios in January of 2023. Also, you can use a mixture of pork and/or chicken broth if needed. Tastes just as yummy!


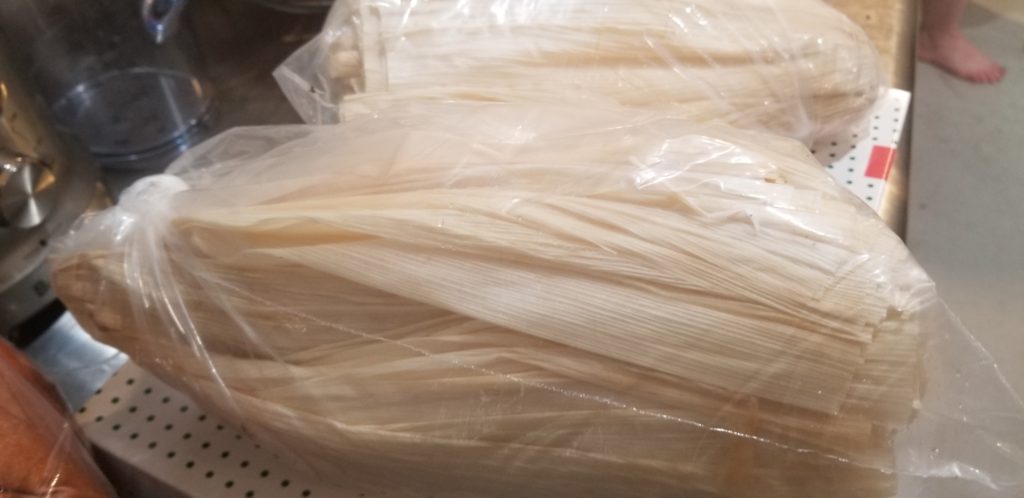
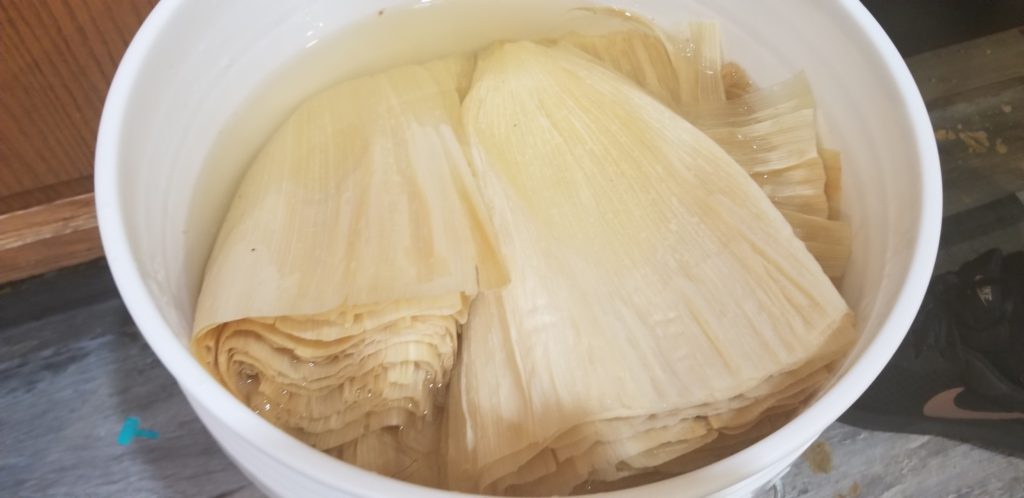
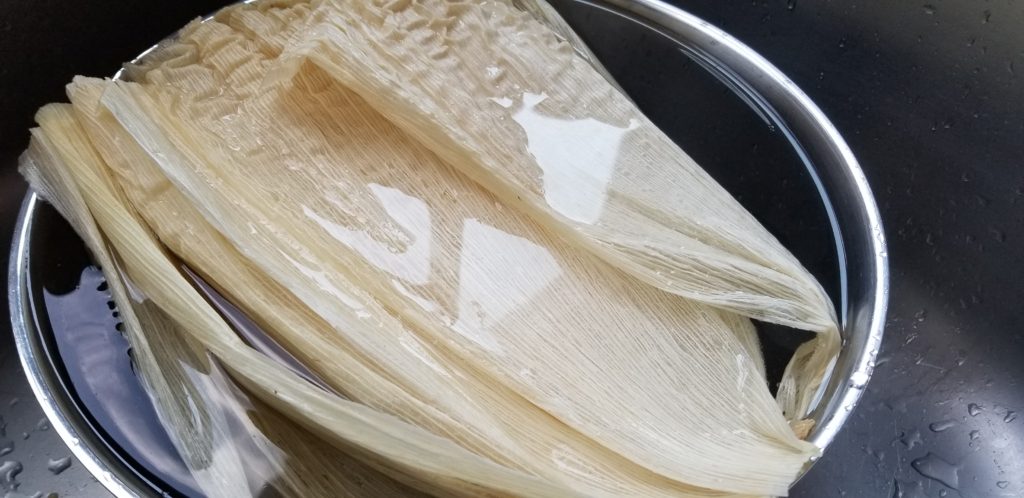
Dried Corn Husks
Basically you just add as many dried corn husks to hot water and let them sit for about 15 minutes to an hour, until they are pliable. It seemed like 15 minutes was enough time for me.
Assembly & Cooking
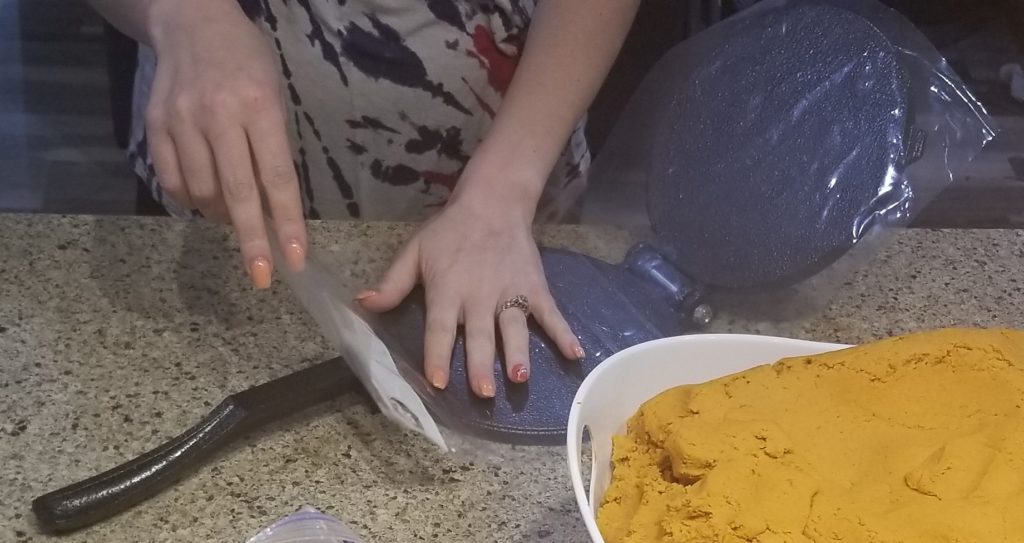
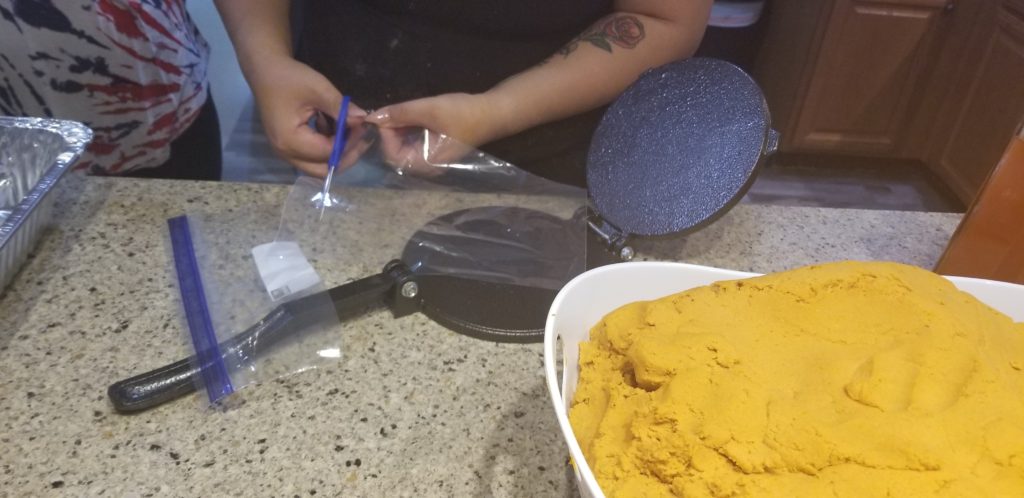
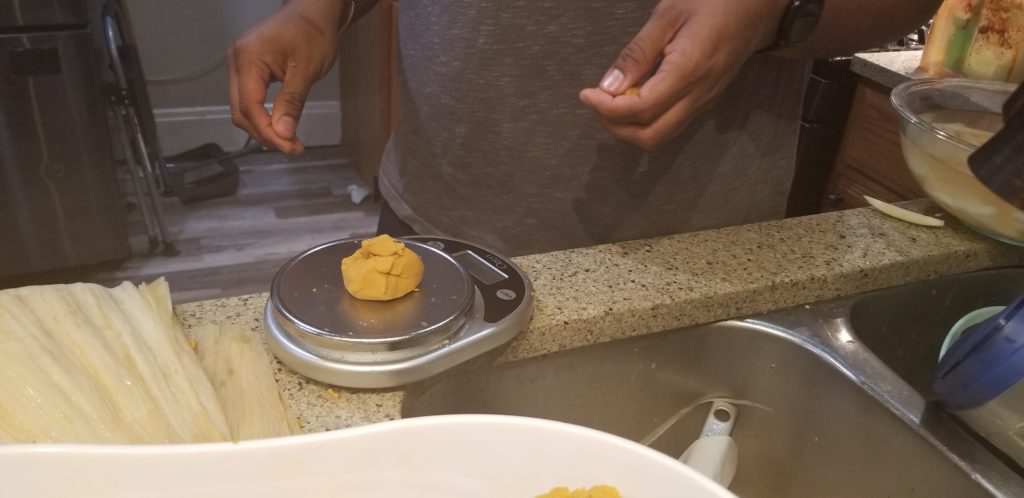
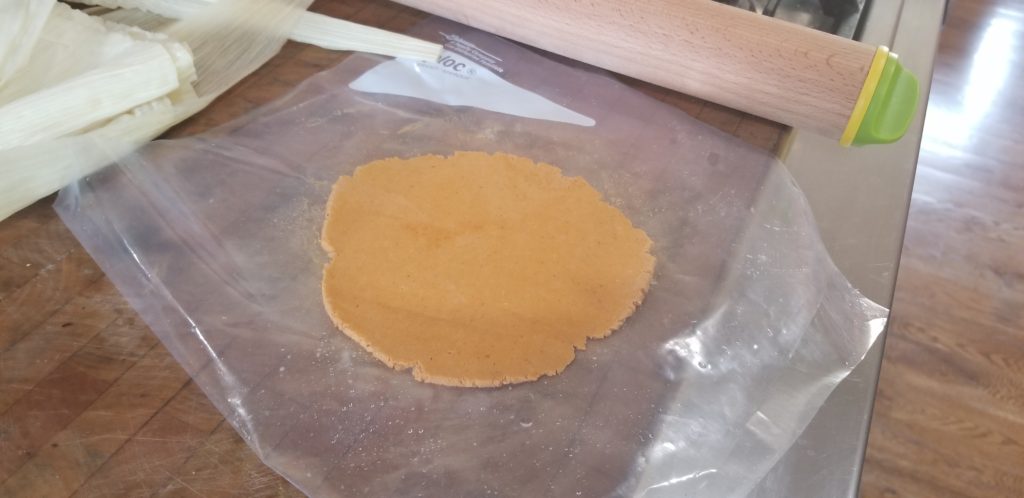
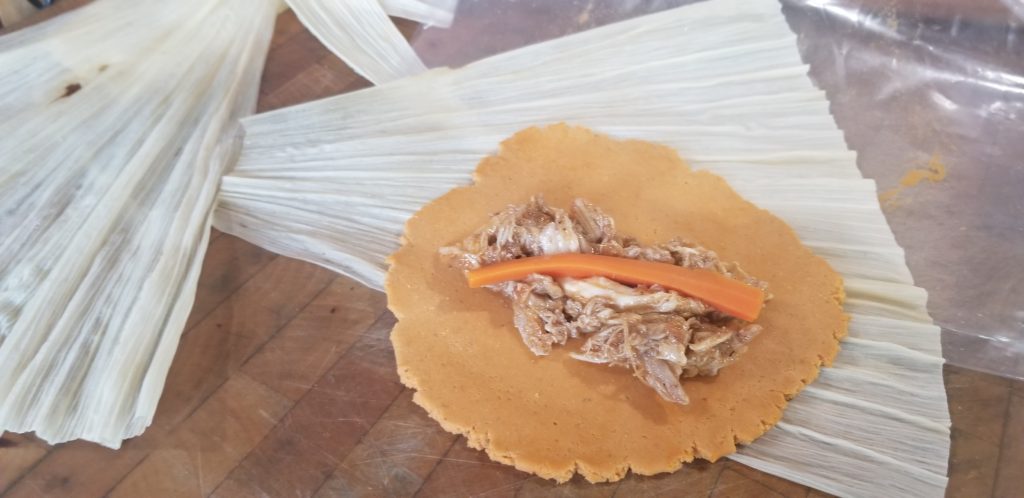
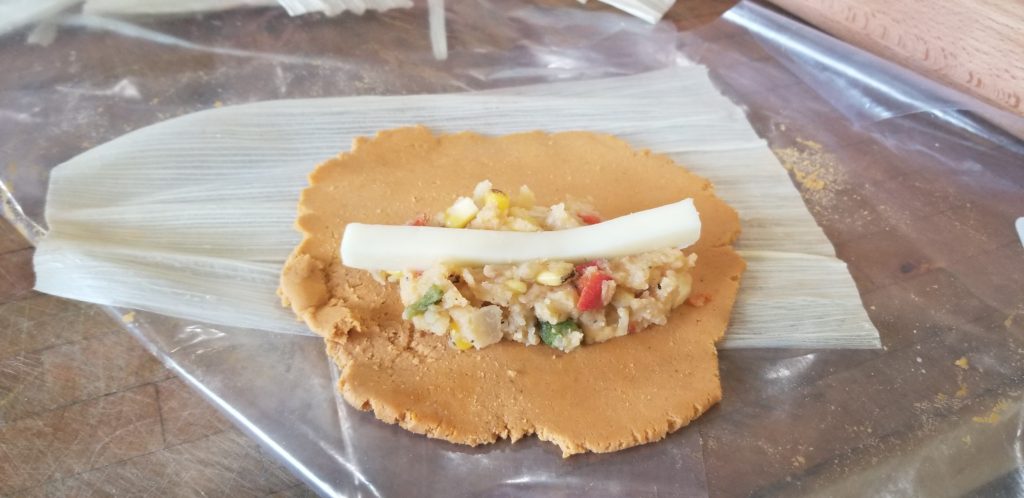
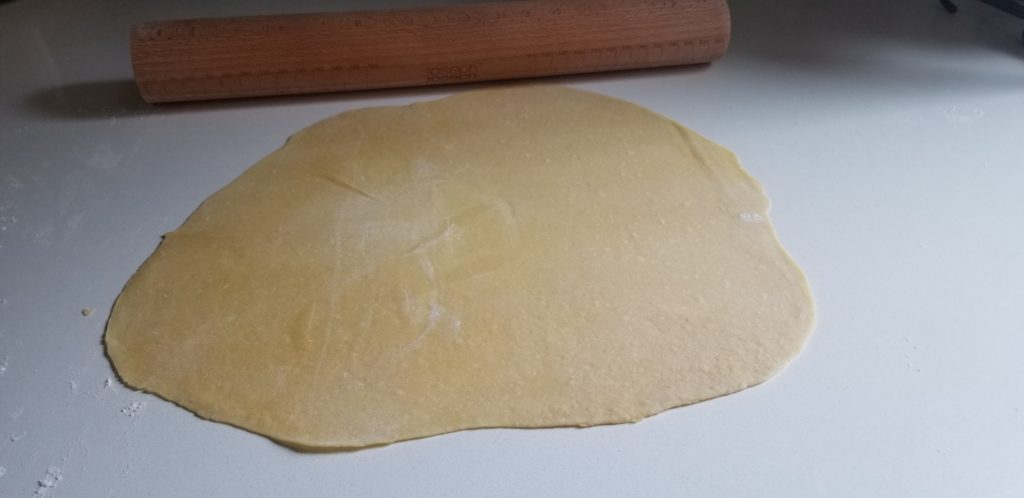
Take a tortilla press and line the bottom and top with a cut up piece of a gallon freezer bag, big enough to cover over the top, as well, before pressing. Alternatively, use cut up freezer bag with a rolling pin to roll out thinly (that is what I did at home since I didn’t have a tortilla press). They don’t look as round and pretty but you can’t tell the difference after you wrap them up. Measure your masa out to about 53 gram balls then press/roll to about a 1/6th inch thickness.
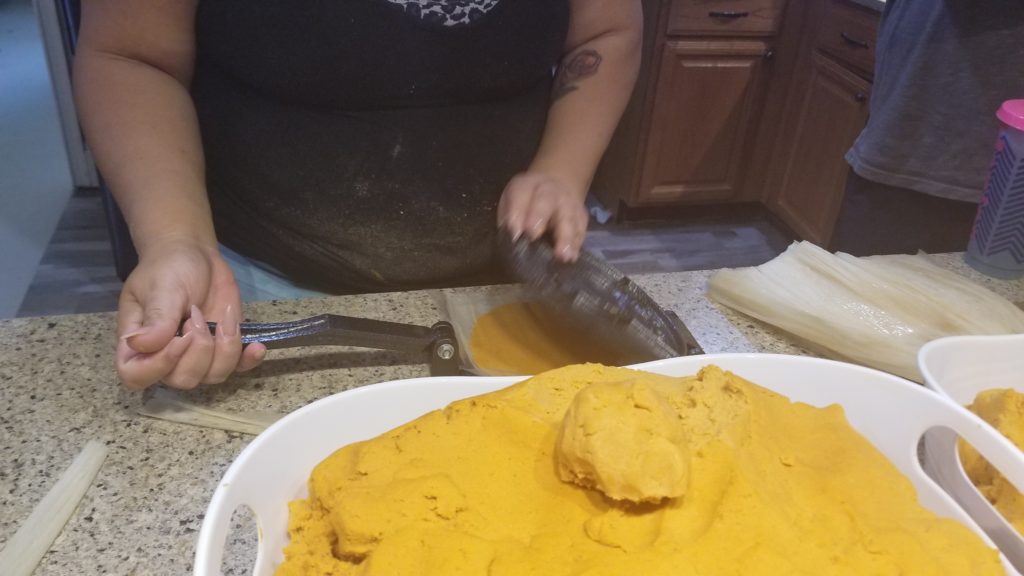
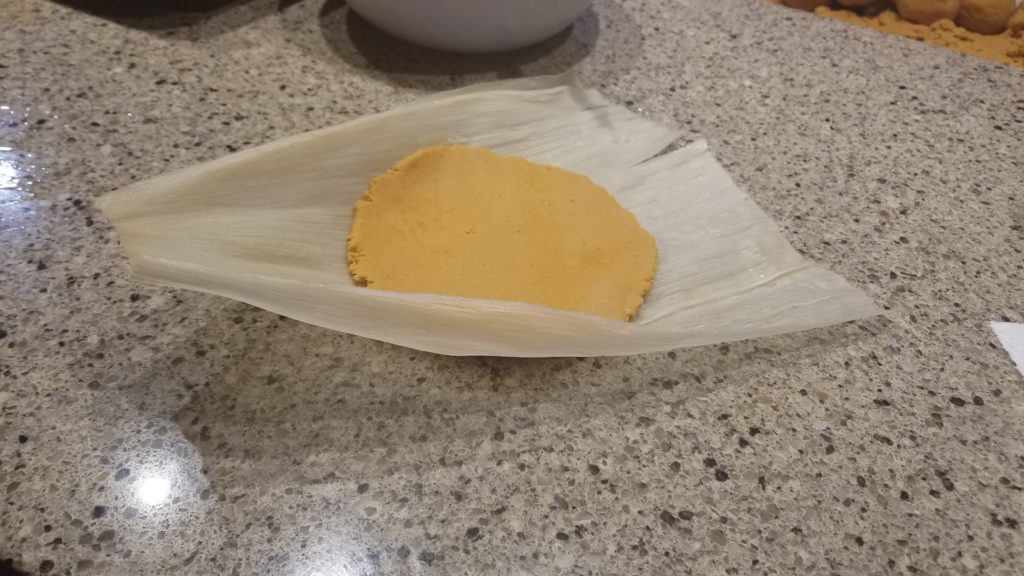
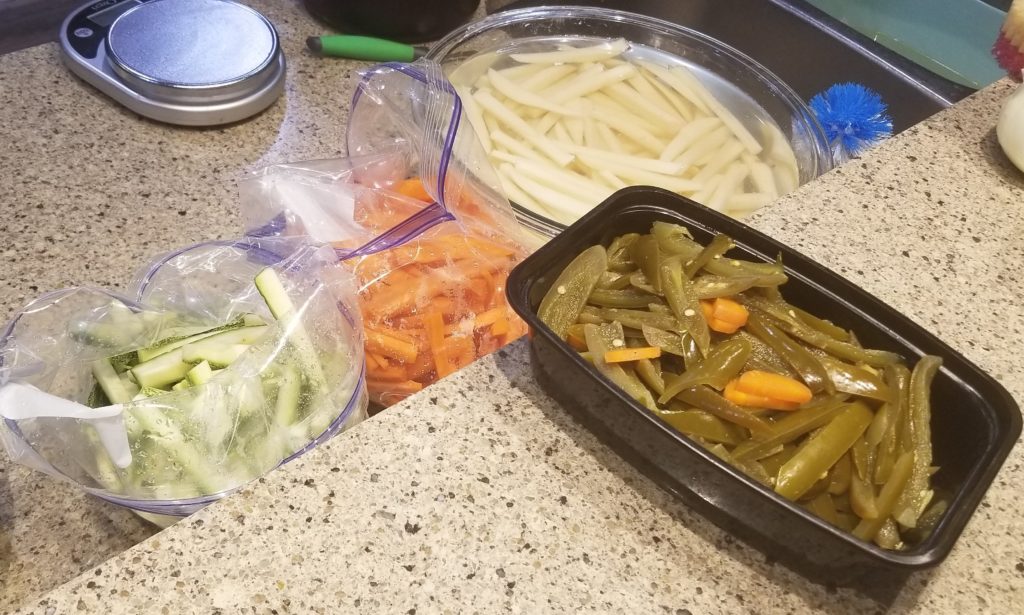
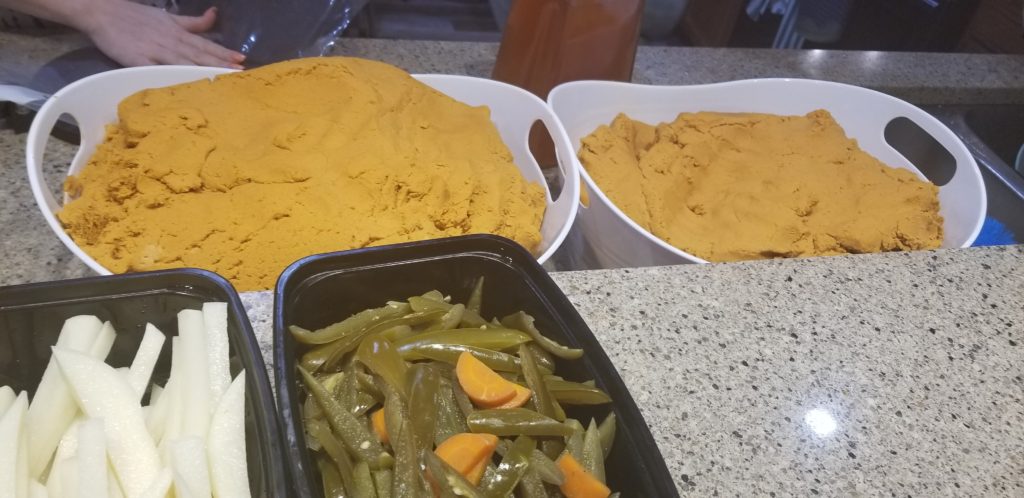
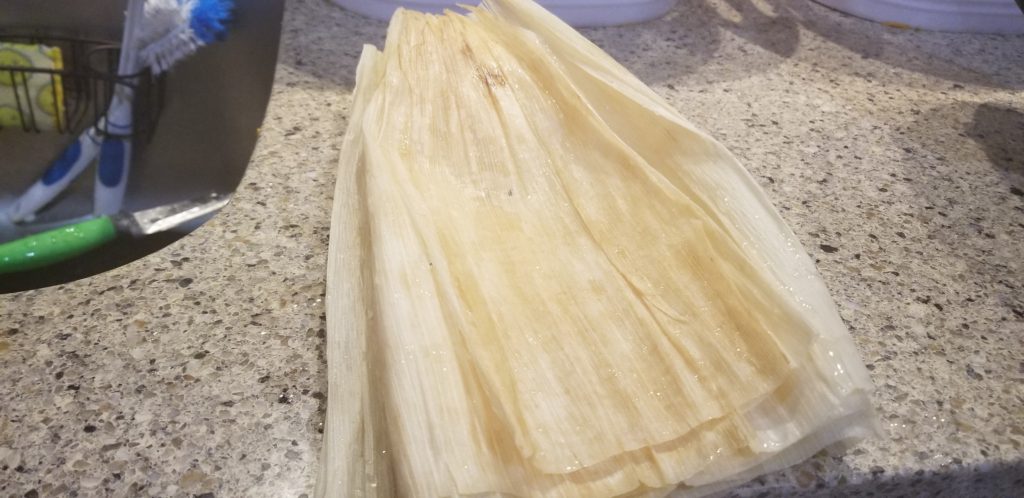
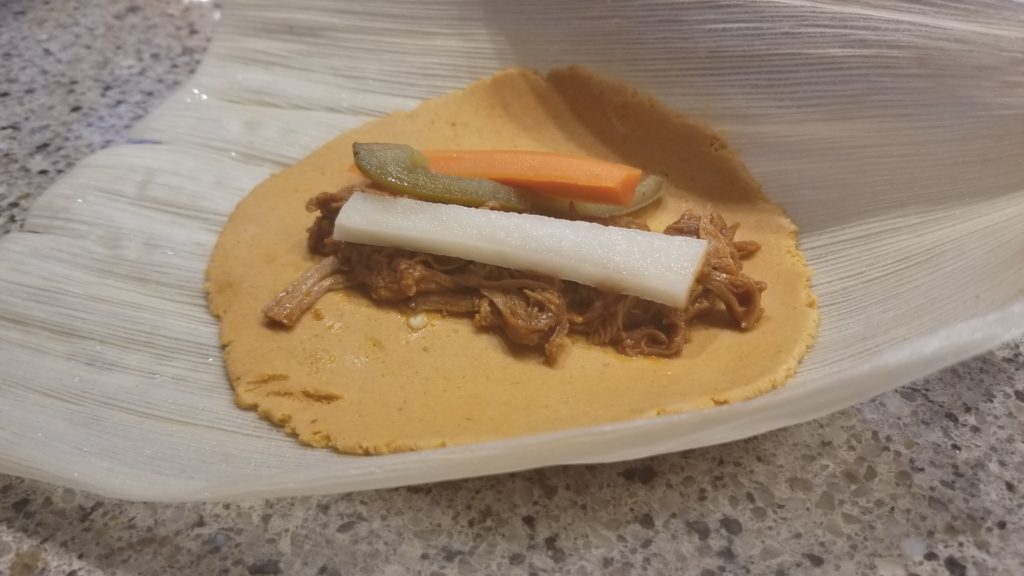
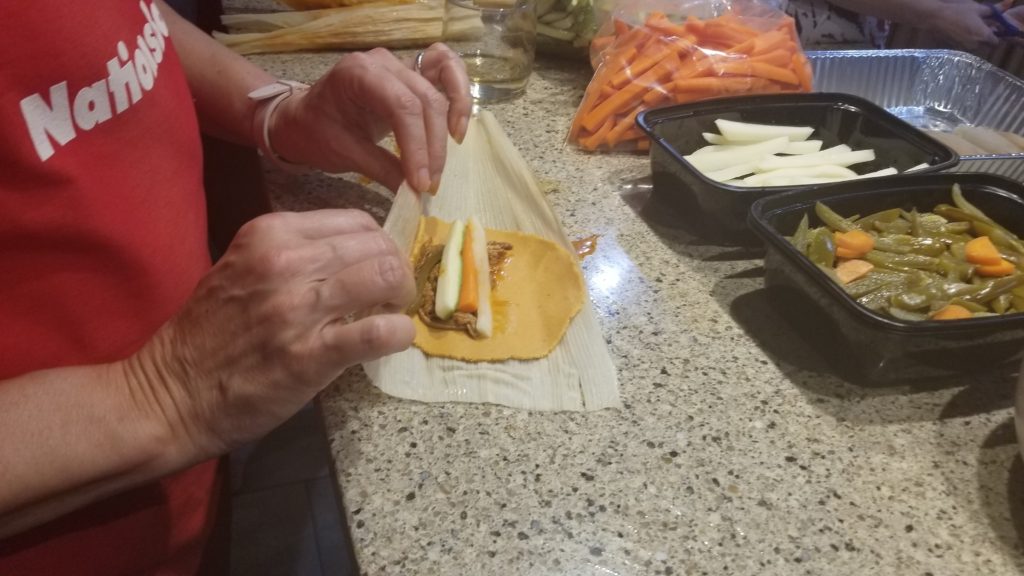
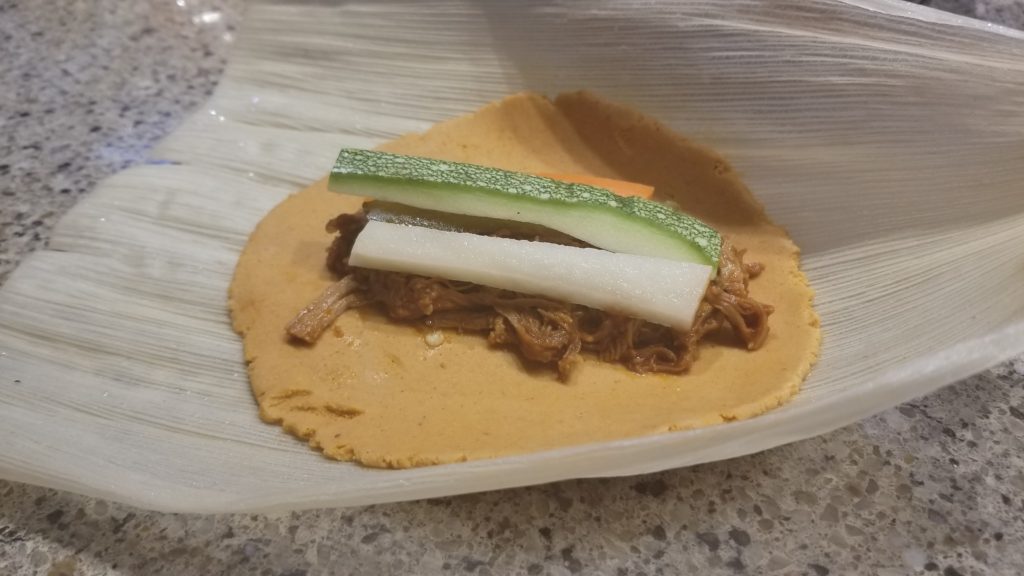
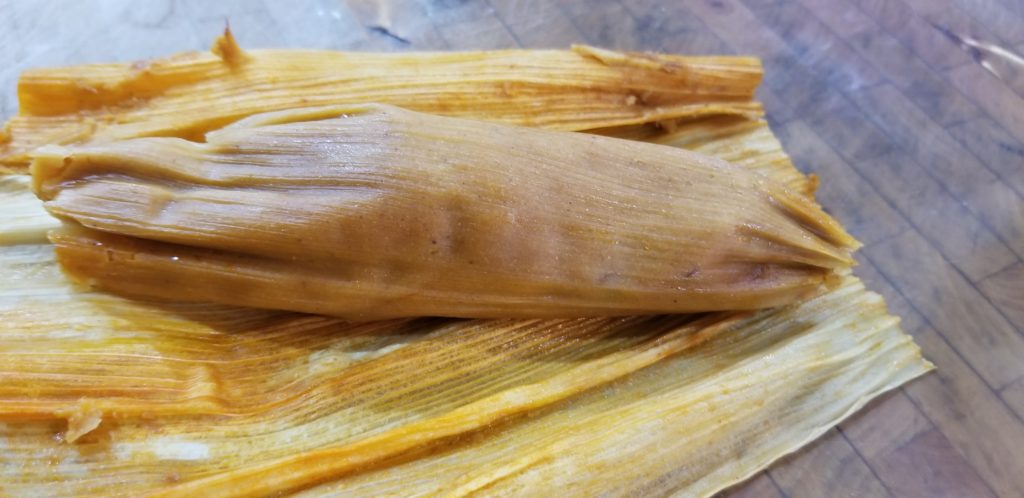
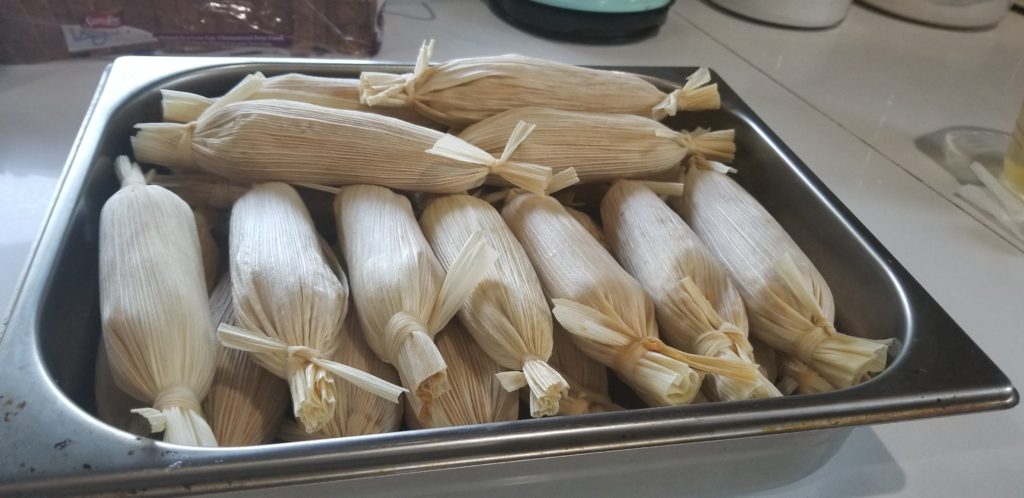
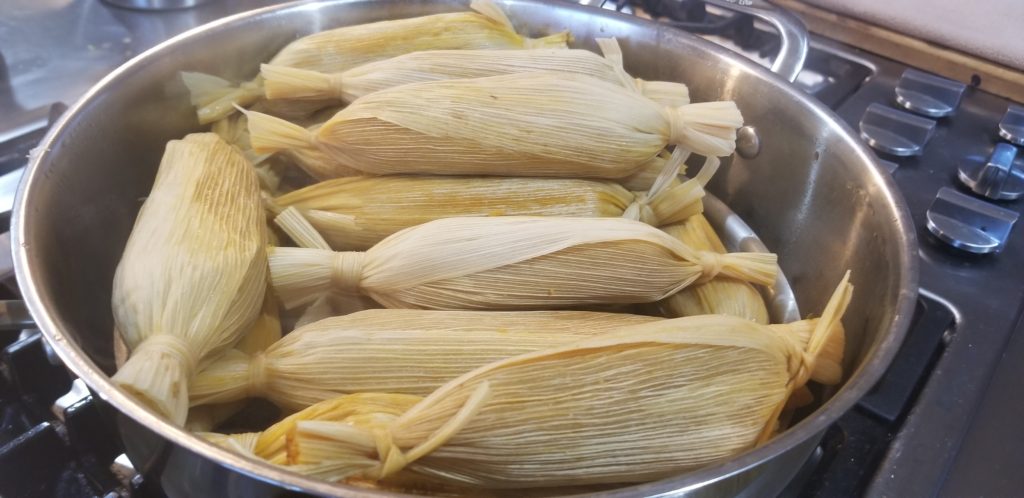
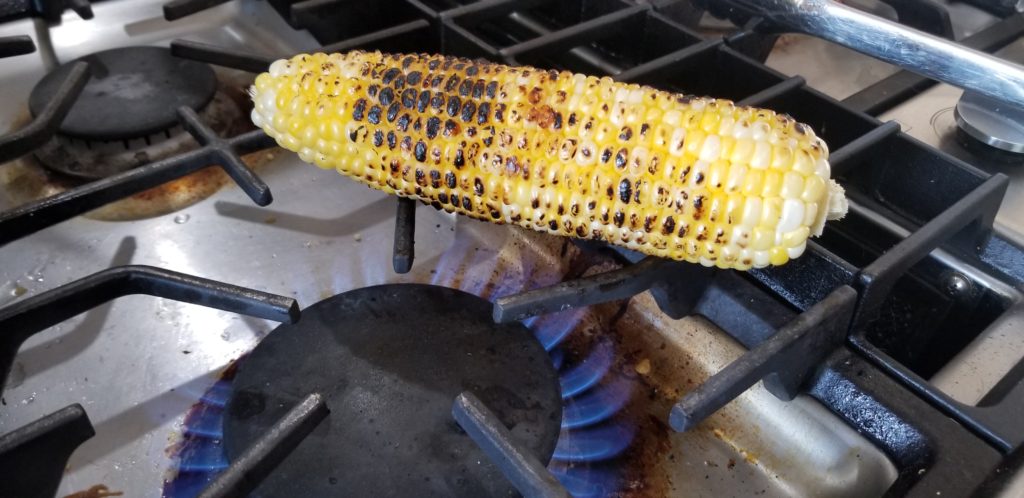
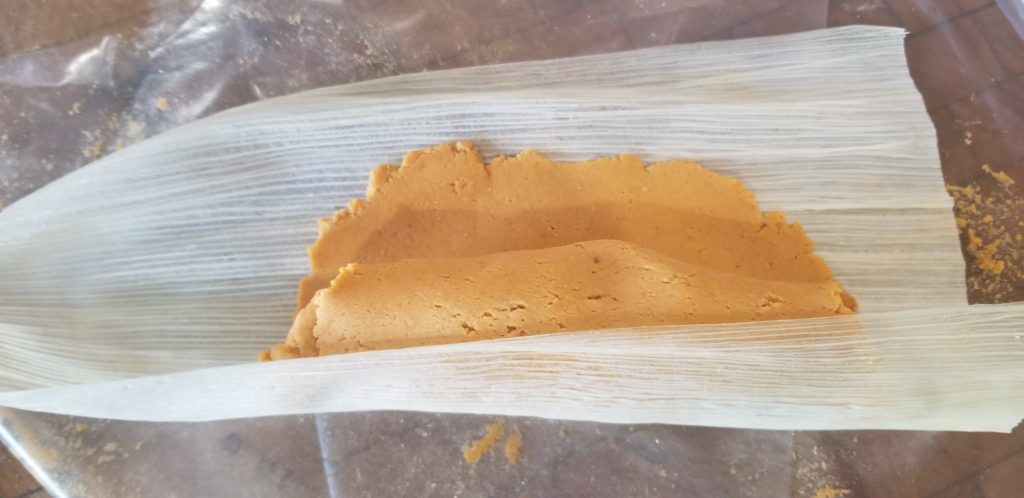
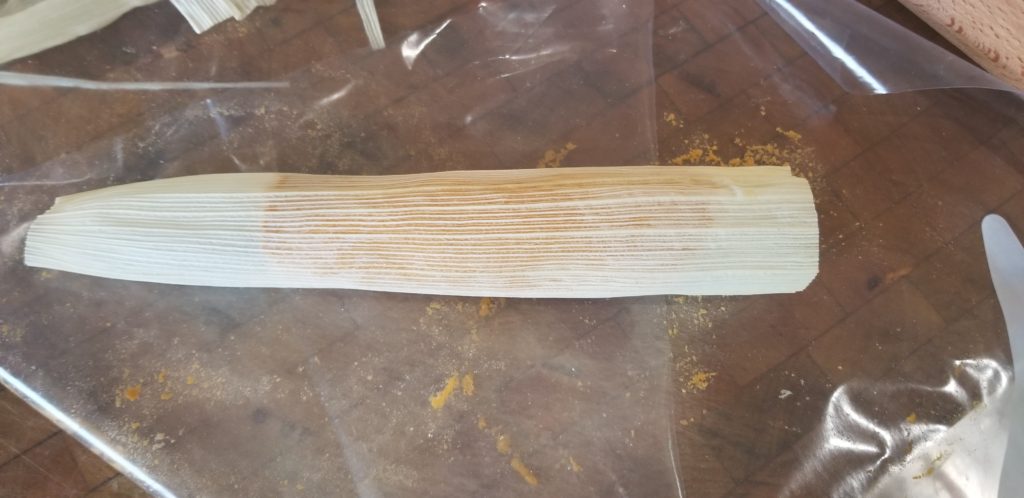
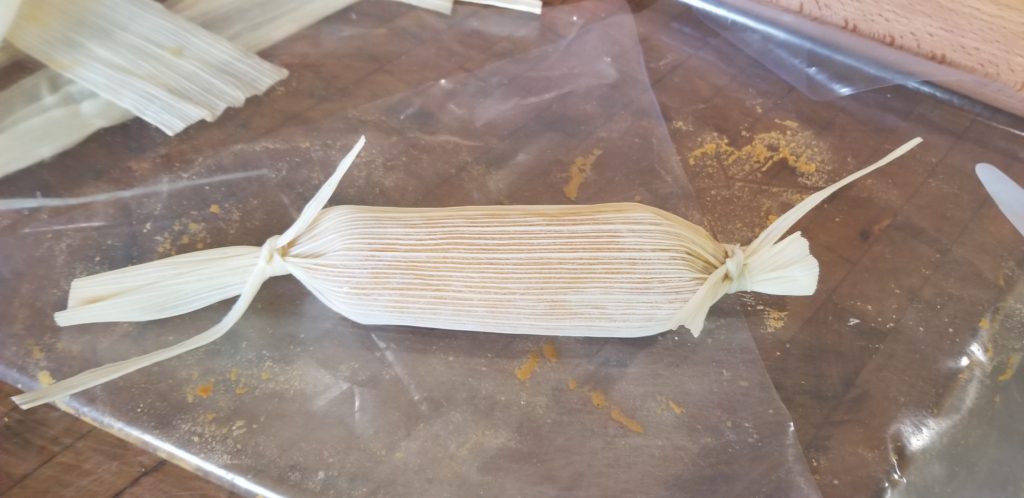
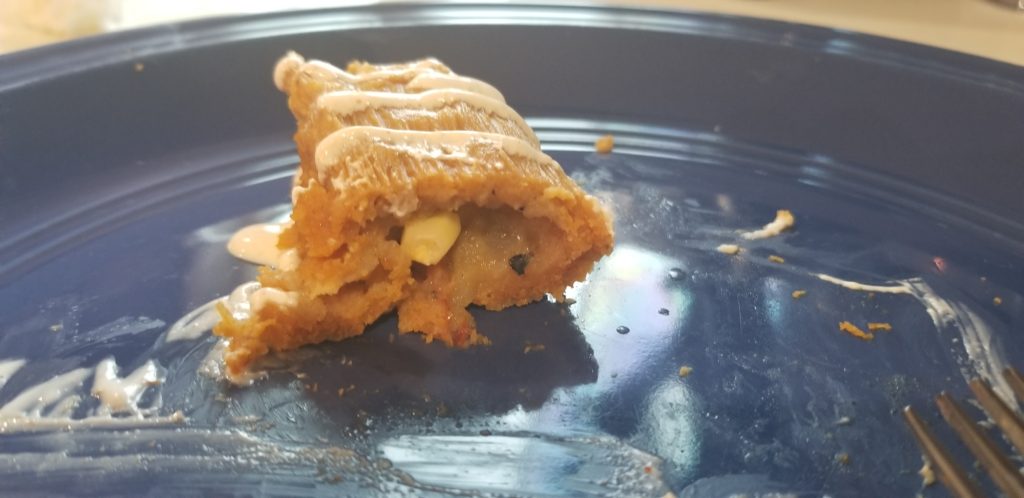
At this point, one person pressed the dough, added it to the softened corn husk and passed it on to the others for the assembly line to start doing its work 🙂 . Fill each masa flat with a little of the strained pork filling (you don’t want a lot of liquid on the tamale), a strip each of carrot, potato, and zucchini, and a couple strip of pickled jalapeno (or just the cheese and roasted poblano if you make that version). Using the corn husk, roll up the masa flat with filling where it rolls the inside without the husk getting stuck into the filling a lot. It really doesn’t matter if the husk is rolled into the dough, but I prefer it not being in there too much since then it breaks the tamale when you try to get it off after its cooked. Kind of like how you would use a bamboo sushi mat but at the end you roll the husk over the roll to keep it all intact. You can tie each end of the husk with a torn string of husk, if they are small enough, or you can fold over the excess and tie with a string of husk in the center…be creative, as long as it blankets the filling well.
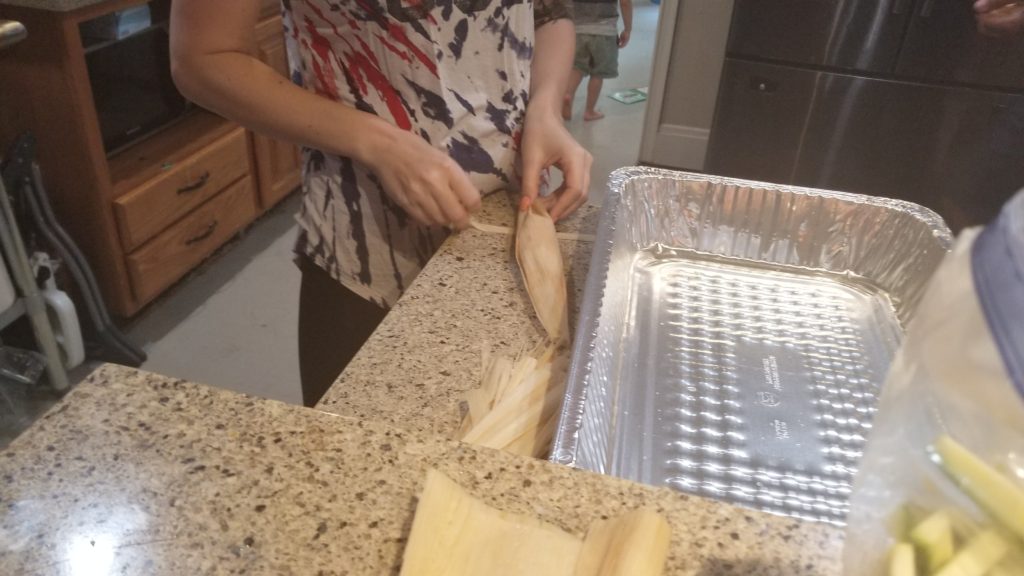
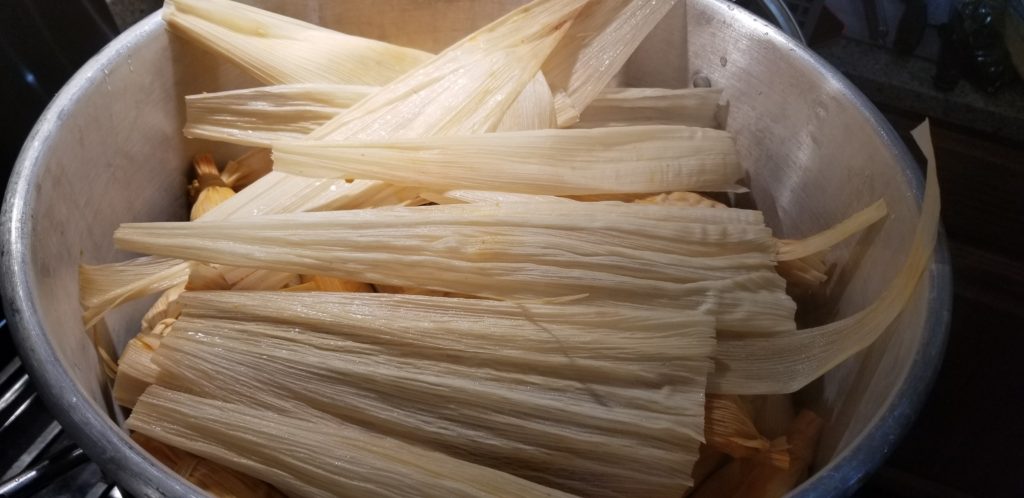
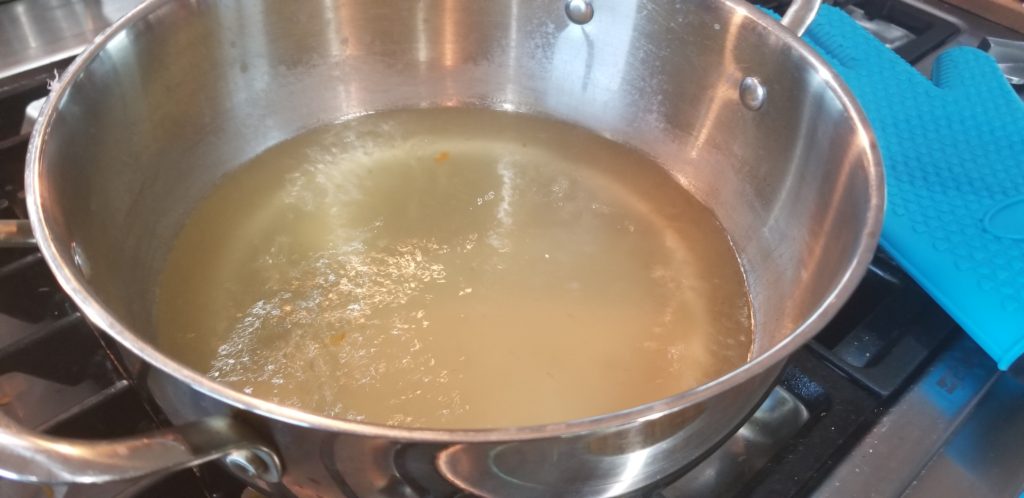
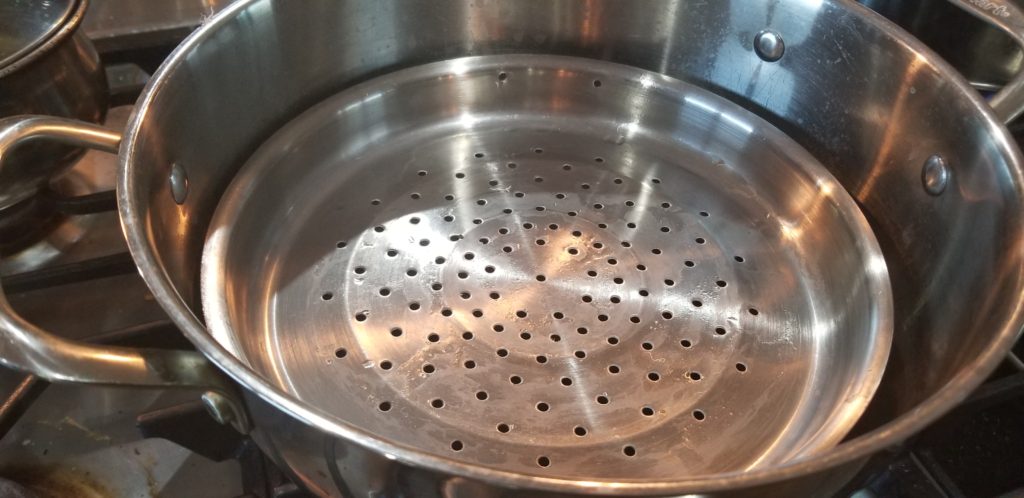
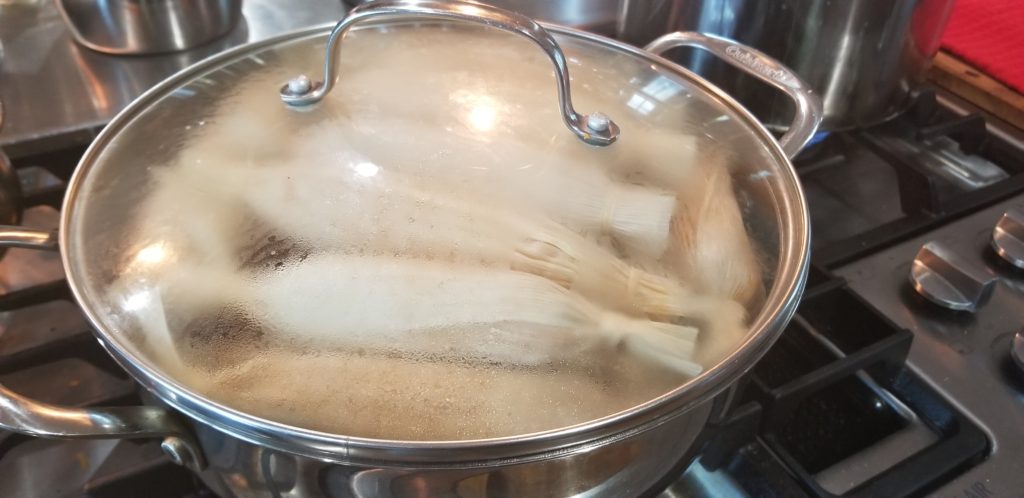
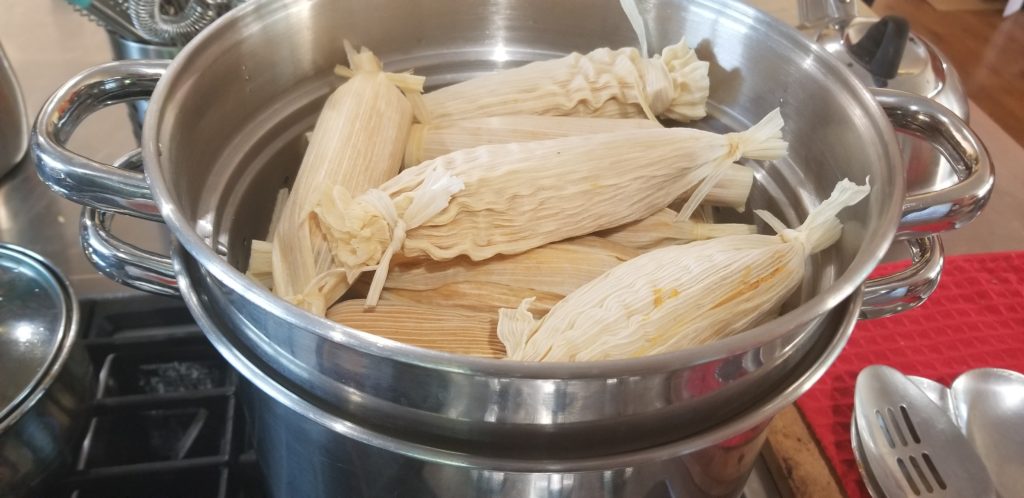
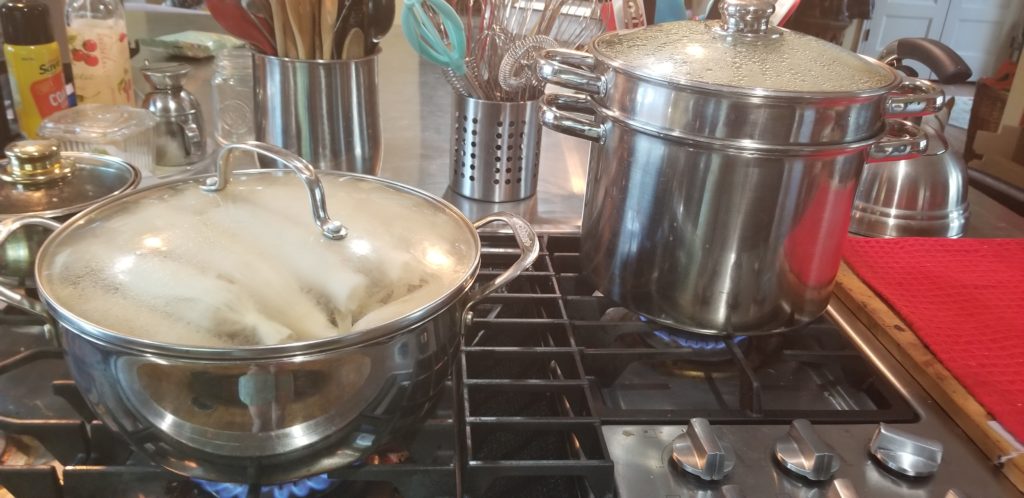
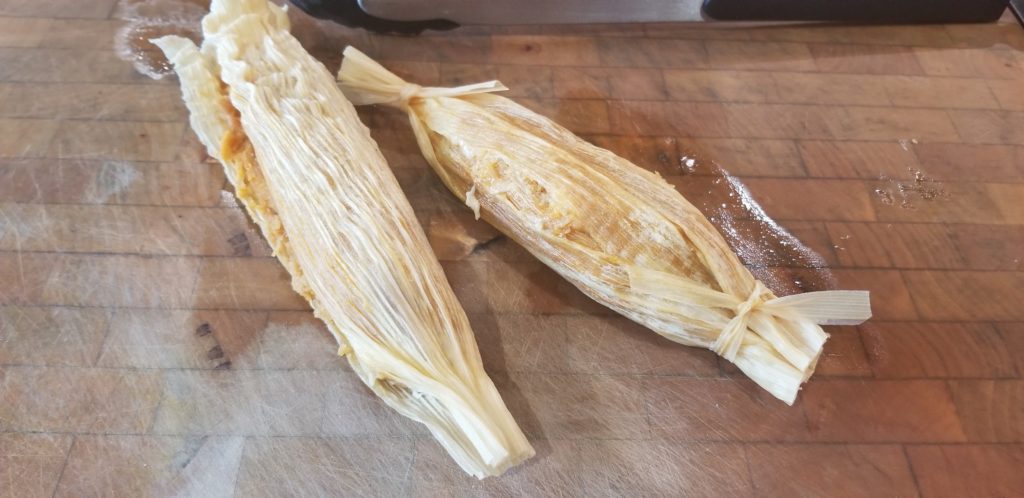
After they are all wrapped you can start steaming them. We layered them horizontally on a steamer in a pot of simmering water (add some chicken stock or bouillon to water to impart flavor into the tamales when steaming), make sure the water isn’t hitting the steamer basket and cook for 40 minutes to an hour, replenishing the hot water, if needed. Take out and let cool to touch before eating. Top with additional chili sauce or whatever you want and enjoy! Whatever you don’t eat you can refrigerate or freeze. If you freeze them just take them out the night before to thaw in refrigerator then reheat them.
The quickest way to reheat any left over tamales is by wrapping them in a damp paper towel and then put them in a steamer bag or freezer bag and close it most of the way, leaving about 2 inches open at the end and microwave for about 25 seconds. If you don’t put them in a bag they get kind of dry.
My Tamale Versions
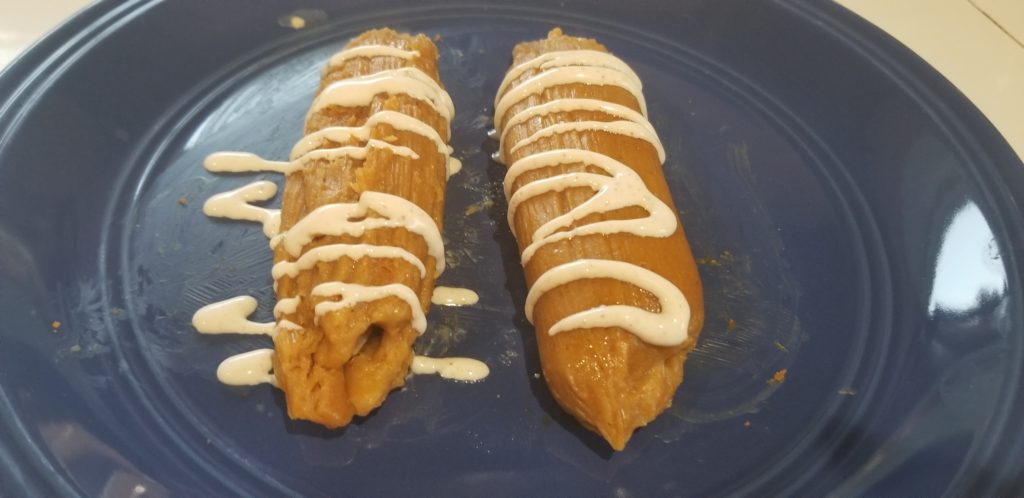
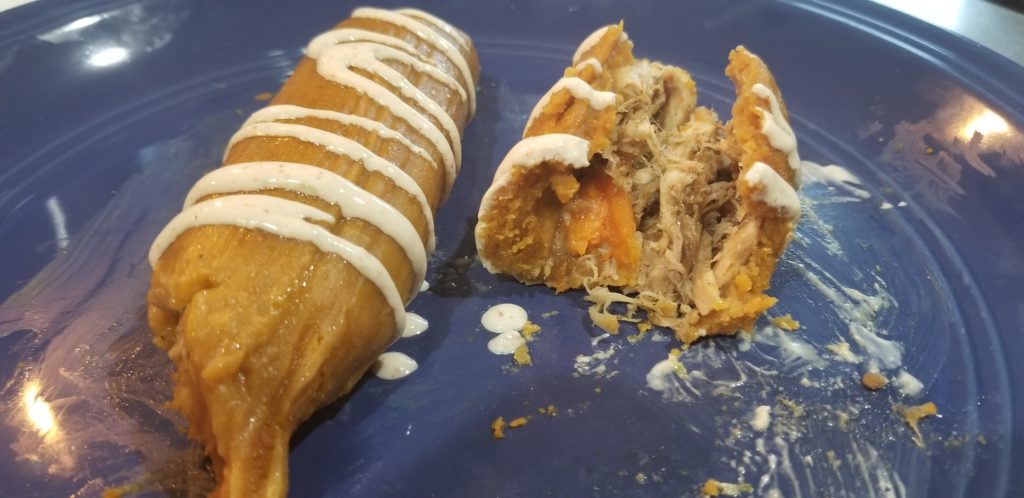
Chicken filling: Since I got to take home the extra masa dough I made some of my own versions of tamales the next day. They turned out wonderful. I enlisted my daughter to measure and roll the masa dough for me, and I made my Greek chicken in tomato sauce recipe and used it as one of my fillings along with a strip of parboiled carrot.

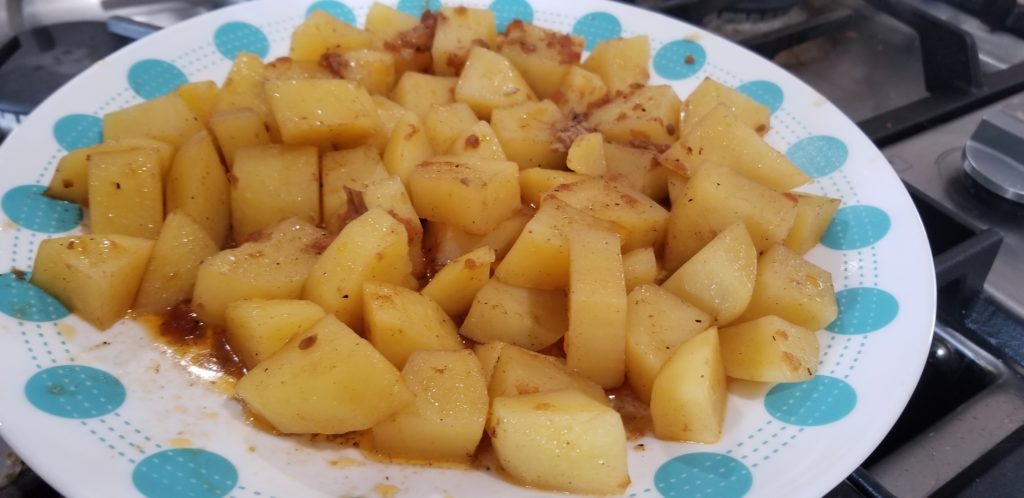
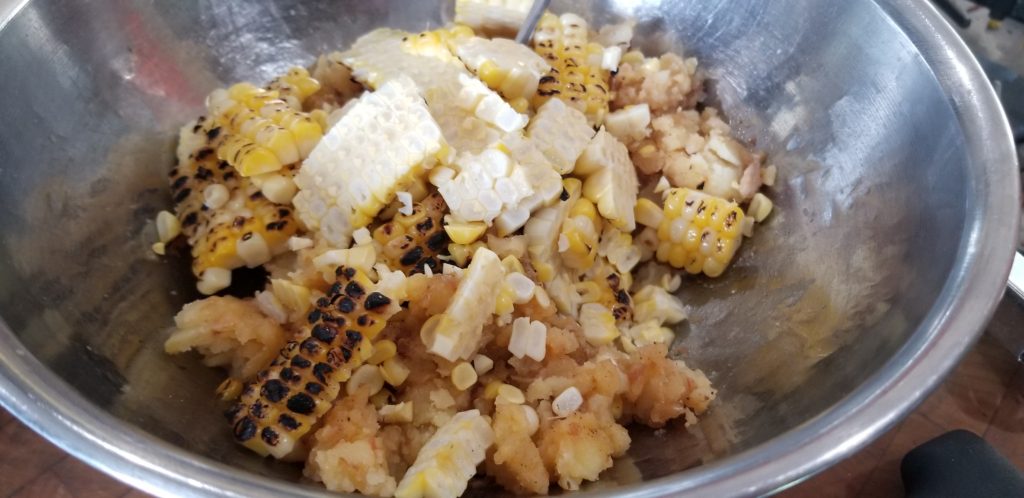
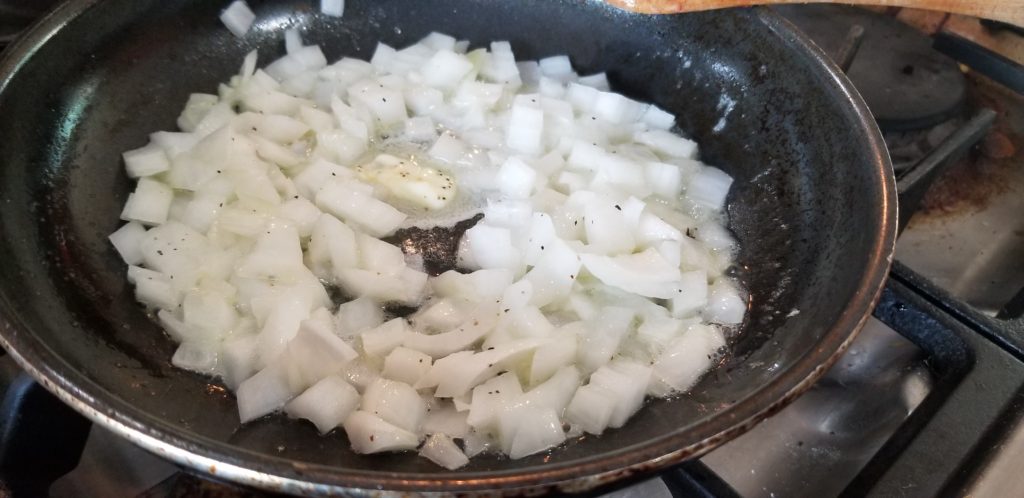
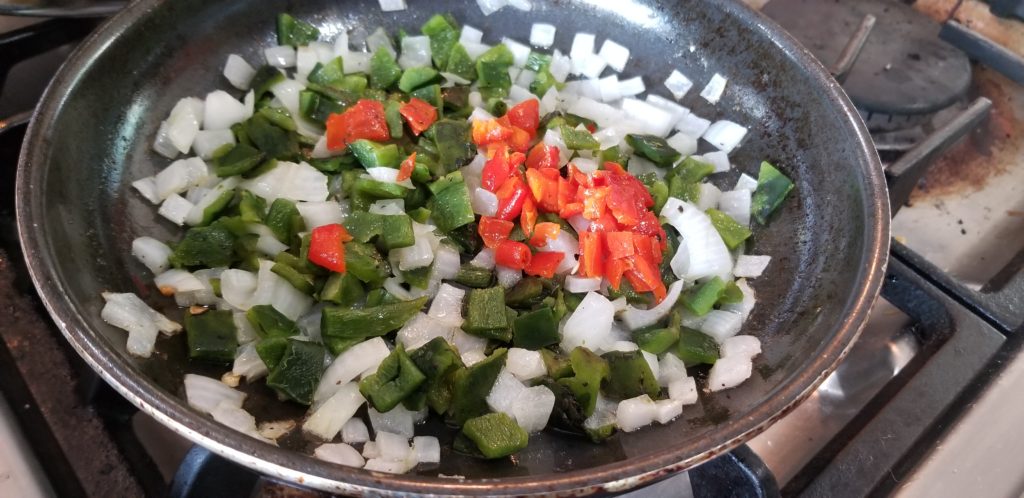
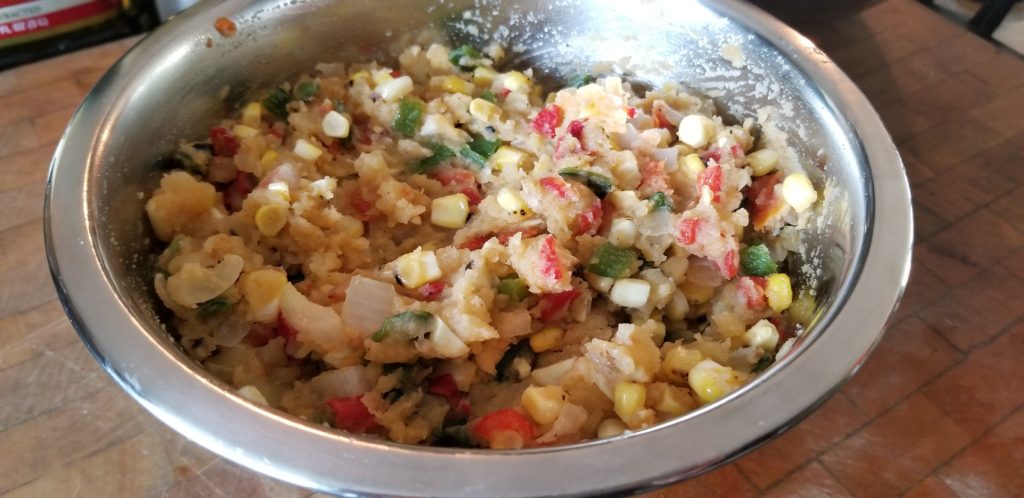
Potato filling: My other filling consisted of the following ingredients all mixed together, at the end I added a little salt and pepper to the mixture. You can mix as much of each ingredient together as you want to make it tasty for you and your family. It was a wonderful spicy bite!


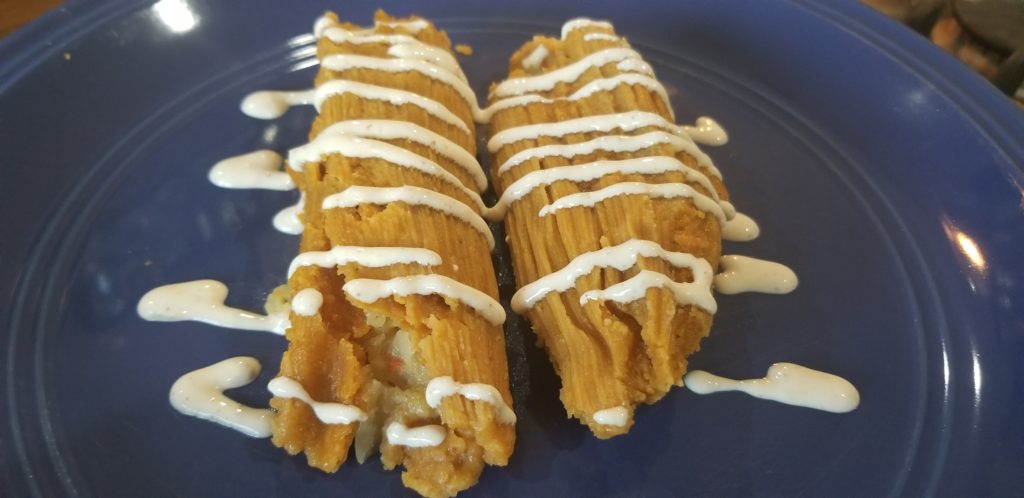
I topped my tamales with a chili lime crema that I made by mixing some chili powder, lime juice and zest, and Mexican crema together…yummo!
What a wonderful experience and opportunity this was…I am ready to learn some more traditional Latin dishes from Monica! What’s next?
Kali Orexi!

Everyone loves a good trifle, I know I do…but are you looking for a trifle that is a little more healthy than most? This one is for you! It uses fresh berries and Greek yogurt to create a refreshing summer treat that you can eat…

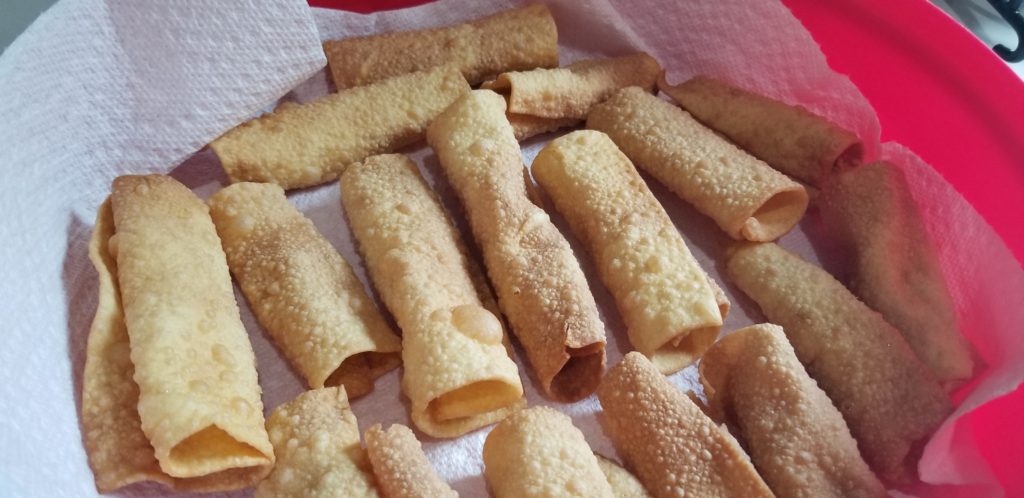
Have you ever tried diples? If you have, you know that they are a melt in your mouth goodness of a dessert…with a delicately crunchy shell dipped in a sweet flavored syrup then drizzled with honey and topped with nuts and cinnamon. If you haven’t…
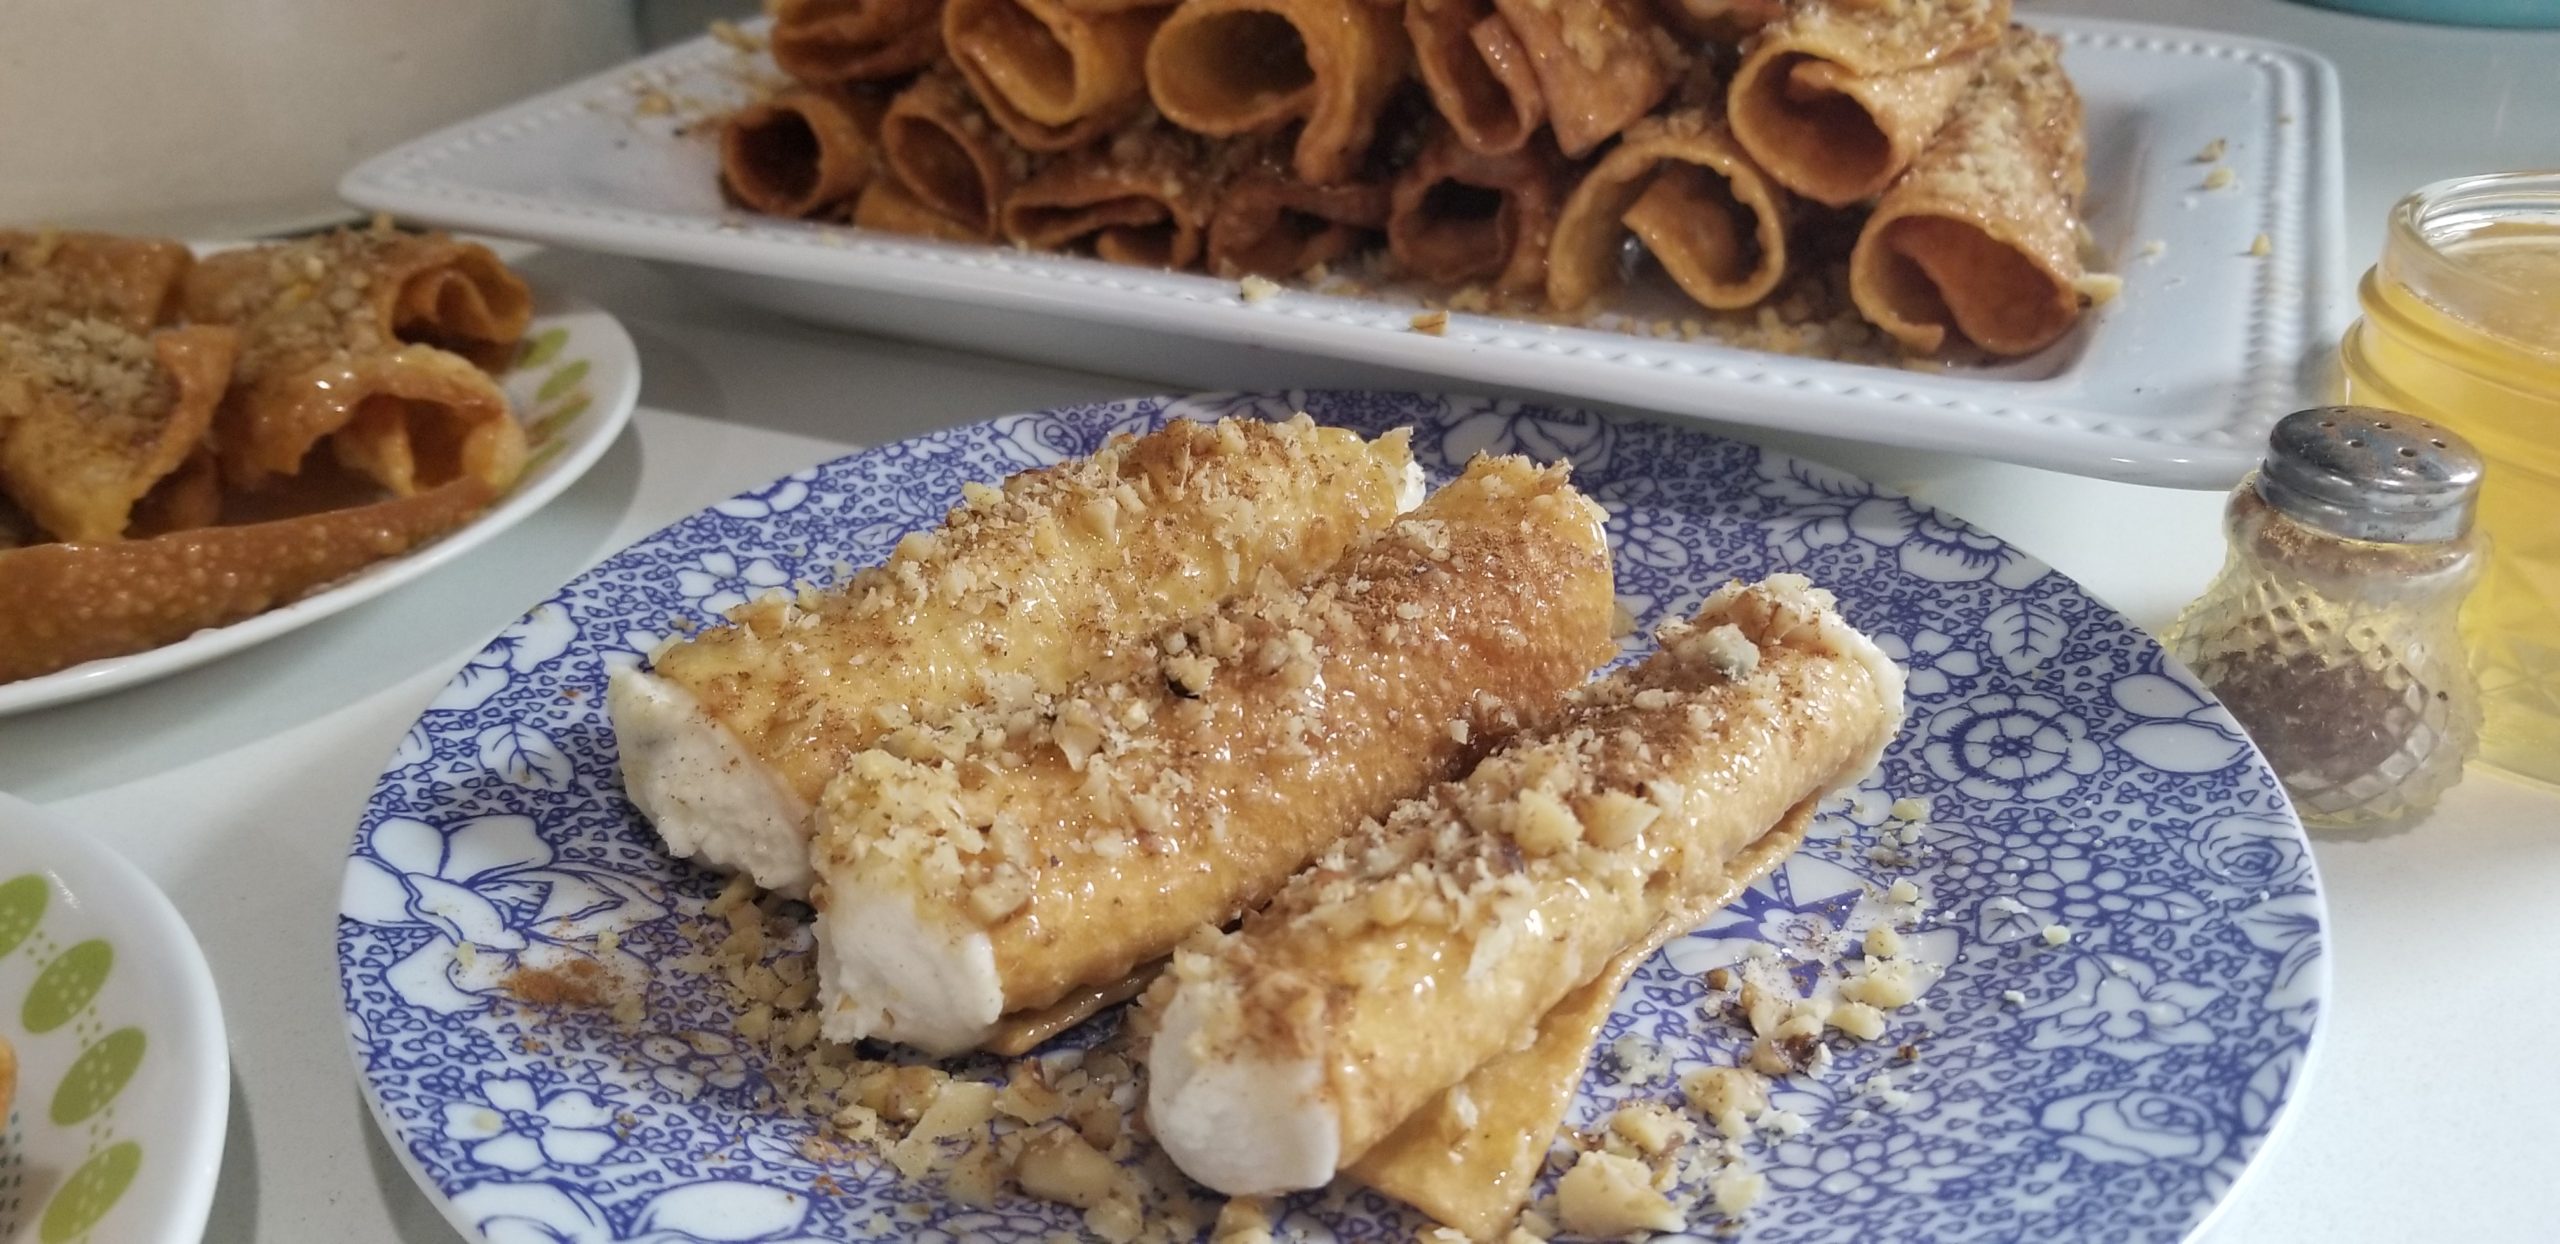
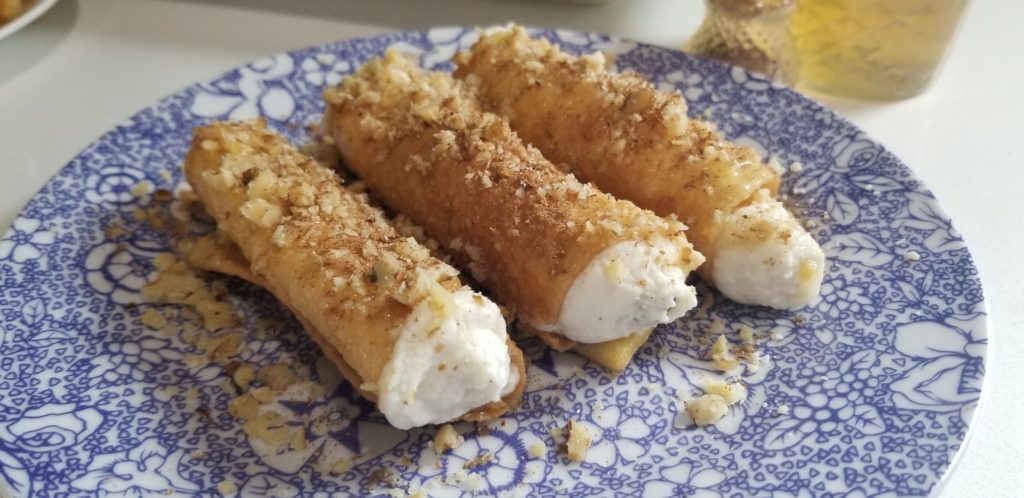
If you have ever had a good cannolo then you know how yummy they are with their slightly sweet and creamy interior and crunchy outer shell. Some are embellished with chopped pistachio’s or mini chocolate chips on each end and dusted with powdered sugar on top. There are many versions you can make.
As I was craving, and making, the traditional Italian version of this dessert a little light bulb went off in my head…I thought the way to make it even better is to pair it with one of my favorite Greek desserts…diples! I mean, everything is better with a little honey, walnuts, and cinnamon, right 🙂 ? Plus, I love the texture of the diples shells more than the cannoli ones, so, this version is “Greeked-up”. It’s a cross between Greek diples and Italian cannoli.
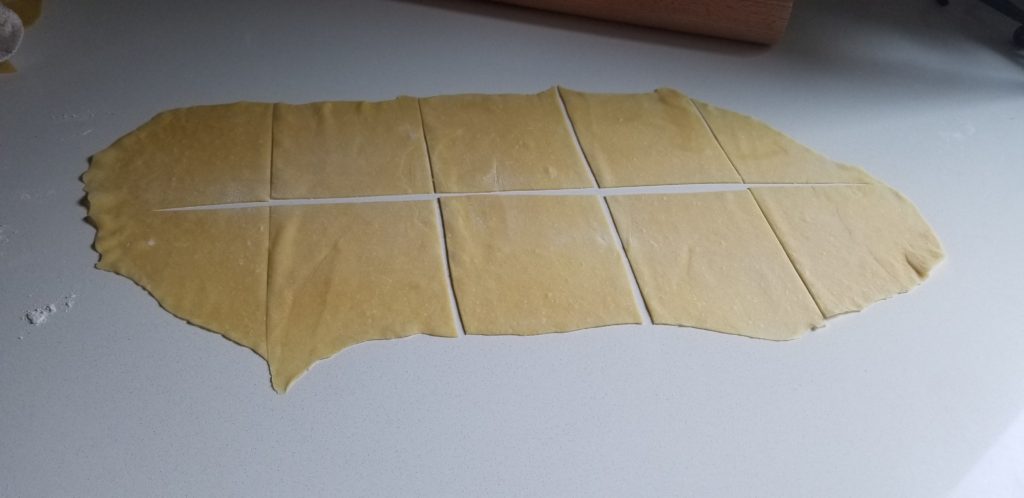
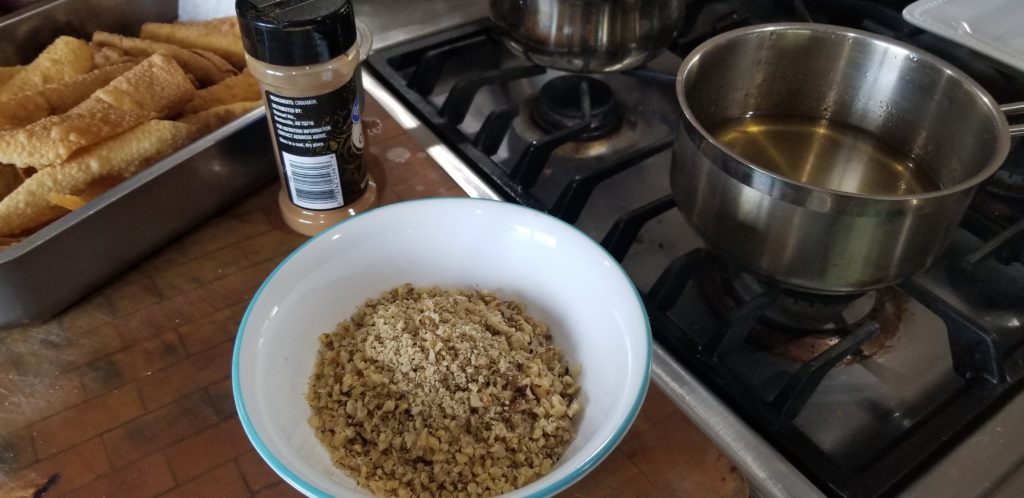
For this recipe I dipped the Greek diples shells into the sweet honey and orange flavored syrup and then filled it with my cannoli filling and topped with a drizzled of honey followed by chopped walnuts and cinnamon…and there you have Greek and Italian fusion at it’s finest! For the traditional Greek diples, click here.
For traditional Greek diples shells you typically add mastixa or maraschino liquor, or plain freshly squeezed orange juice in the dough. Since this is Greek/Italian fusion I used Marsala wine since it is typically used in Italian cannoli shells.
You will need:
Diples Shells:
Cannoli Filling:
Dipping Syrup:
Topping:
Steps:
For the shells:
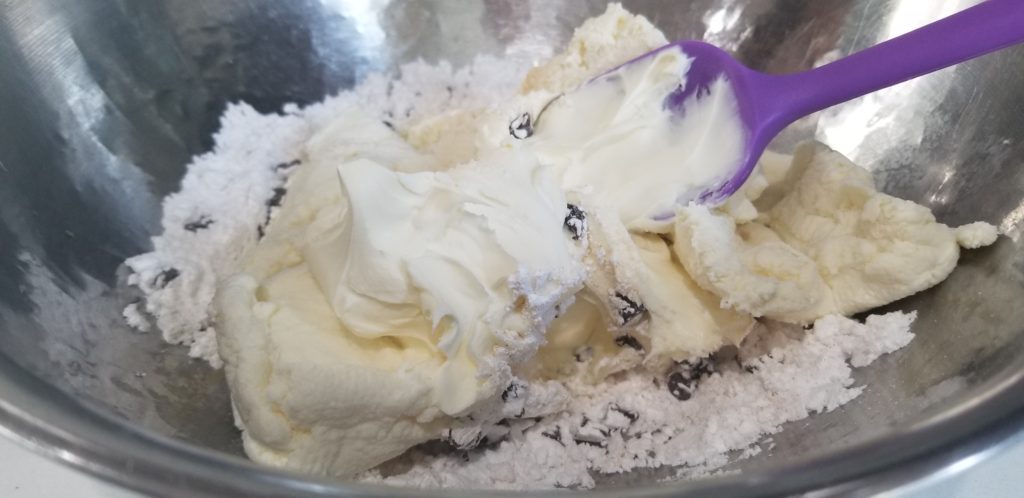
For the cannoli filling:
For the dipping syrup:
Assembly:
Kali Orexi!


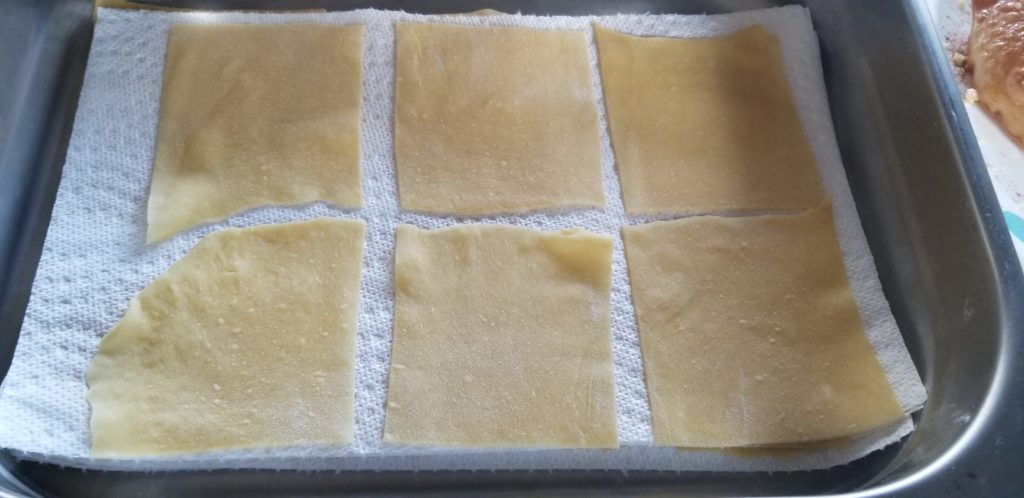
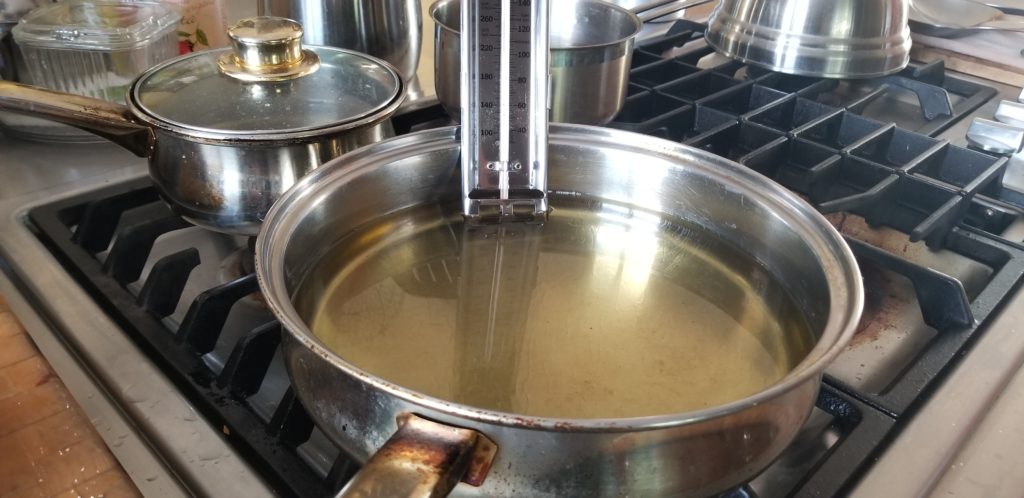
Video on how to fry diples dough:
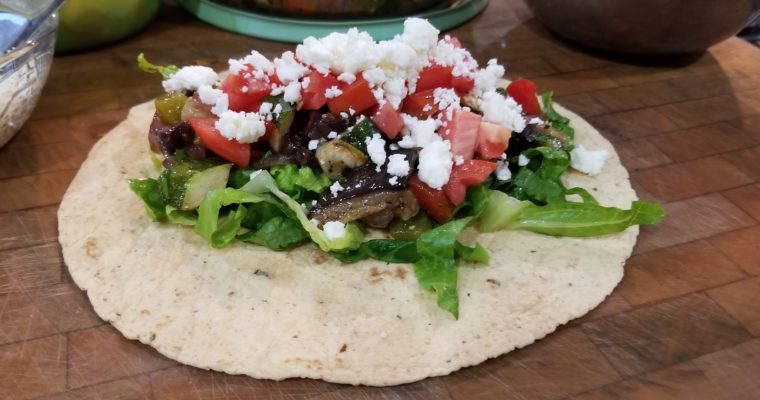
Are you tired of eating meat all the time, or are just craving veggies? This is a wonderful and easy wrap to make. It’s light, healthy, tasty, and low carb-if you want it to be 🙂 . You can make it with any veggies you…