Author: The Mid-Med

Pita Bread-Greek Style

Pita Bread-Greek Style

There’s nothing better than making your own pita bread. It’s not too hard to make, just some waiting while the dough rises, and it’s very rewarding to eat hot off the press, oh, I meant pan 🙂 . Pita can be used for just about…

Souvlaki Me Pita (aka meat pieces in pita bread)

Souvlaki Me Pita (aka meat pieces in pita bread)

Okay, I have to believe that most of you reading this have had a souvlaki sandwich, or maybe the more popular version in America-the gyro sandwich. Or…at least some form of sandwich that involves stuffing pita bread and wrapping it up! If not, well you…

Imam Baildi (aka Stuffed Eggplant)

Imam Baildi (aka Stuffed Eggplant)

[Jump to Recipe]

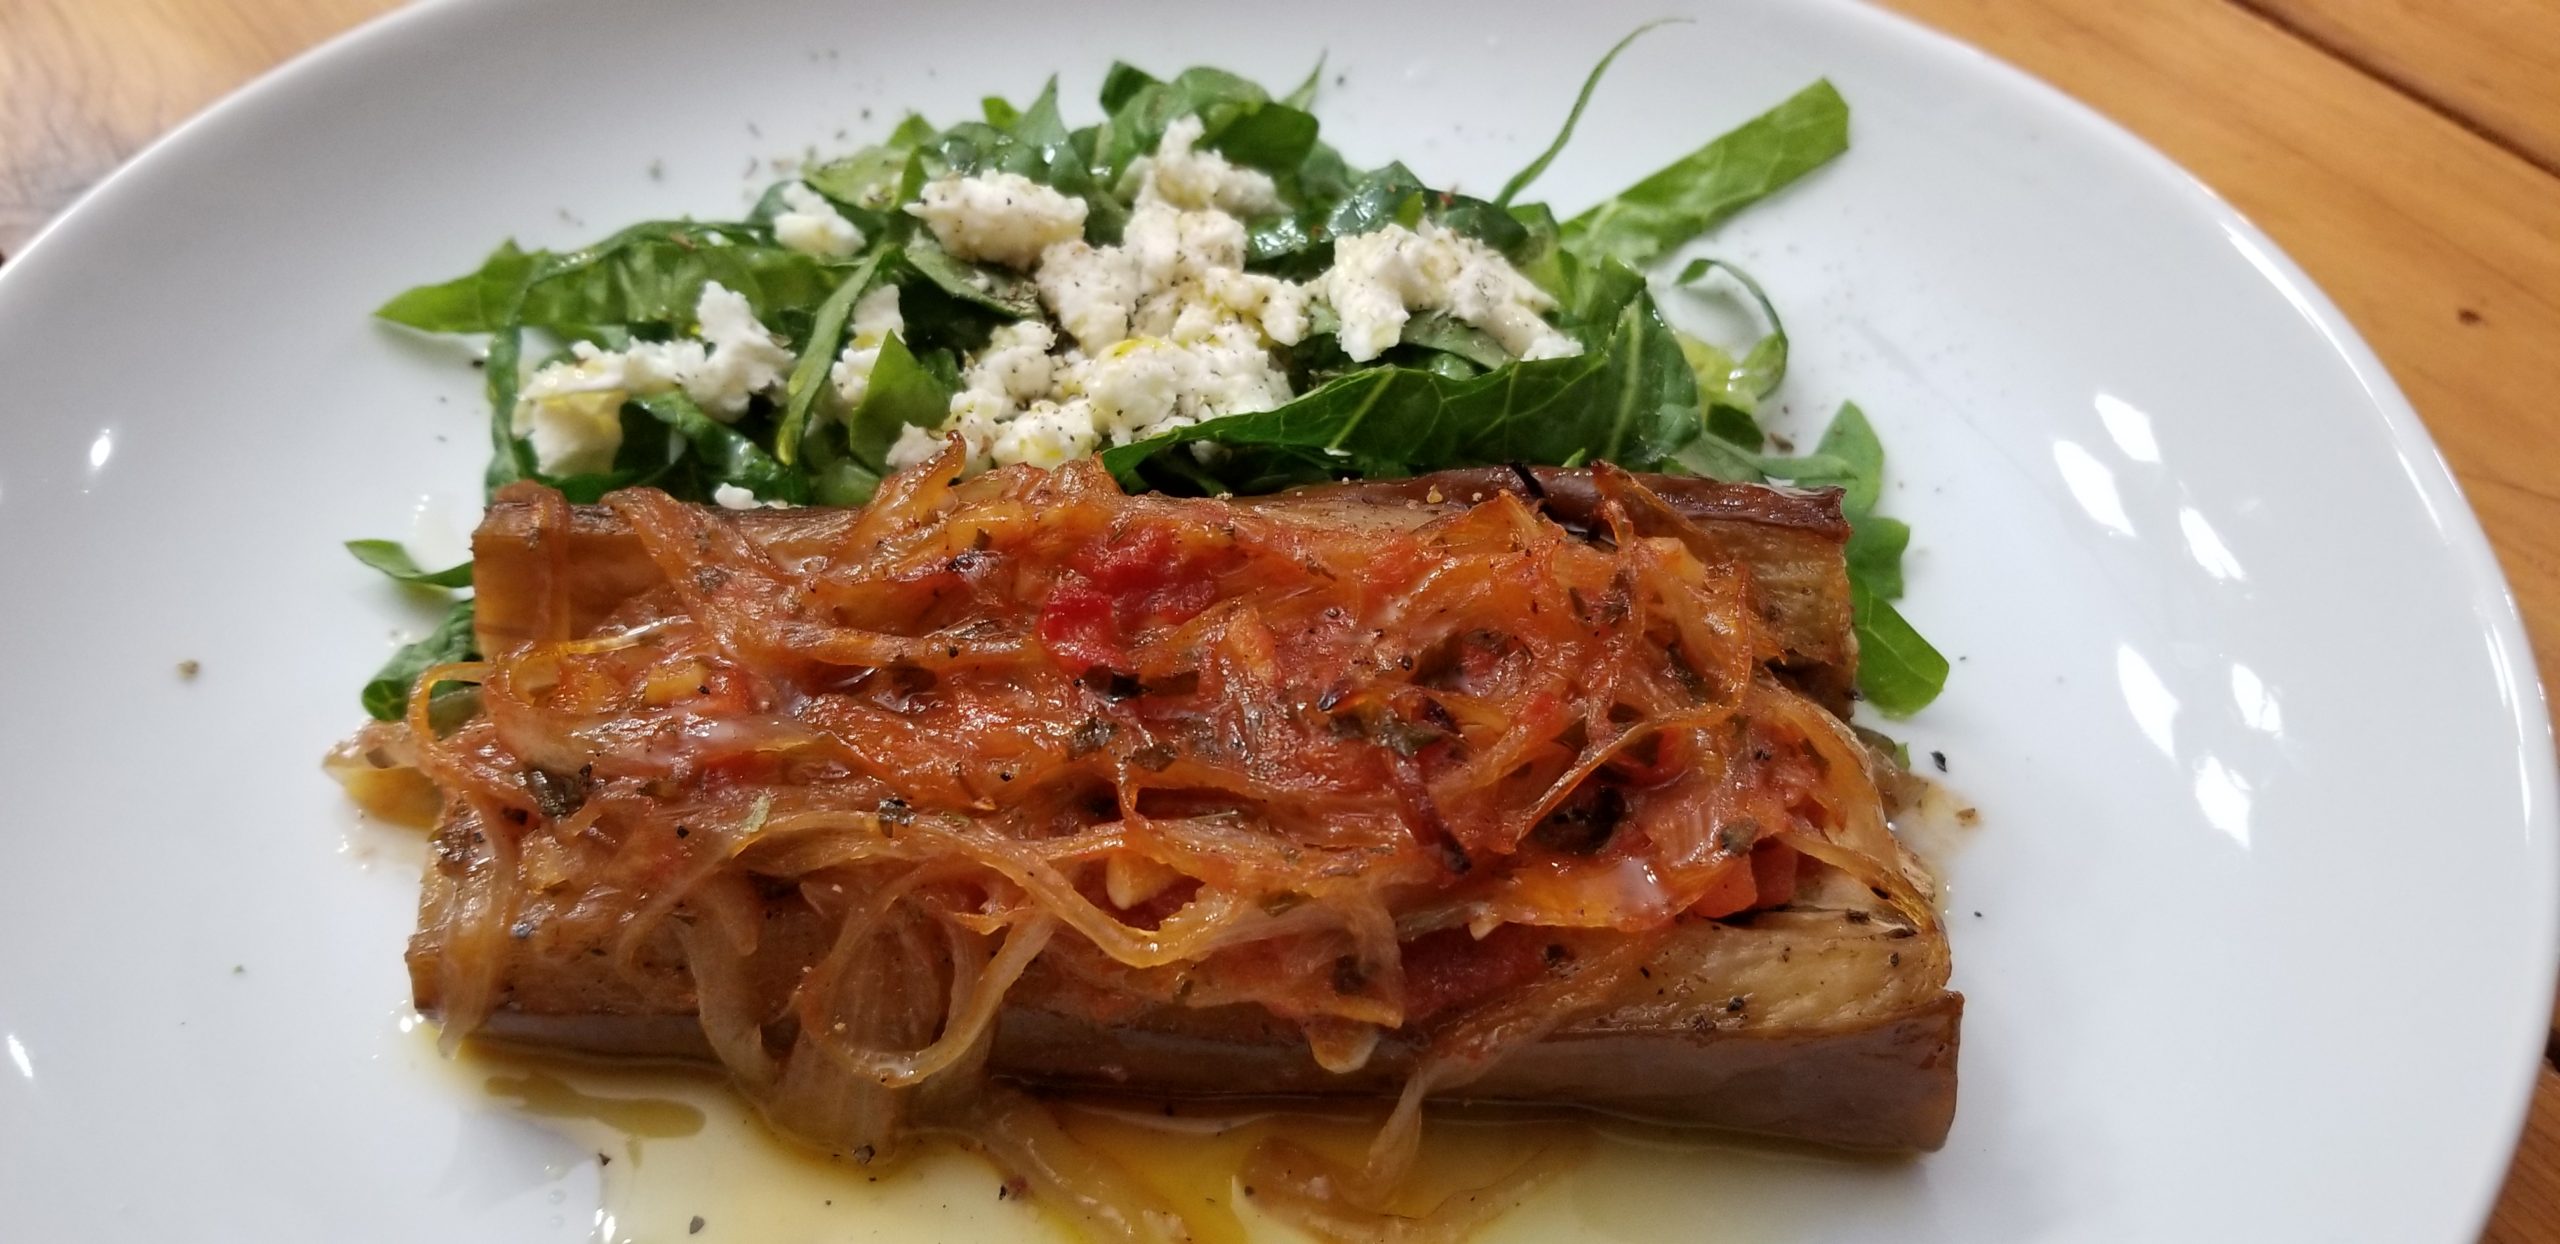
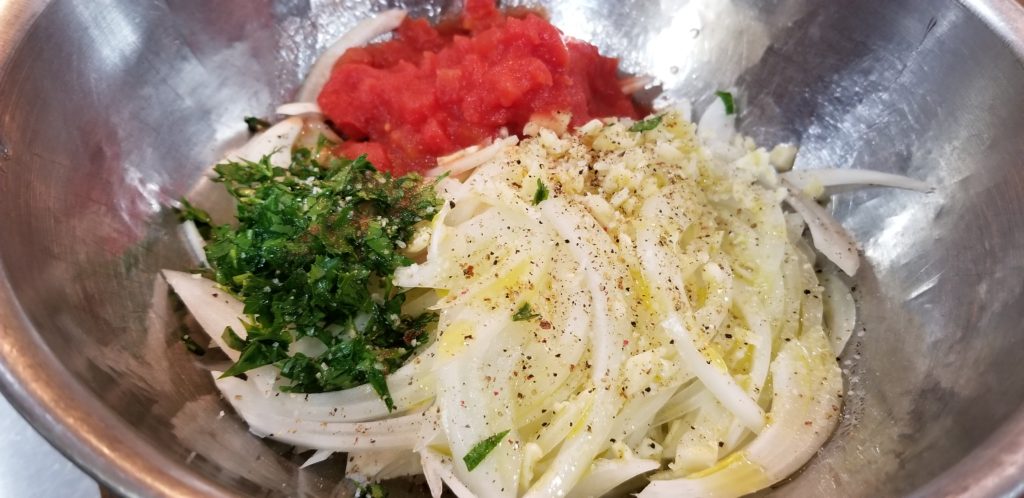
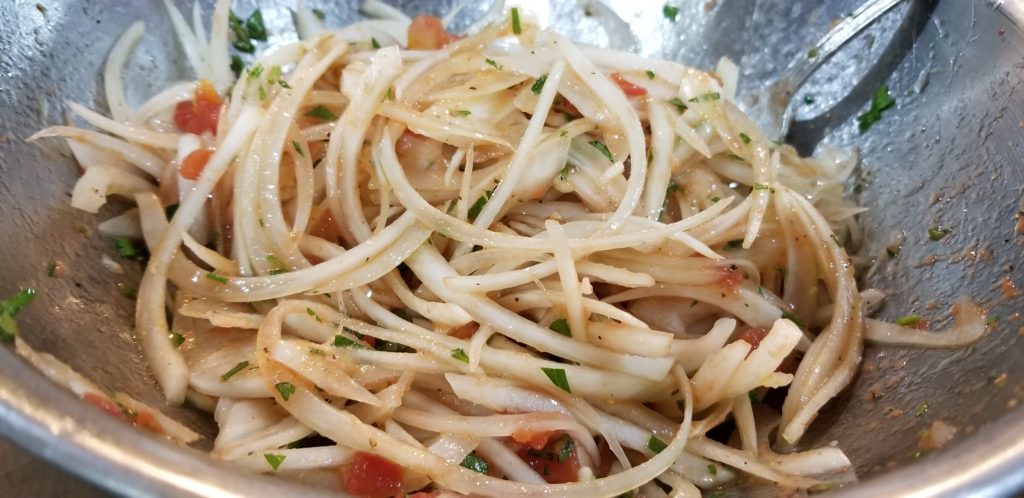
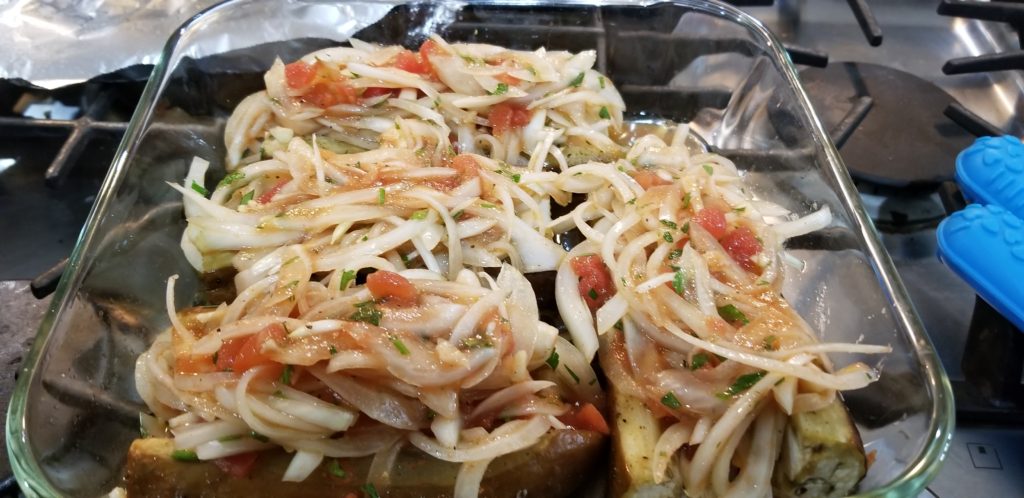
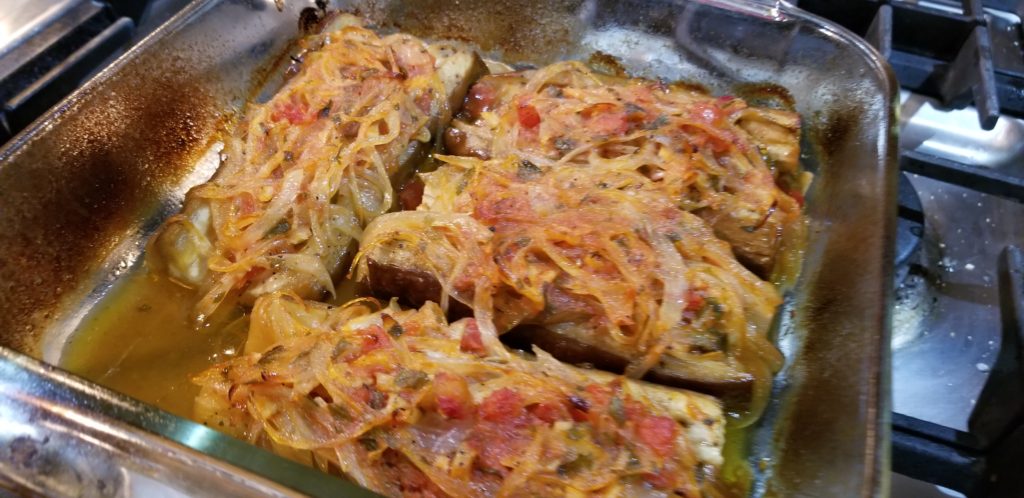
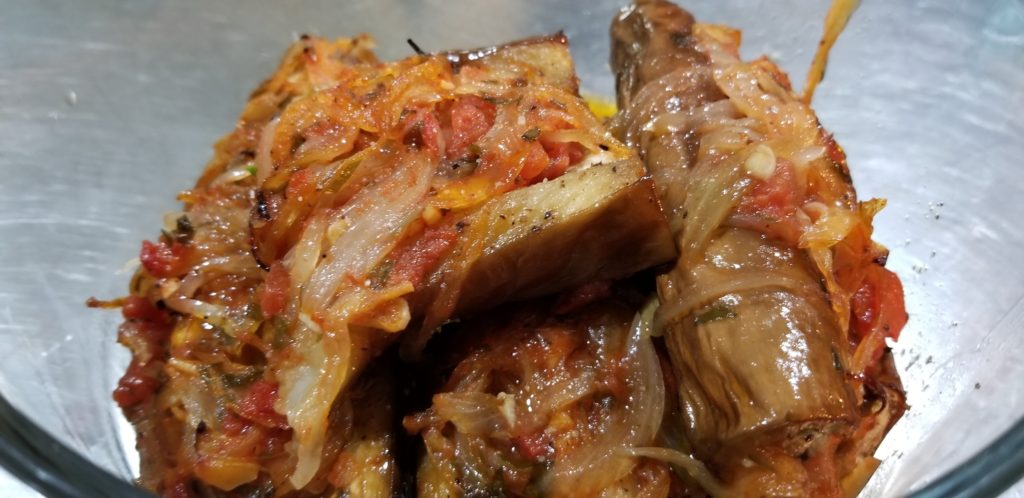
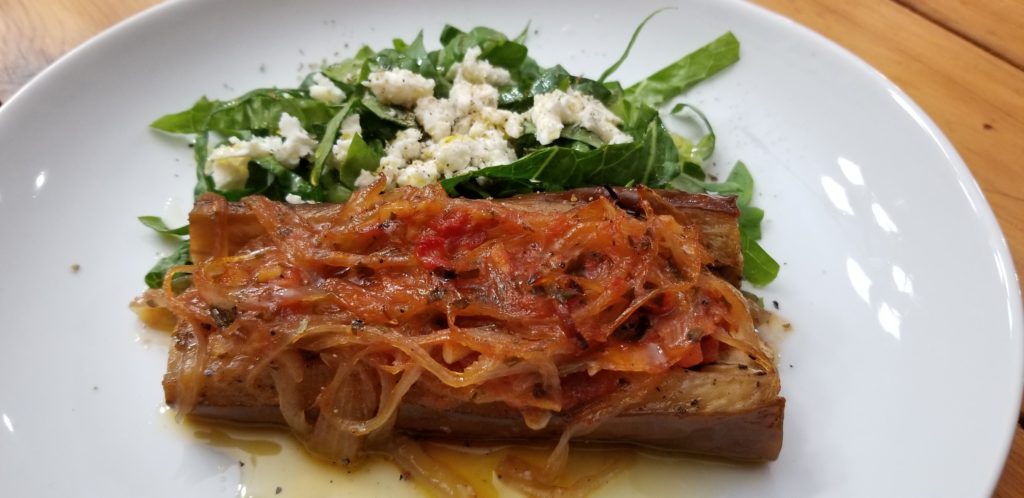
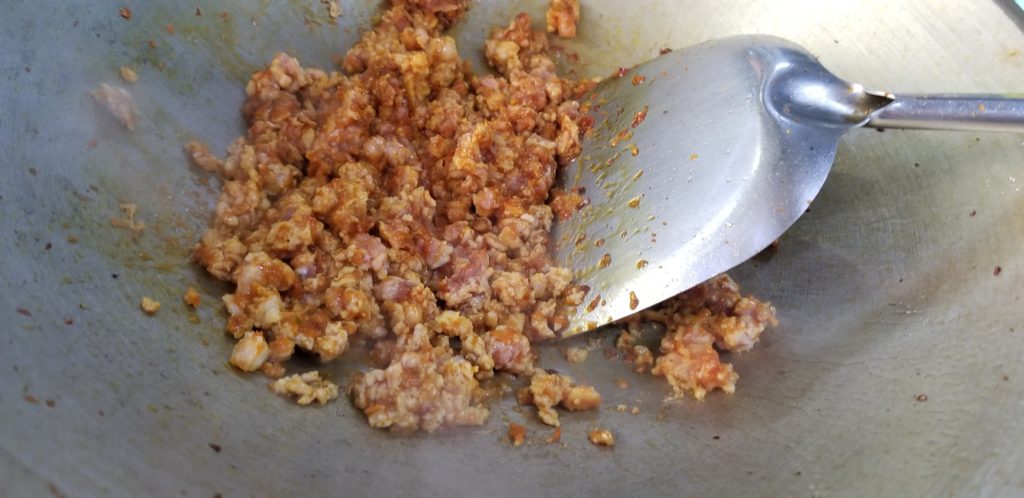
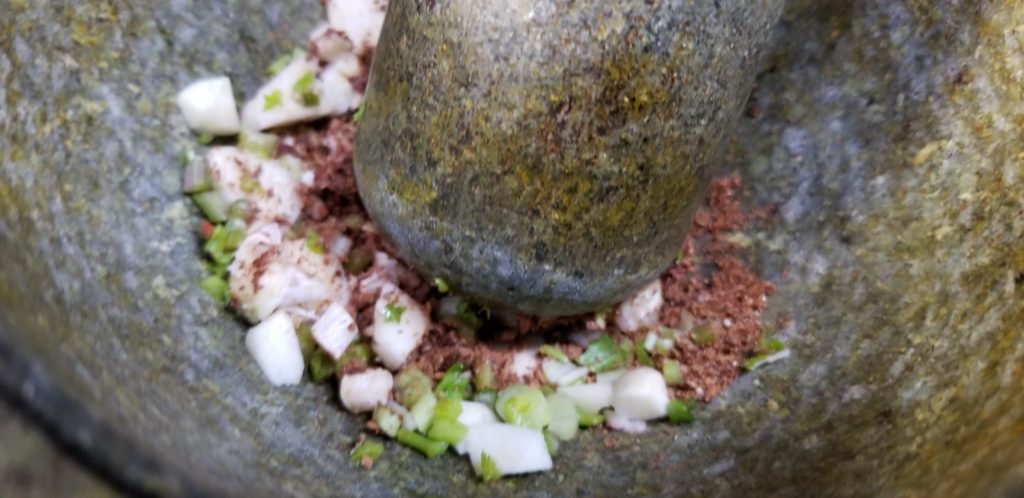
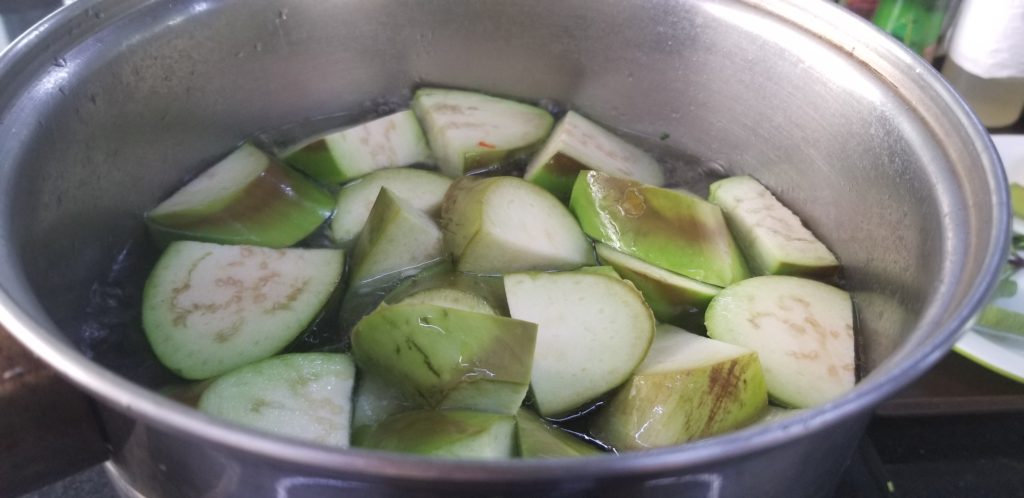
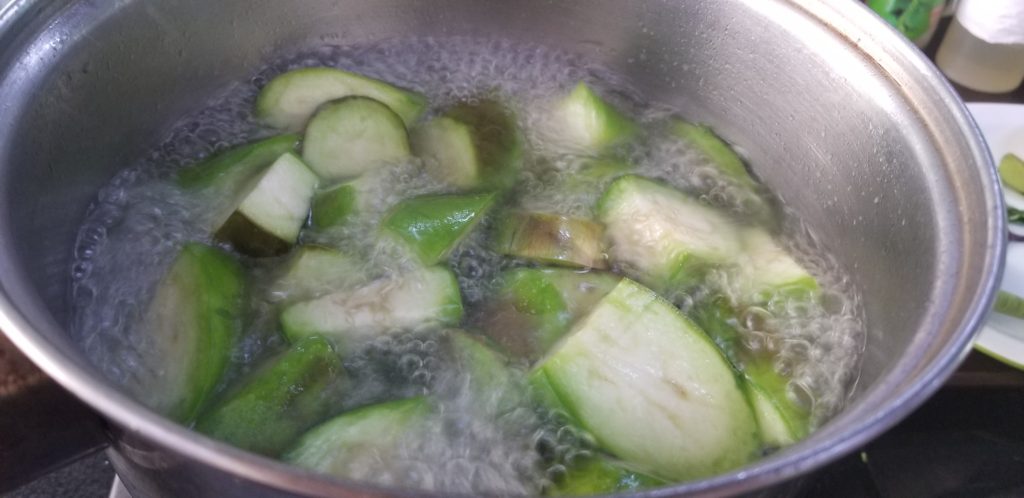
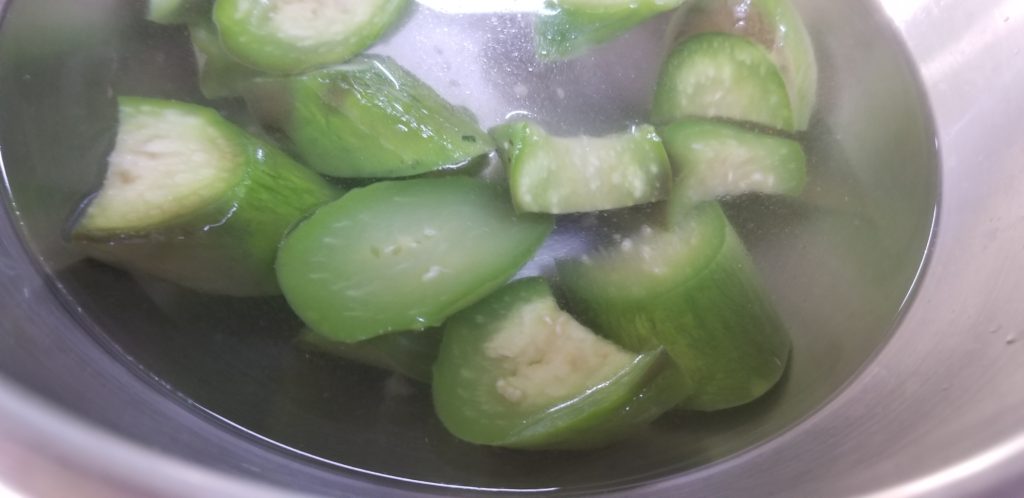
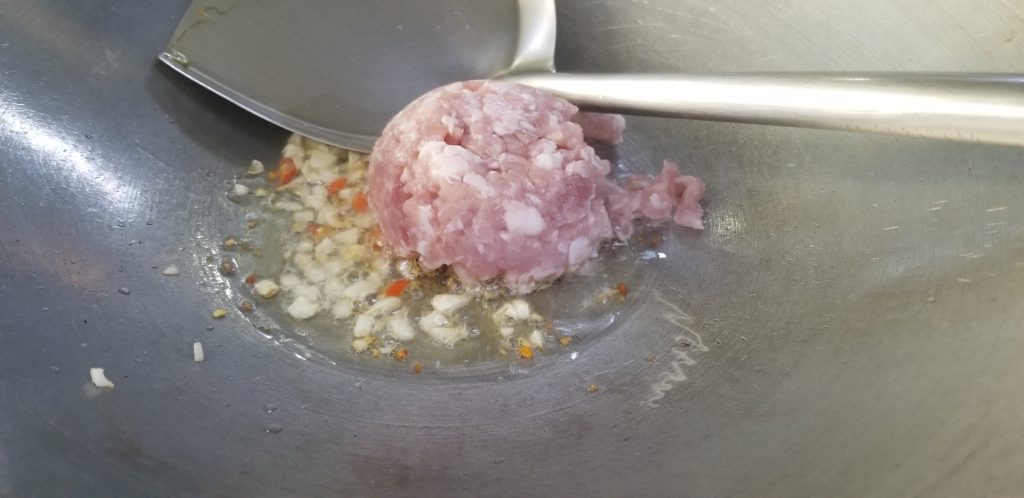
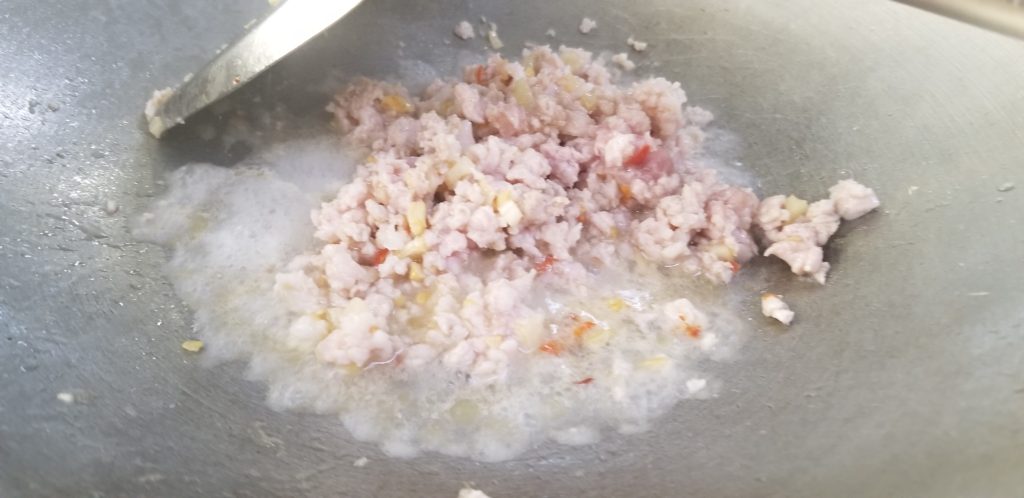
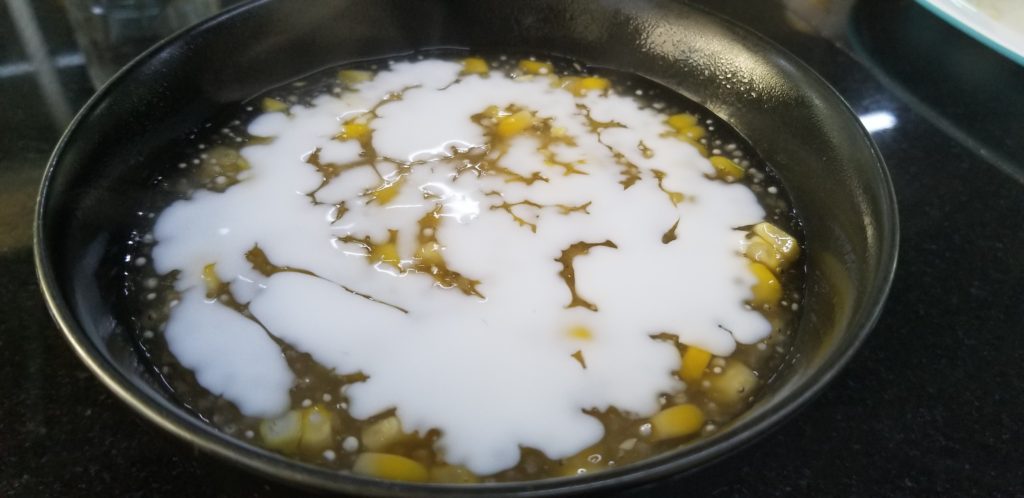
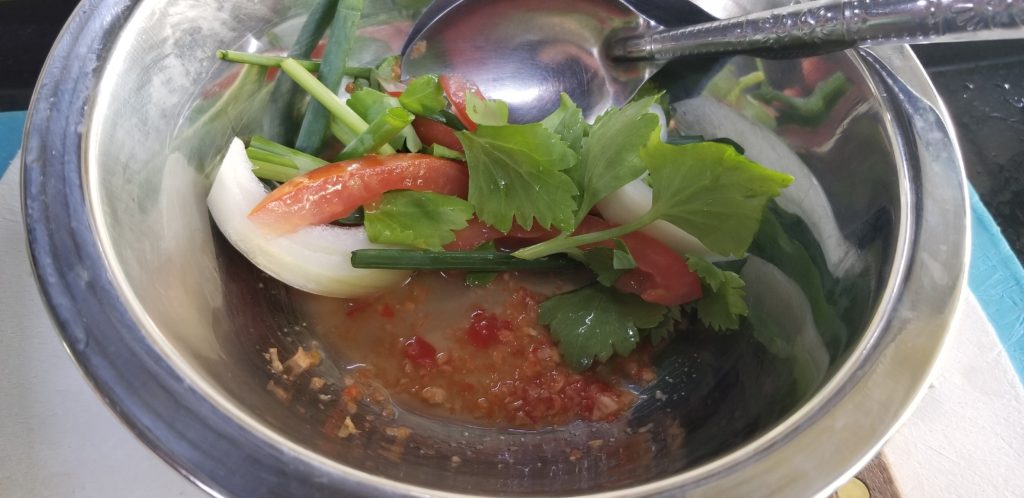
There are a lot of Greek recipes that utilize eggplant…but this one is one of the simplest ones and very healthy AND only has 6 ingredients. My mother used to make this a lot when I was growing up. I used to love slopping up the olive oil sauce with some warm bread and eating it with some feta cheese…oh my gosh, it is wonderful.

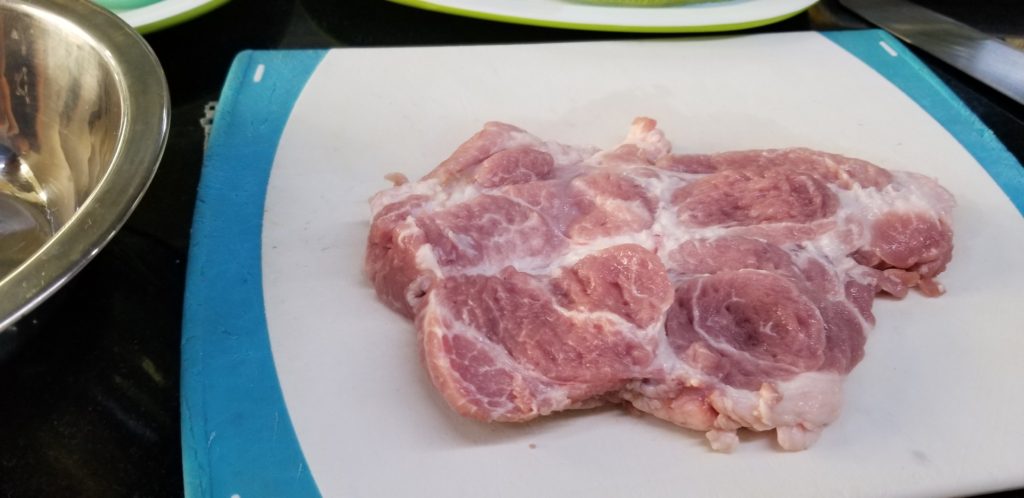
You can use any type of eggplant you want, but I prefer the Japanese style eggplants. I think they have a sweeter taste and also the skin cooks up nice and soft. If you substitute most of the onions with ground beef and then add some bechamel on top it becomes a different eggplant recipe, called papoutsakia (little shoes), but that is a recipe for another time 🙂 .

You just need:

  • 2 long Japanese style eggplants, cut in half
  • 1 large sweet onion, sliced thinly
  • 4-6 garlic cloves, sliced thinly or chopped
  • 4 tablespoons chopped Italian parsley, chopped
  • 2 tablespoons of spearmint (or other variety of mint), chopped (optional)
  • 3/4 cup petite diced canned tomatoes (or chopped fresh), with juices
  • 1/8 to 1/4 cup olive oil, plus a couple of drizzles
  • Salt and pepper to taste

Steps:

  1. Preheat oven to 375.
  2. Make a slit down the middle of each of the 4 pieces of eggplant and put into a greased pan.
  3. Drizzle with olive oil and rub all over the pieces, season with salt and pepper then cover with foil.
  4. Bake for about 30 minutes, until the eggplants soften slightly, or you can pan fry with a little oil in non-stick pan.
  5. Saute thinly sliced onion in a pan until mostly cooked, then mix in the rest of the ingredients, stir, turn off heat and allow to cool for 5 minutes.
  6. Remove eggplants from oven and open the slits and fill with onion mixture. Stuff each one as much as you can and then set the rest of the filling on top of the eggplants.
  7. Cover with foil again and bake in oven for an hour to 1 1/2 hours (the eggplant should be tender and onions should be totally cooked).
  8. Remove foil and bake for another 10-15 minutes until top is slightly brown (this step optional).
  9. Serve and enjoy with a lettuce salad, feta, and warm bread.

Kali Orexi!

Imam Baildi

A simple vegan dish that lasts for a week in the fridge. Make it on a Sunday and eat it all week. Add bread and a simple salad to make it a meal

Ingredients
  

  • 2 long Japanese style eggplants cut in half
  • 1 large sweet onion sliced thinly
  • 4-6 garlic cloves sliced thinly or chopped
  • 4 tablespoons chopped Italian parsley chopped
  • 2 tablespoons spearmint (or other variety of mint) chopped (optional)
  • 3/4 cup petite diced canned tomatoes or chopped fresh, with juices
  • 1/8 to 1/4 cup olive oil plus a couple of drizzles
  • Salt and pepper to taste

Instructions
 

  • Preheat oven to 375.
  • Make a slit down the middle of each of the 4 pieces of eggplant and put into a greased pan.
  • Drizzle with olive oil and rub all over the pieces, season with salt and pepper then cover with foil.
  • Bake for about 30 minutes, until the eggplants soften slightly, or you can pan fry with a little oil in non-stick pan.
  • Saute thinly sliced onion in a pan until mostly cooked, then mix in the rest of the ingredients, stir, turn off heat and allow to cool for 5 minutes.
  • Remove eggplants from oven and open the slits and fill with onion mixture. Stuff each one as much as you can and then set the rest of the filling on top of the eggplants.
  • Cover with foil again and bake in oven for an hour to 1 1/2 hours (the eggplant should be tender and onions should be totally cooked).
  • Remove foil and bake for another 10-15 minutes until top is slightly brown (this step optional).
  • Serve and enjoy with a lettuce salad, feta, and warm bread.
Giouvarlakia Avgolemono Soup (aka Greek Meatball Lemon-Egg Soup)

Giouvarlakia Avgolemono Soup (aka Greek Meatball Lemon-Egg Soup)

A lot of you are probably aware of the famous Greek lemon-egg chicken soup with rice, kotosoupa avgolemono, but are you familiar with another lemon-egg soup that is popular to make in Greece? It’s a meatball and rice lemon egg soup and it is just…

Bangkok Thai Cooking Academy-Day 22

Bangkok Thai Cooking Academy-Day 22

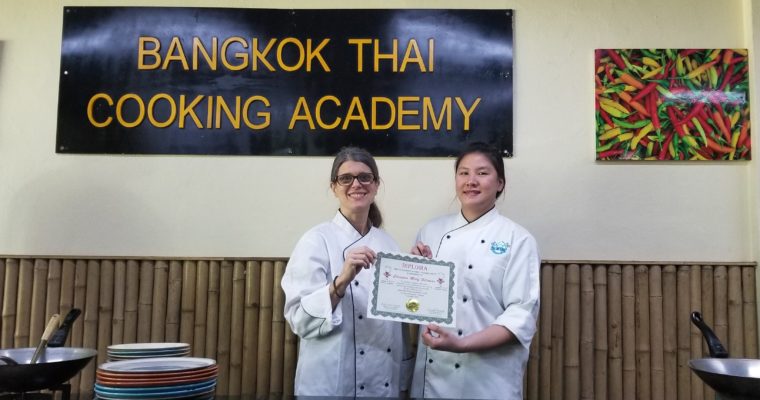
My current journey is at it’s end. Yes, I’m done! Six weeks of class all condensed into 22 days of instruction! You can call me Chef now 🙂 . I earned my Master Thai Culinary Chef Diploma! Yesterday (Saturday) was my last day of class.…

Bangkok Thai Cooking Academy-Day 21

Bangkok Thai Cooking Academy-Day 21

One more day left. I can’t believe how quick this has gone. I don’t want to finish :). There were no new ingredients I worked with today. Does that mean I’ve learned it all? Probably not, but I have learned a lot.
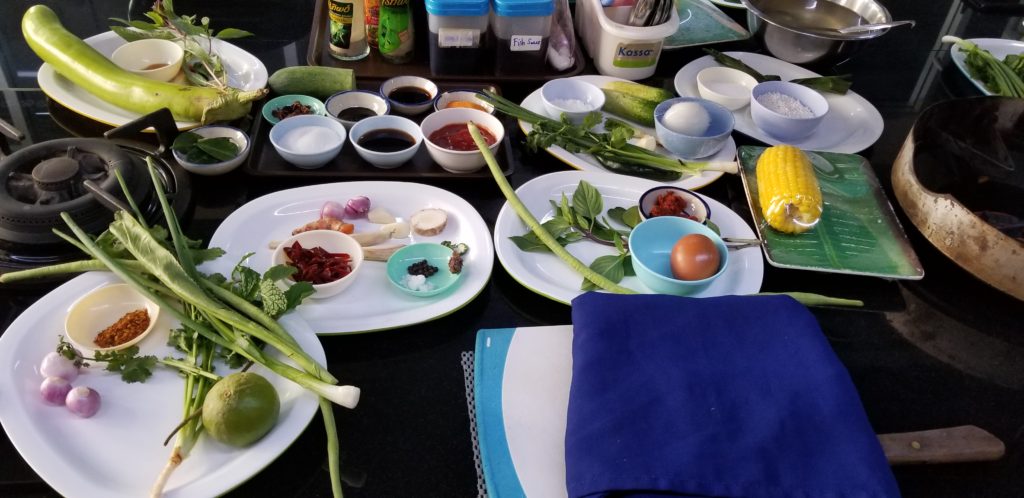
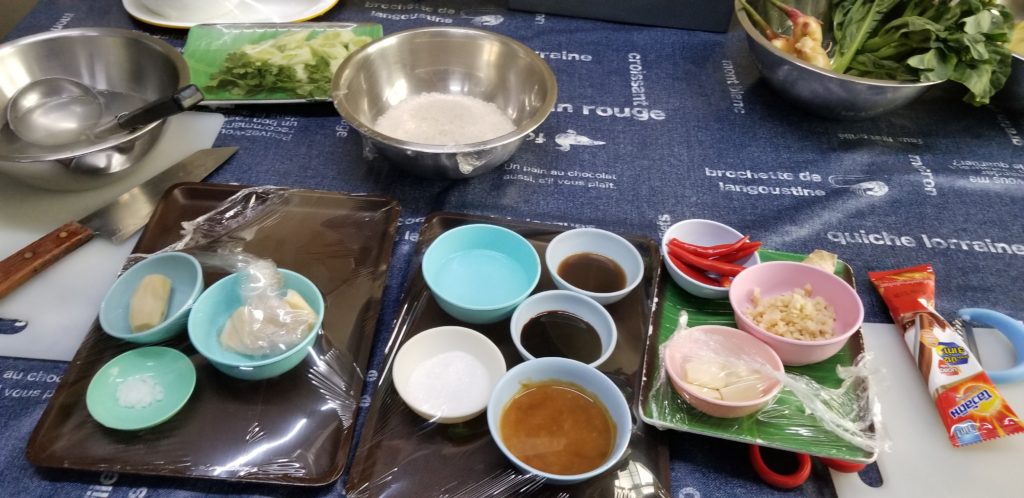
My work area today:

Today Chef Ratch taught us 7 dishes, making some up from the holiday break, and some of my favorite dishes! They were:

  • Southern curry paste (Prik Gaeng Kua Kling)
  • Stir fried pork with southern curry (Kua Kling Moo)
  • Crispy roasted pork belly (moo Krob)
  • Barbecue pork served with rice (Khao Moo Dang)
  • Spicy minced chicken salad (Laab Gai)
  • Thai fish cakes with sweet chili sauce (Tord Man Pla)
  • Stir fried eggplant with minced chicken and basil (Pad Ma Kau Yaw)
  • Sweet corn in tapioca & coconut milk (Sa Khoo Piak Khao Pode)

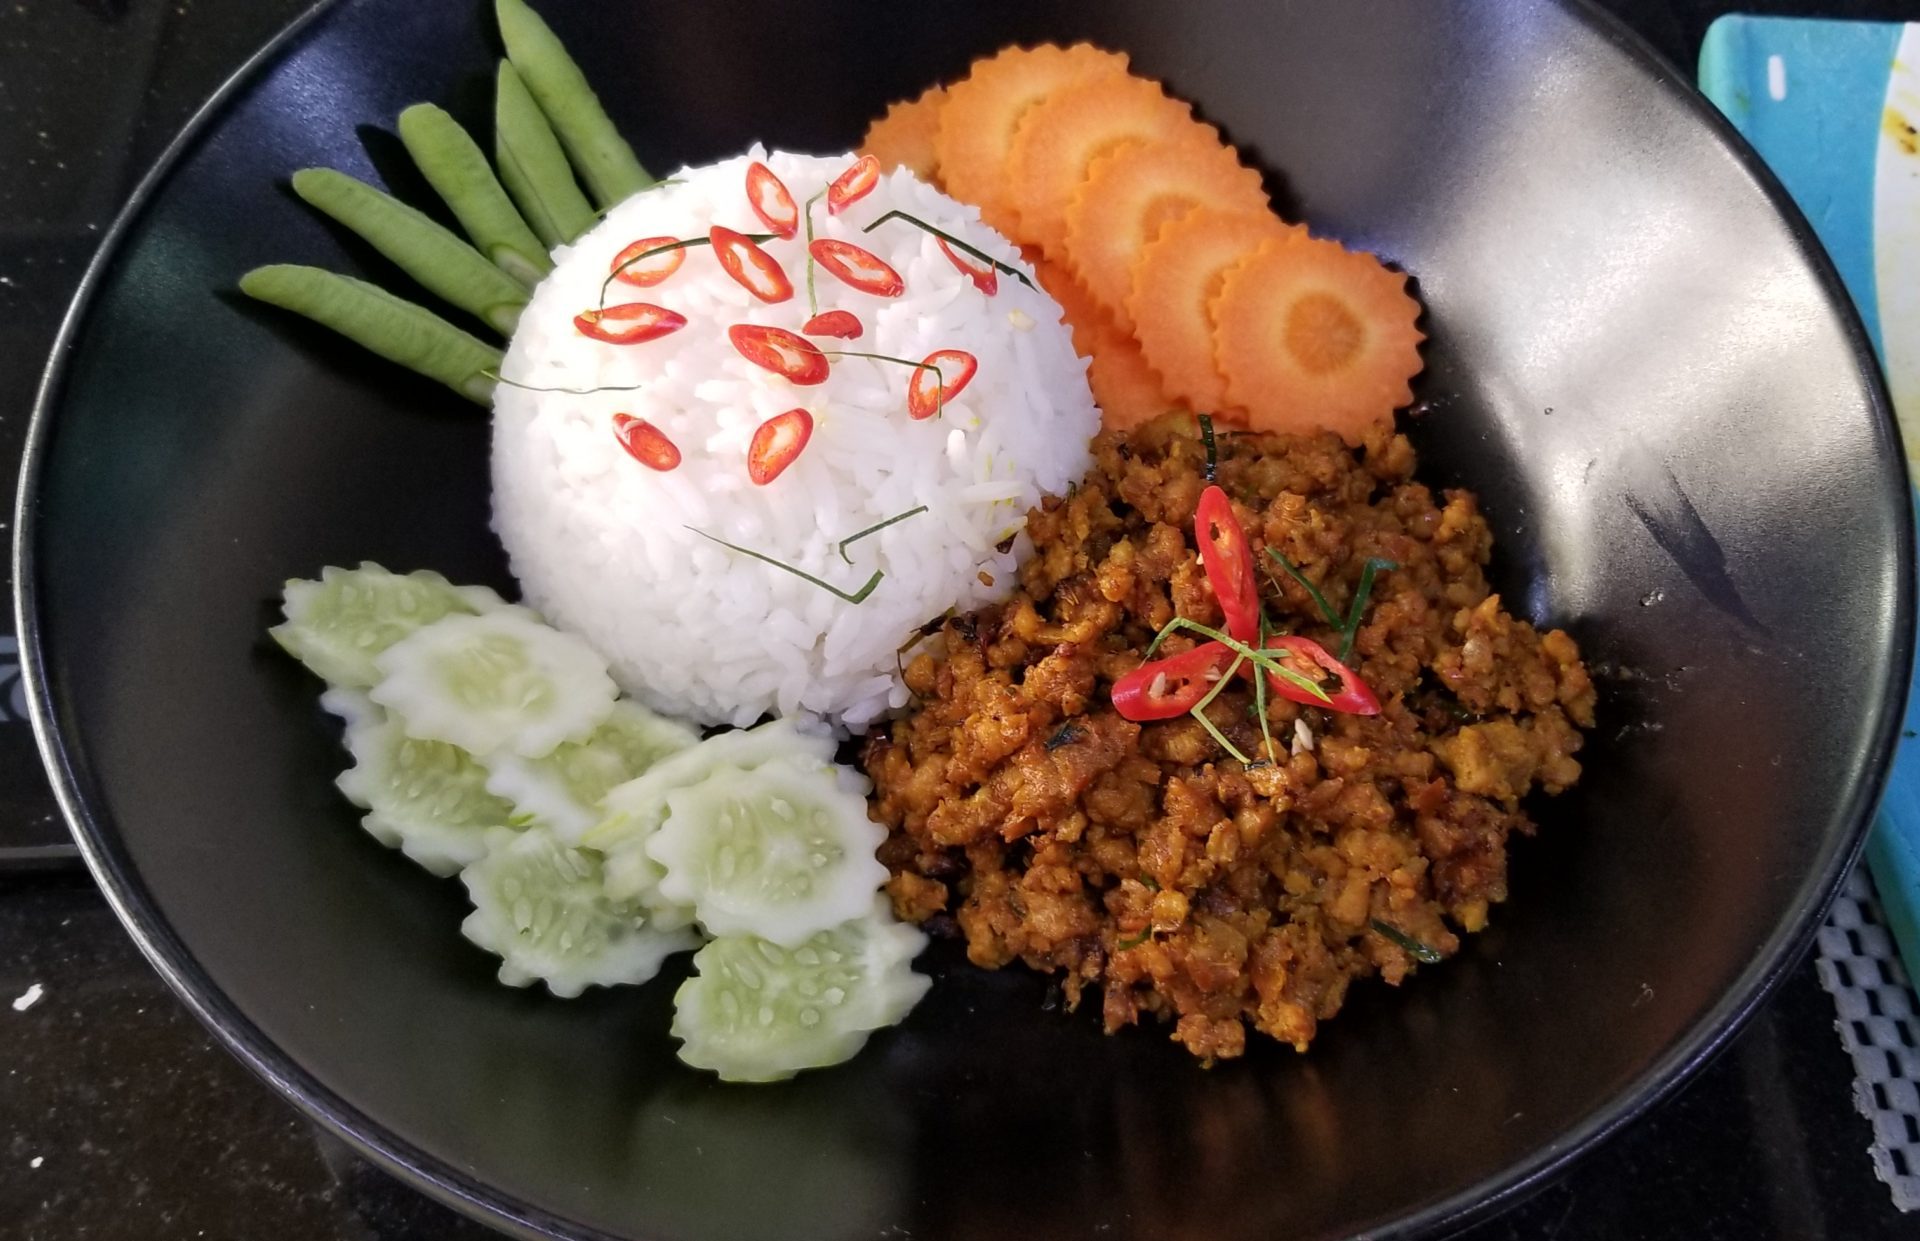
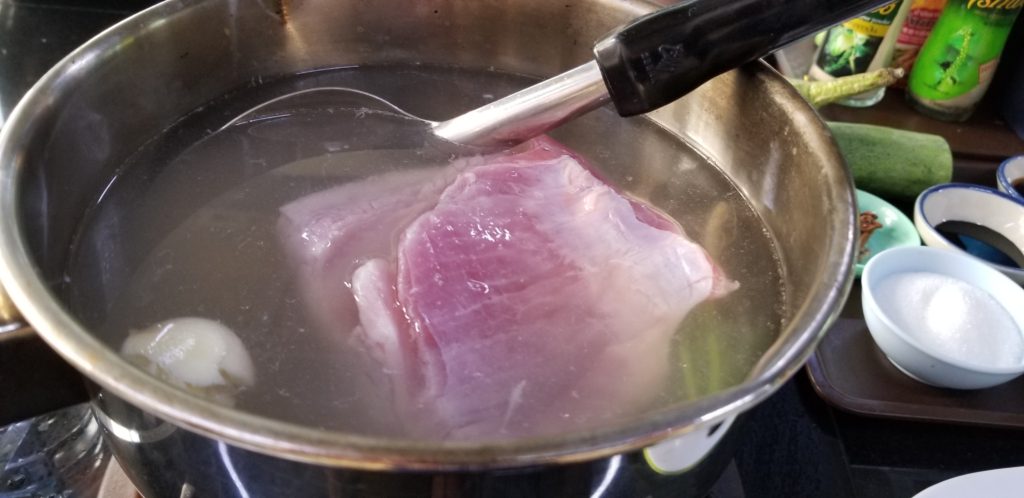
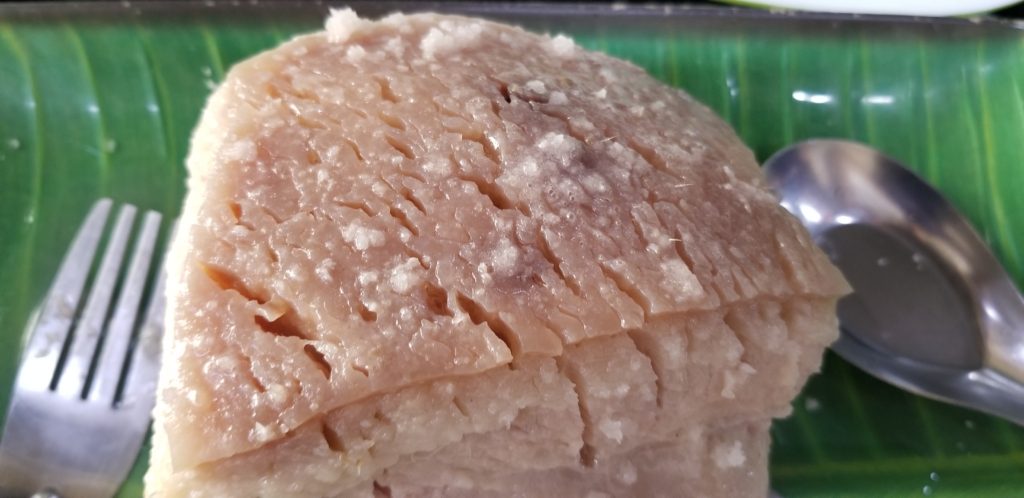
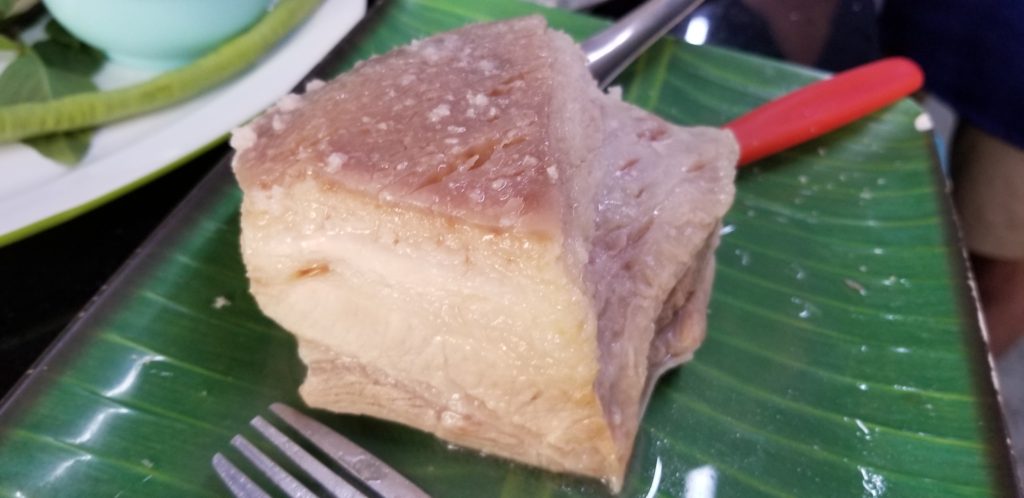
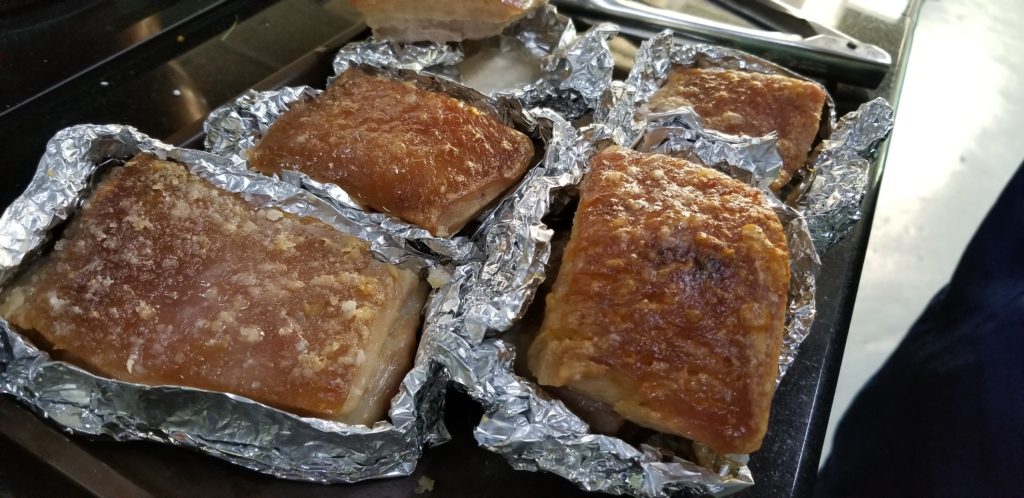
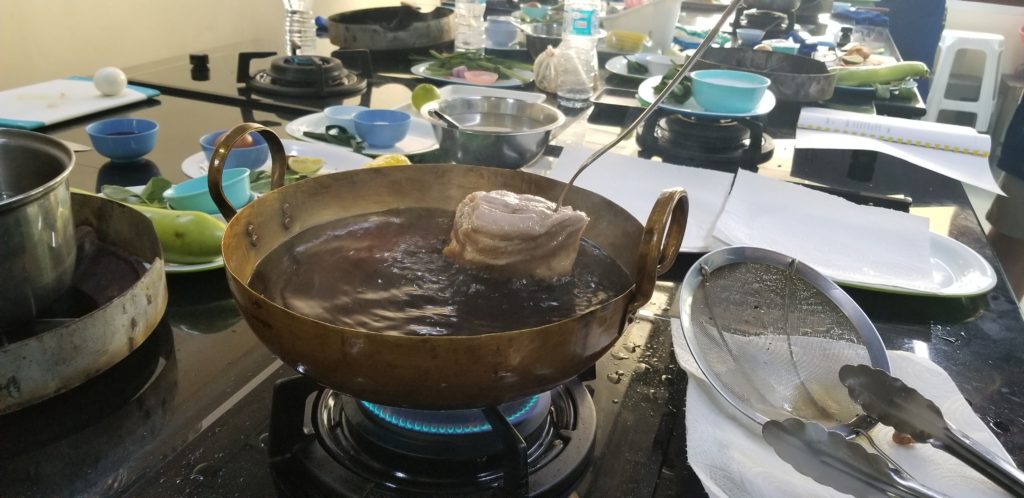
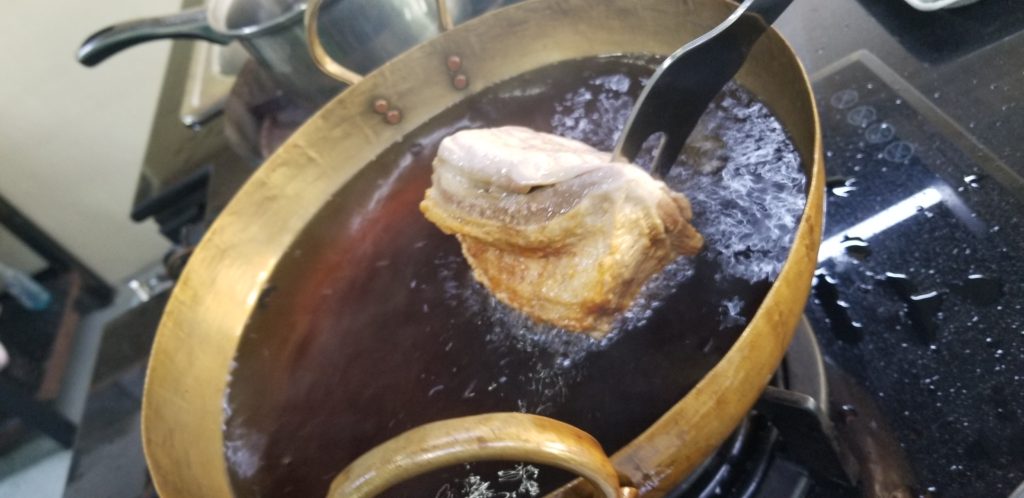
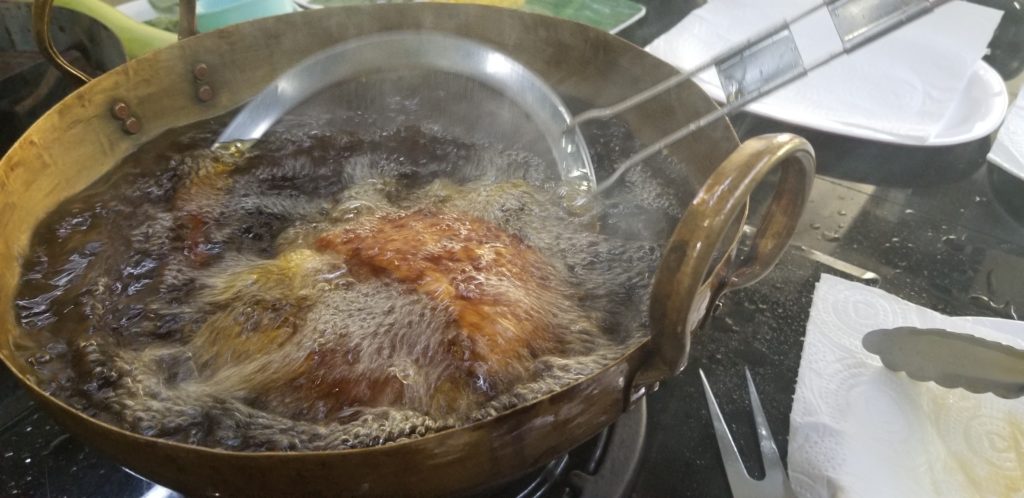
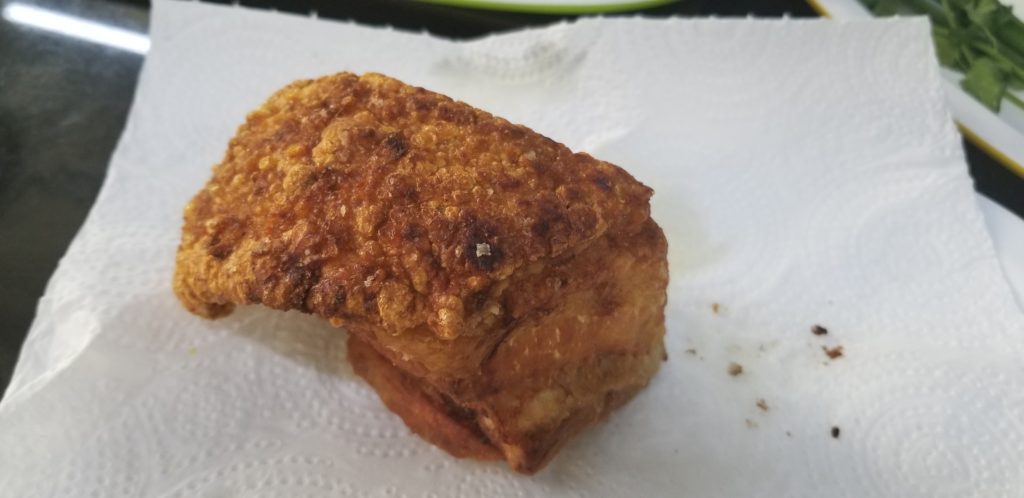
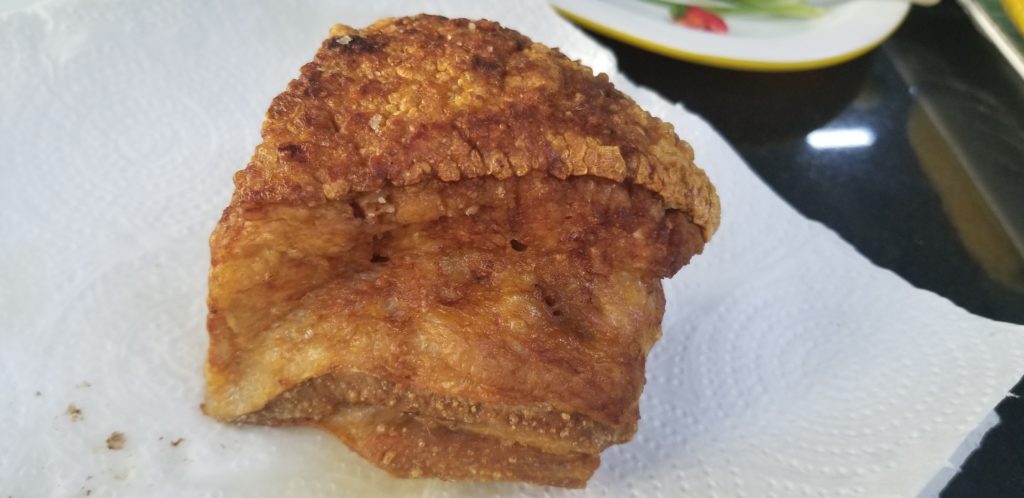
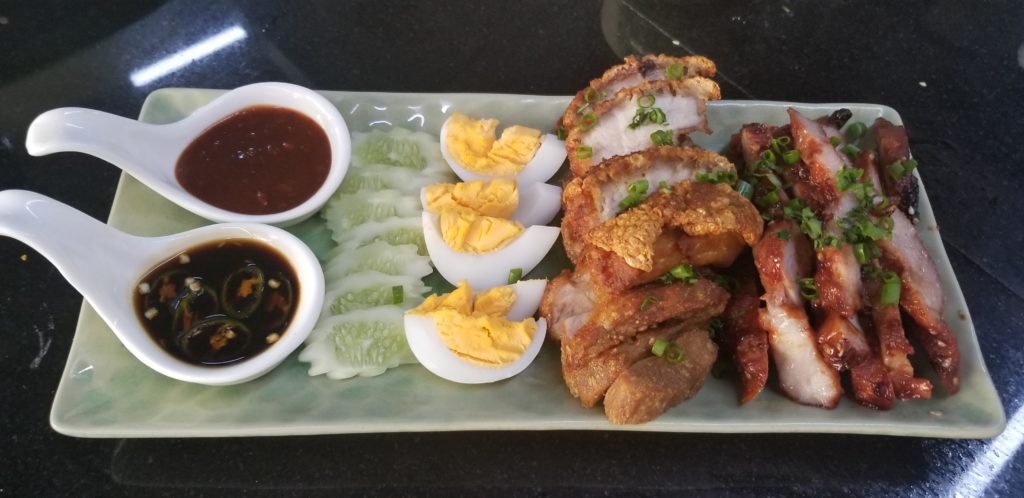
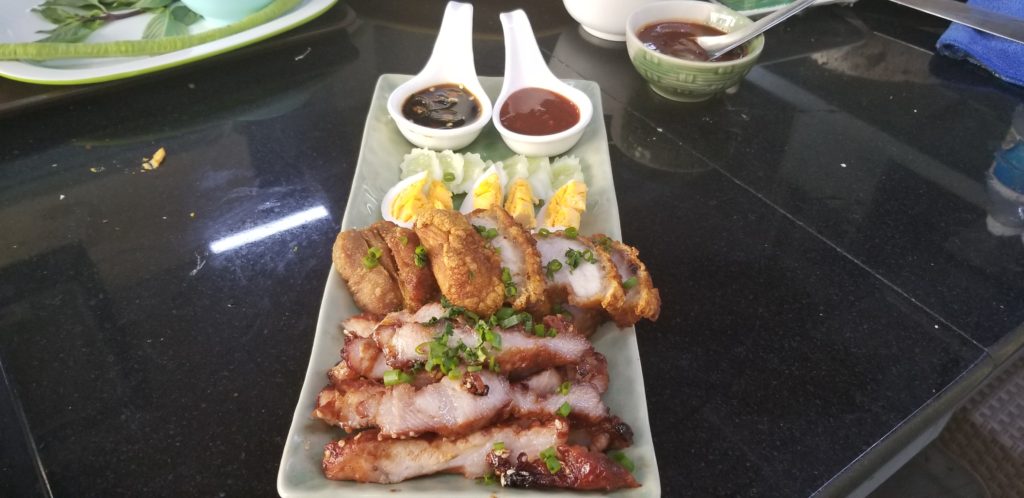
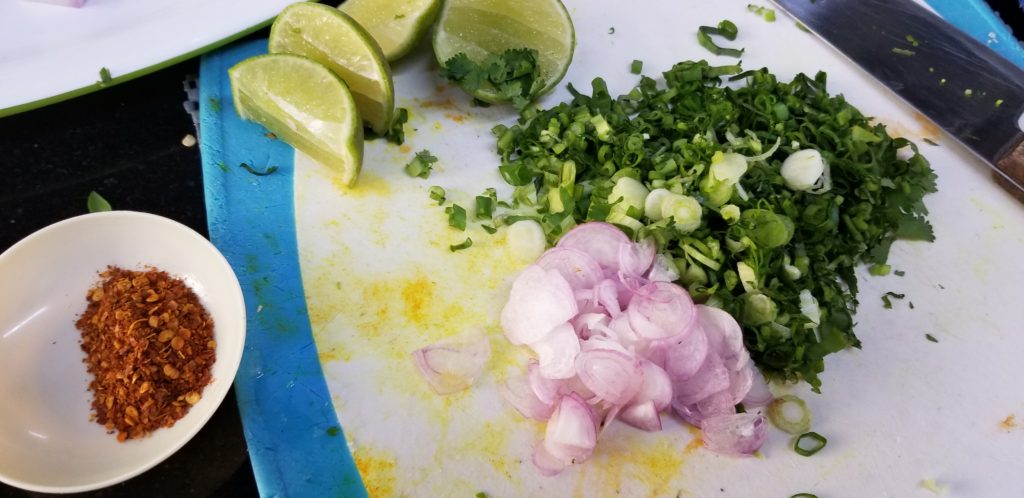
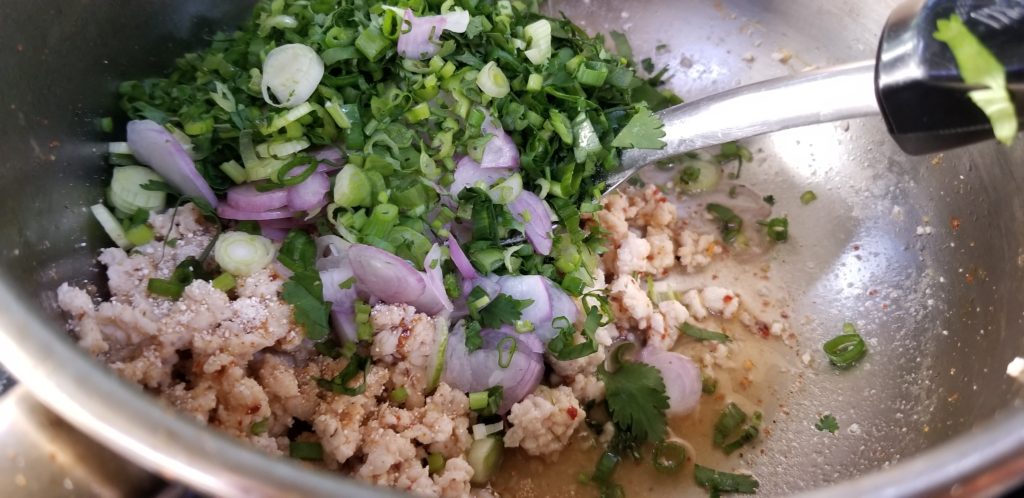
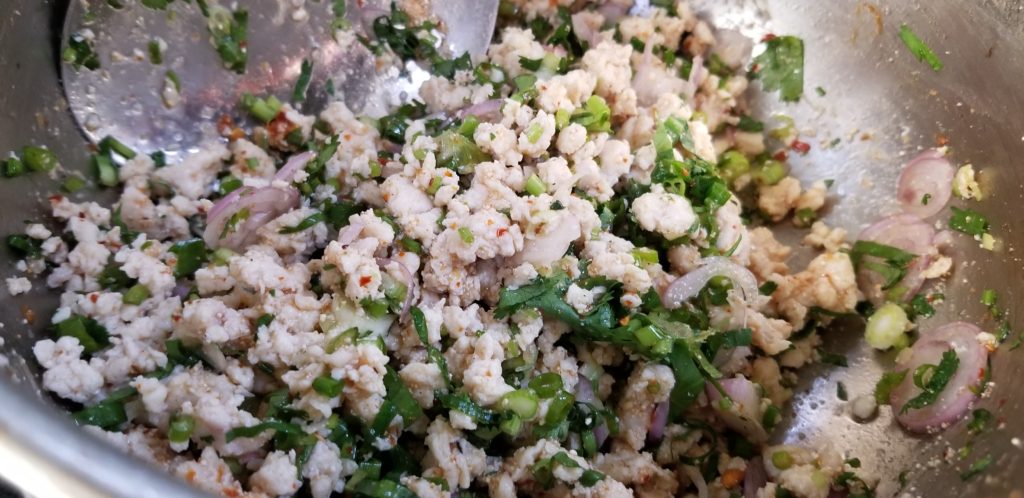
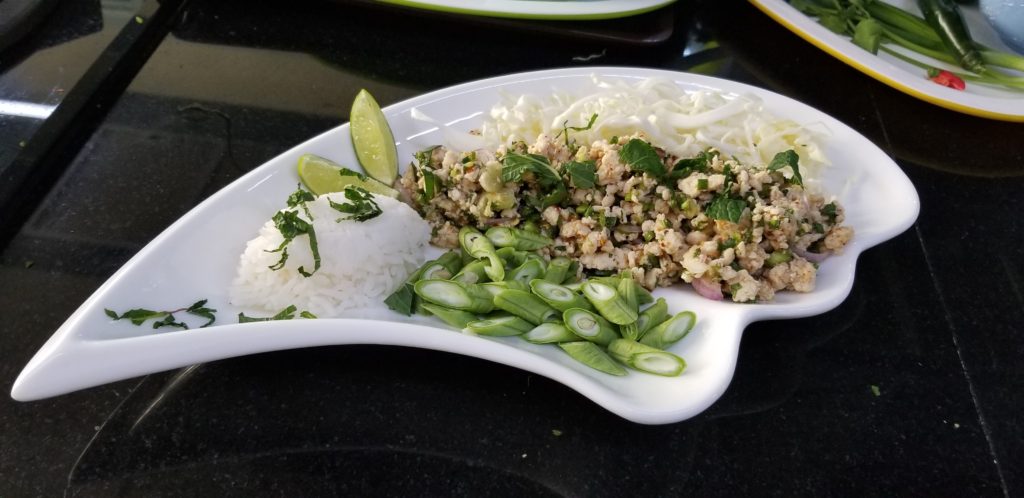
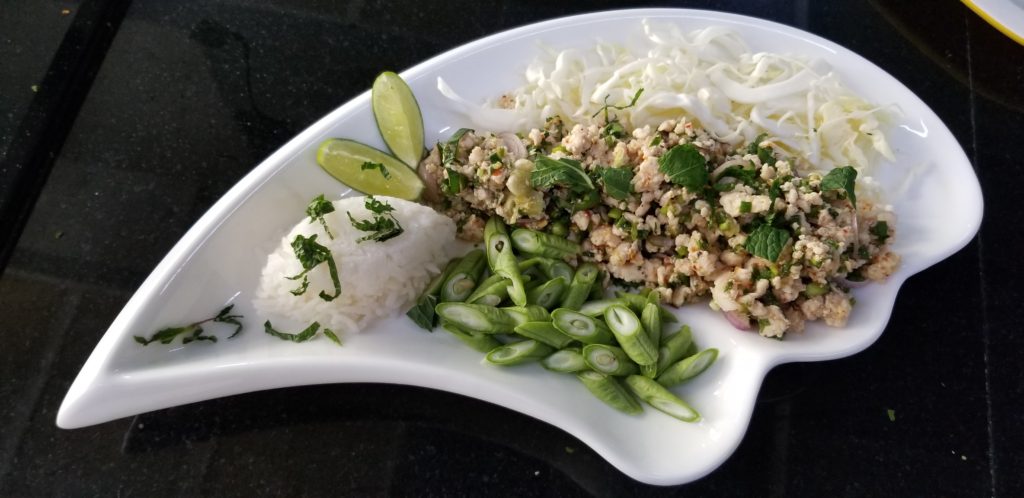
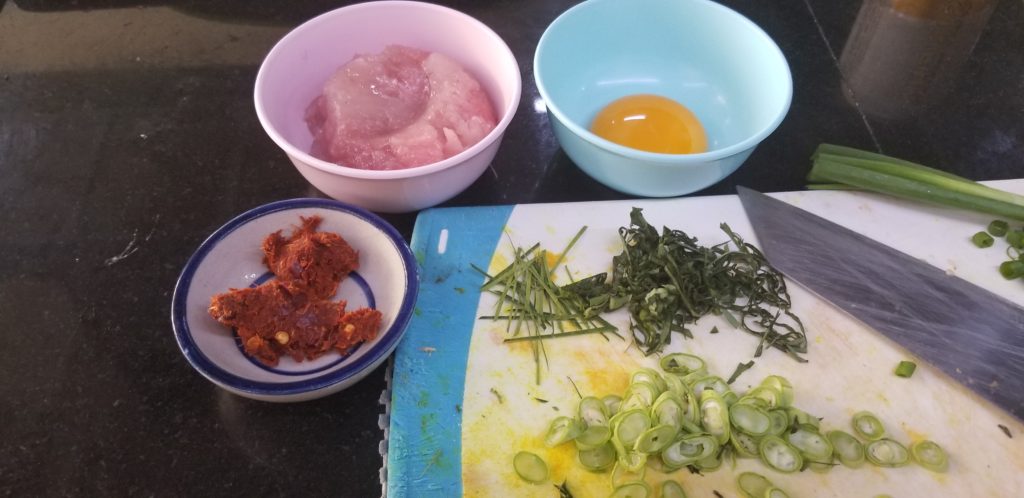
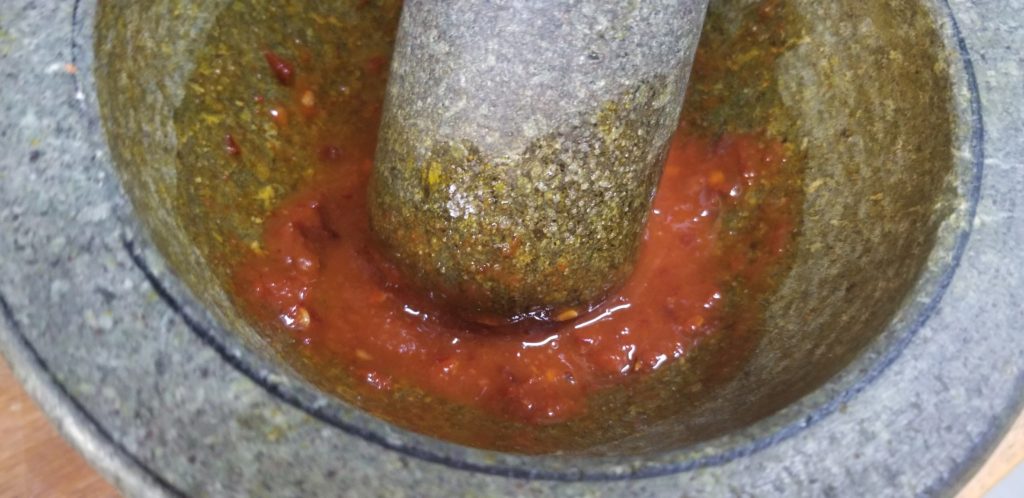
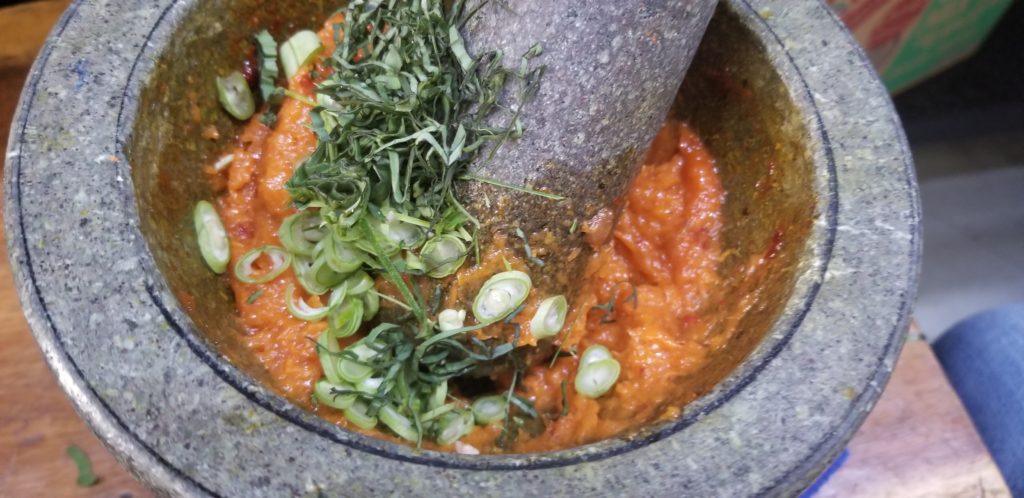
I have to say, although everything tasted good, my favorites today included the crispy roasted pork belly, the barbecue pork and the spicy minced chicken salad (one of my all time favorite dishes to eat and NOW I know how to make it). The pork belly had minimal spices on it but it was so tasty and tender, and the skin so crunchy. The barbecue pork had an amazing flavor as well, although that one had A LOT more ingredients in the recipe. AND the chicken laab was not disappointing at all! It’s hard to choose. Narrowing it down to two would be the crispy roasted pork belly or the chicken laab….hummmmm…okay, I will go with the crispy roasted pork belly…at least that is what my taste buds are saying right now.

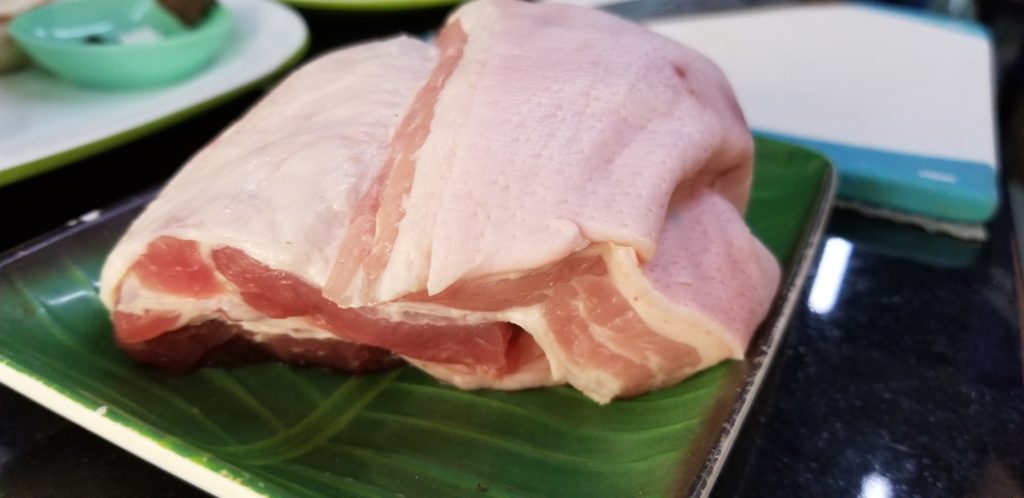
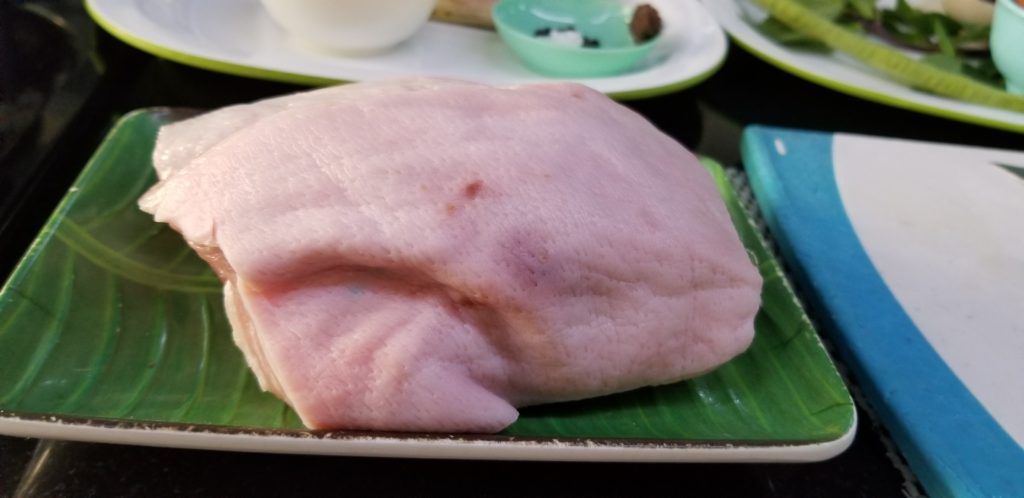
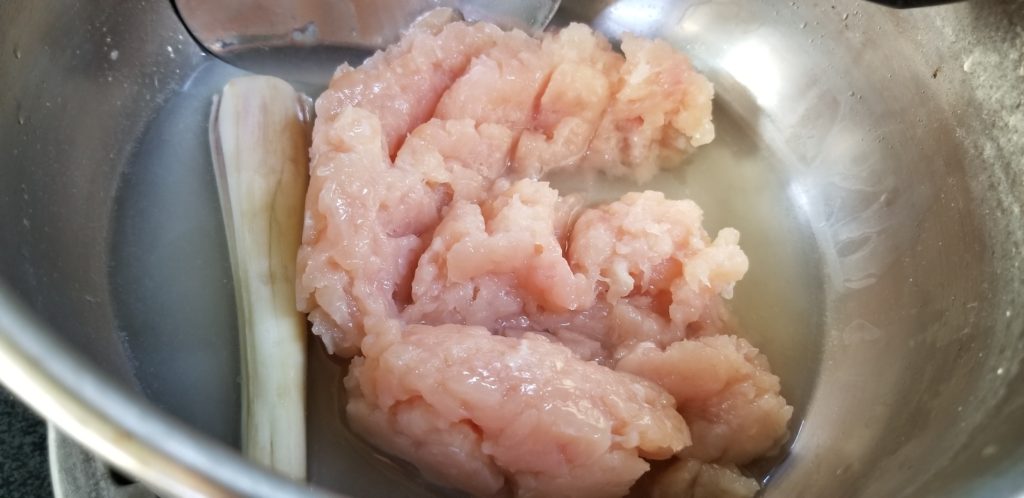
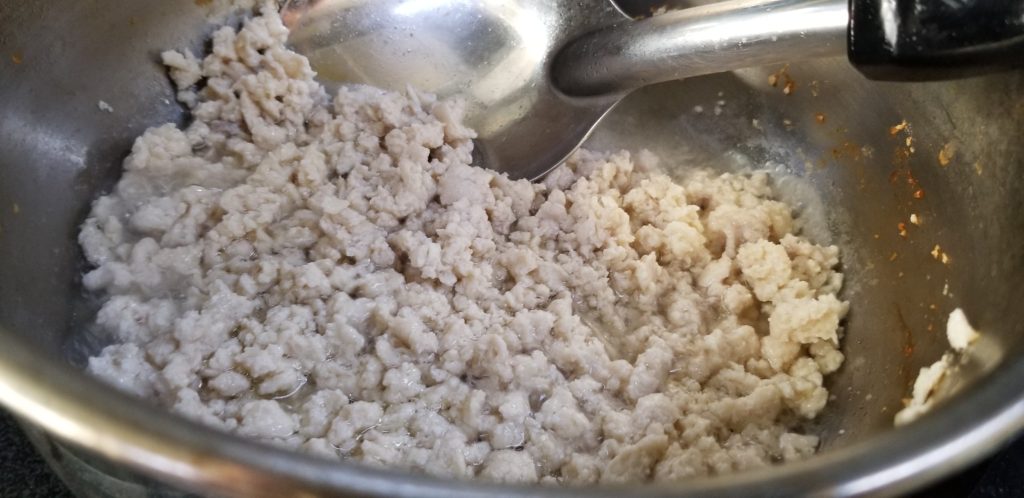
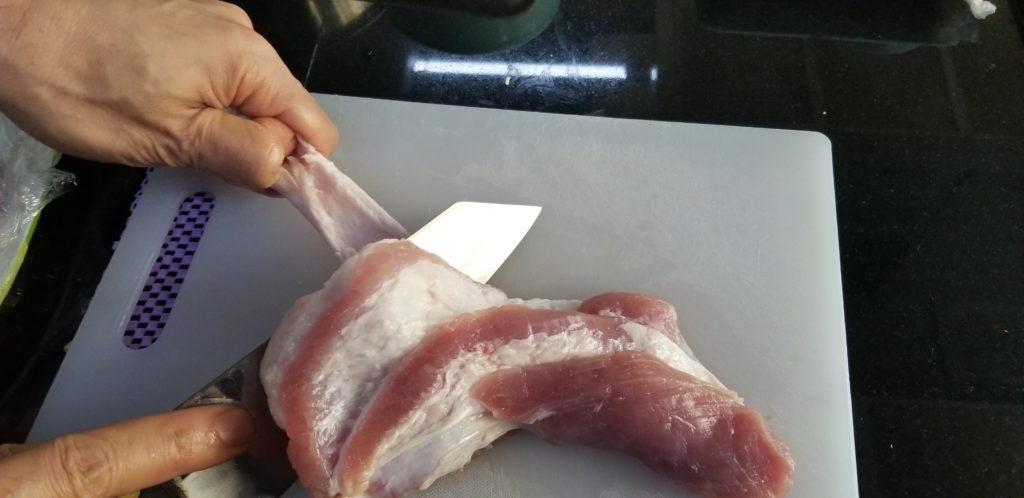
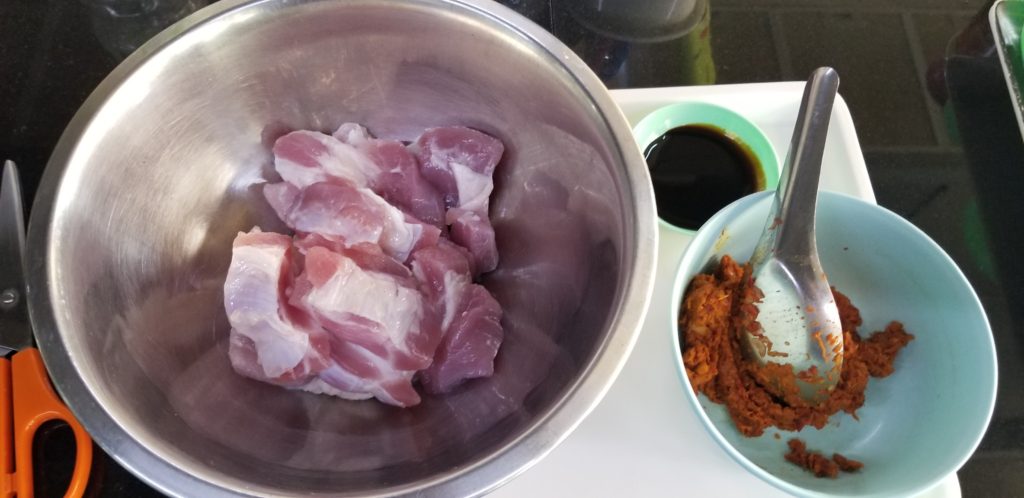
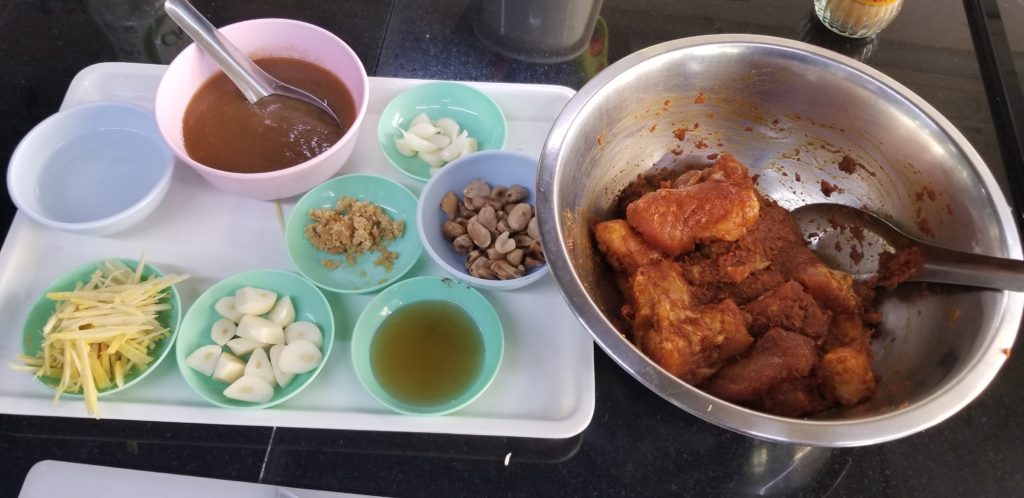
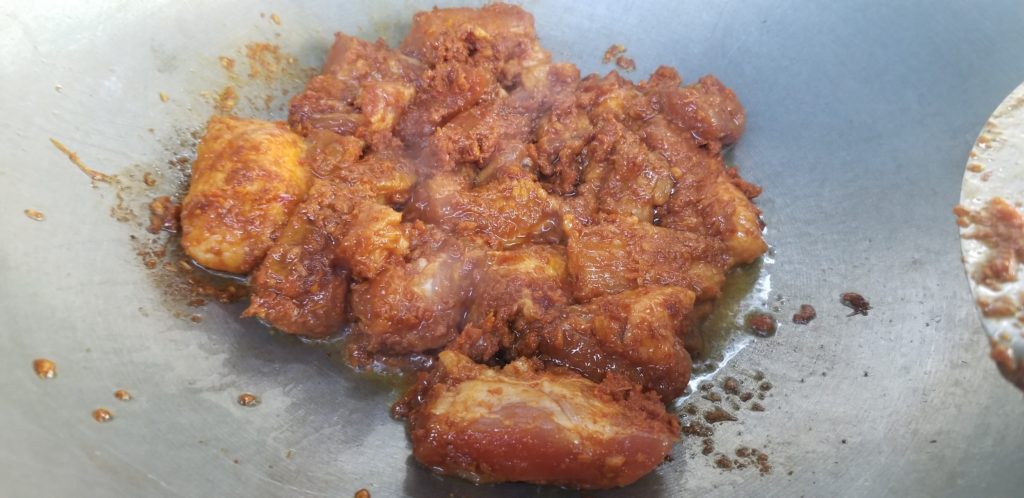
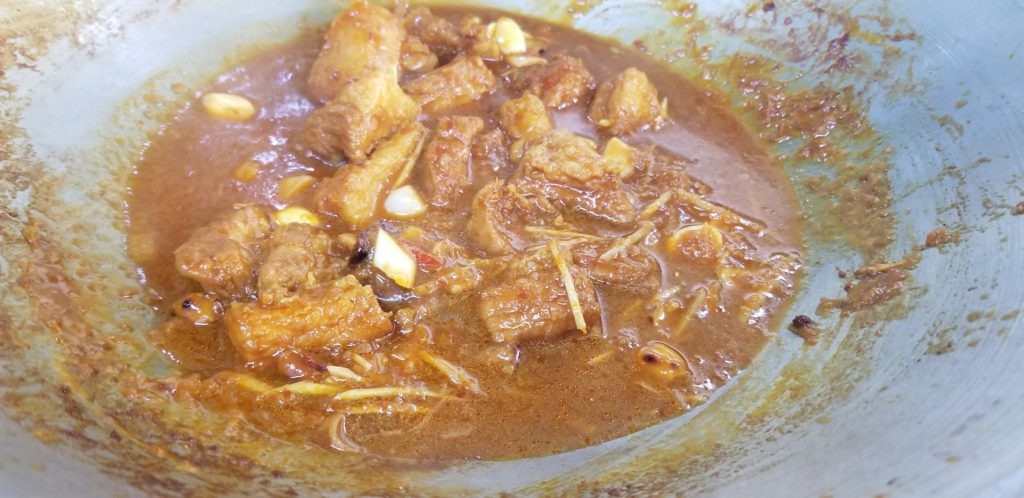
For the crispy roasted pork belly, you will need:

  • 300 grams pork belly, chunk
  • 1 coriander root, smashed
  • 1 garlic clove, smashed
  • Enough stock to cover pork belly
  • 1/2 teaspoon salt
  • 1/2 teaspoon sugar, optional, if you want it towards the sweeter side
  • 2 tablespoons rice vinegar

Steps:

  1. Add stock to pot with coriander, garlic and pork belly and bring to boil for about 15 minutes, until 60-70% done and the skin is softened. Drain well and wipe dry with a paper towel.
  2. Combine the rice vinegar, salt, and sugar (if using) and rub on the skin side of the pork.
  3. Use a sharp carving knife (or a skewer or fork) to poke the rind with as many holes as possible in order to get the mixture into the meat.
  4. Put pork onto a crumbled piece of aluminum foil and then on a roasting tray/pan.
  5. Cook in 215 degree oven for about 30-60 minutes, to dry out the skin/fat a little before frying.
  6. Heat oil in a wok over medium heat and then add pork belly (skin side down) to fry until the skin is crispy, about 10 minutes. Turn and leave in for about 5 more minutes or until crispy and the color turns to brown.
  7. Remove onto paper towels and let cool for 5 minutes before slicing.
  8. Serve with sauce of your choosing. It’s good with Thai sweet sauce (mix 1 tablespoon each of sugar, vinegar, dark sweet soy sauce and 2 tablespoons of soy sauce, and 1 thinly sliced long green chili, voila, your sauce).

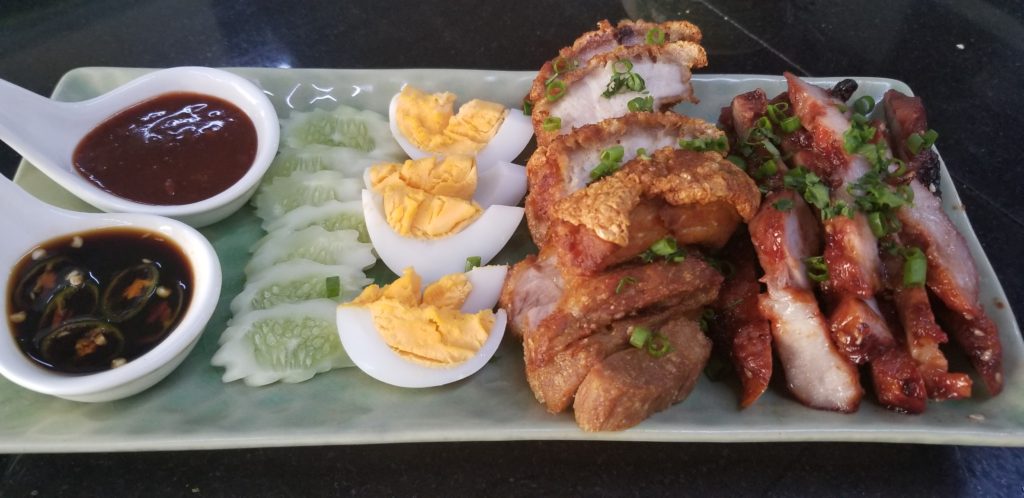
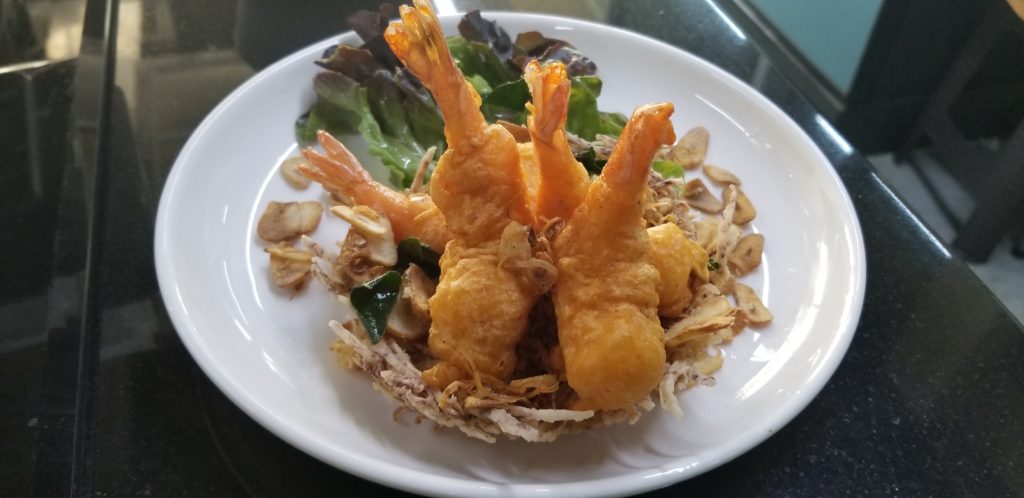
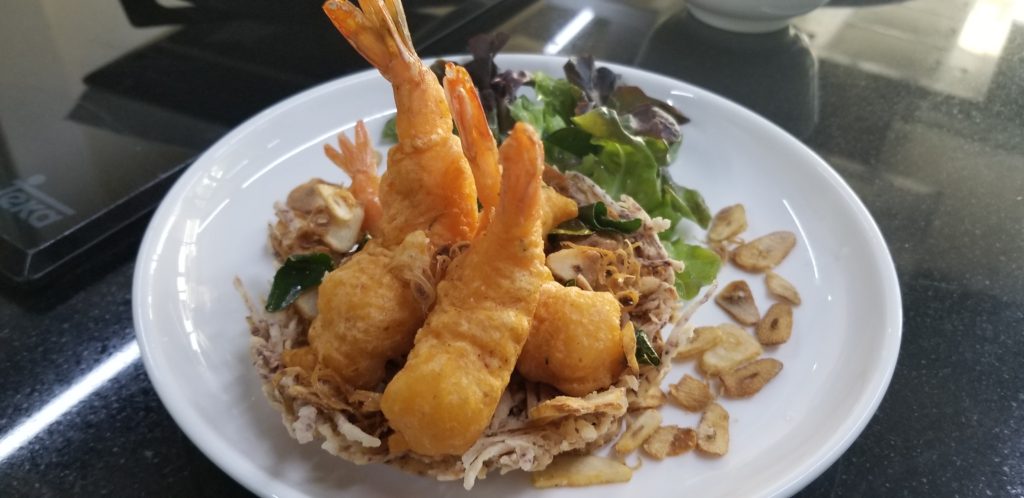
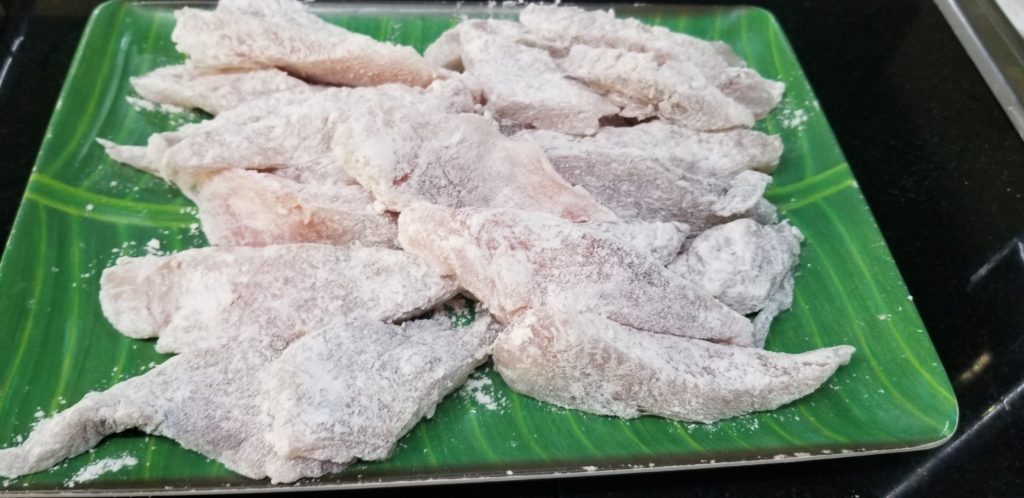
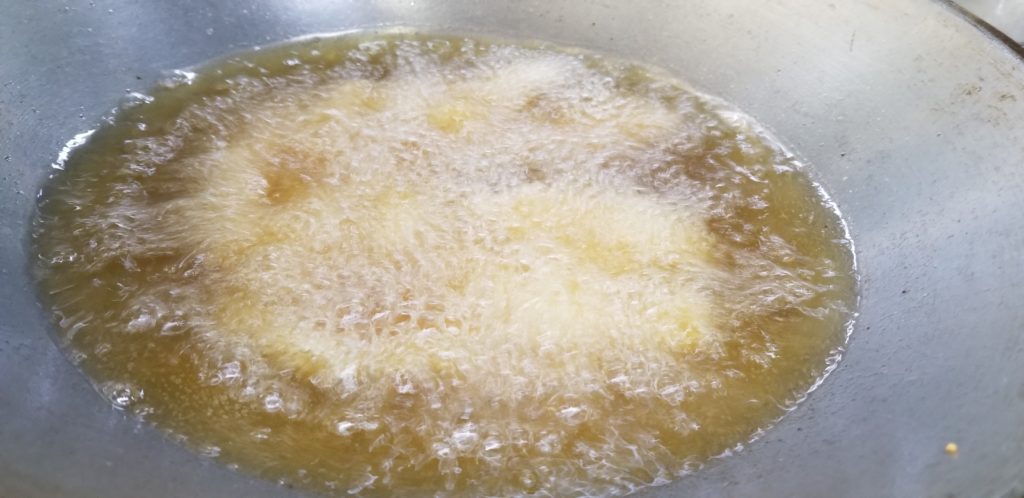
Some of the other wonderful dishes from today:


That was a lot of dishes! Catch you tomorrow (my last day 🙁 ) with another 8 dishes!

Bangkok Thai Cooking Academy-Day 20

Bangkok Thai Cooking Academy-Day 20

Happy New Year everyone! I hope you all had a safe one. I was ready to go back and cook today after two days off! Only two more days left. It’s kind of a bitter sweet thought. I’m excited to go back home and see…

Bangkok Thai Cooking Academy-Day 19

Bangkok Thai Cooking Academy-Day 19

Happy Monday. Hope you all had a wonderful weekend. I made a few things today that I’ve been waiting to see how it’s done here. Just fyi, won’t have class tomorrow and the next day for the new year so will get back to you…

Bangkok Thai Cooking Academy-Day 18

Bangkok Thai Cooking Academy-Day 18

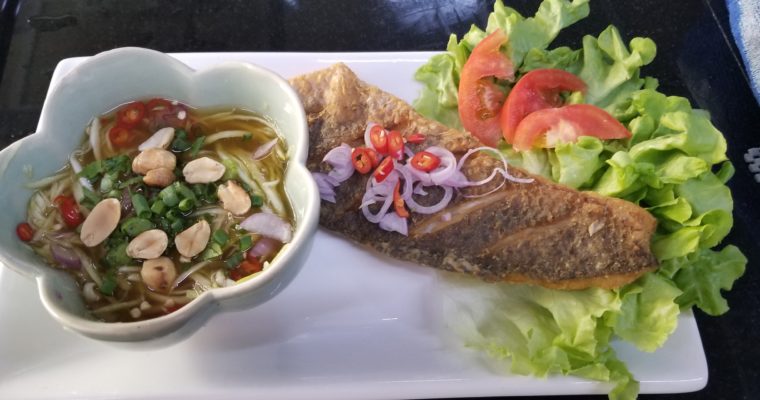
Hi All, I am about 12 hours late posting this days yummy dishes…had a few distractions last night, like a Thai massage and my friends took me out to eat at a Greek restaurant, for a change of pace, and then dancing. Was a FUN evening!

Today was an eight dishes day, taught to me by Chef Nat. This was my last private lesson with him…did I tell you how AMAZING he is? I know I have! I will miss his tutelage! You can tell he is an experienced Chef with lots of knowledge of Thai food, as well as other countries.

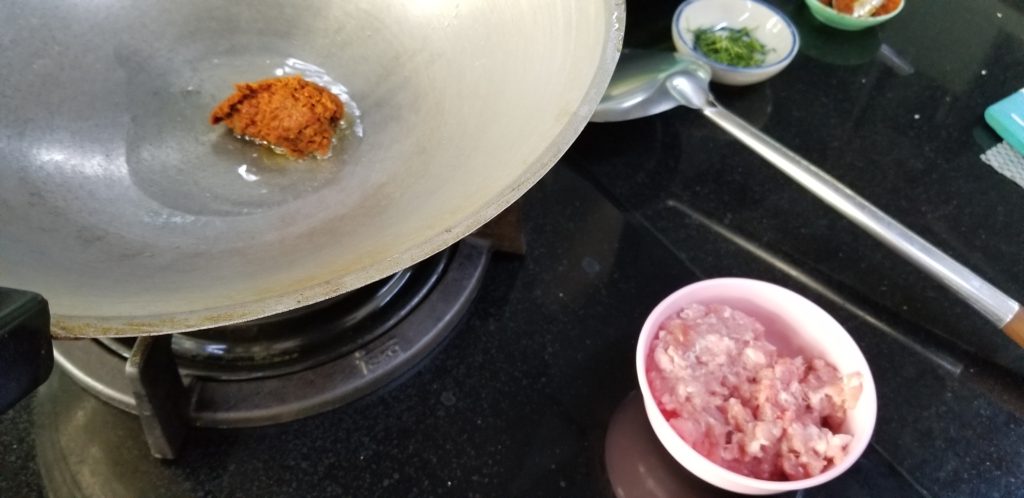
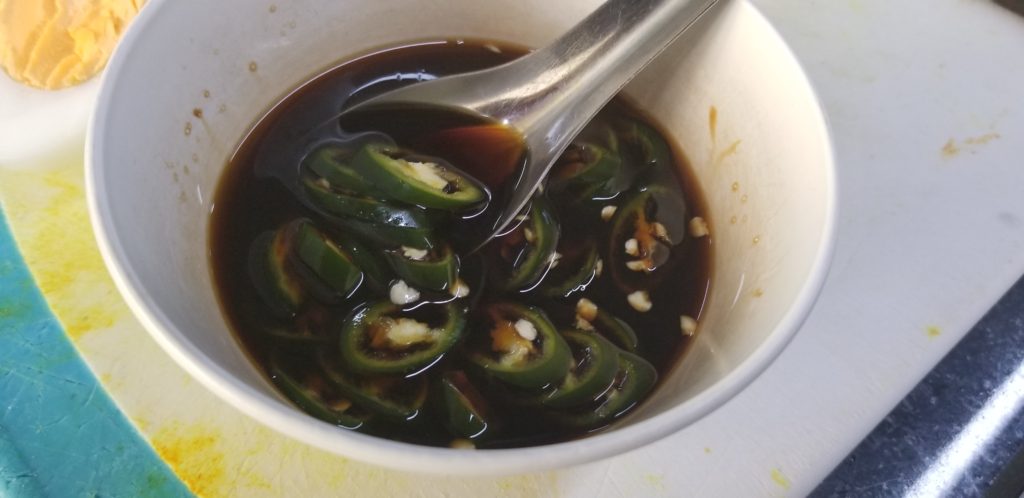
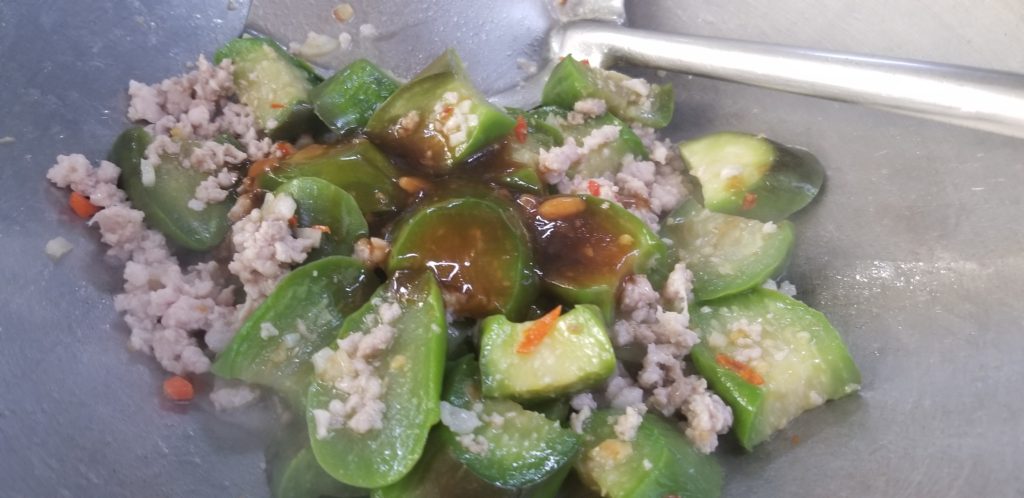
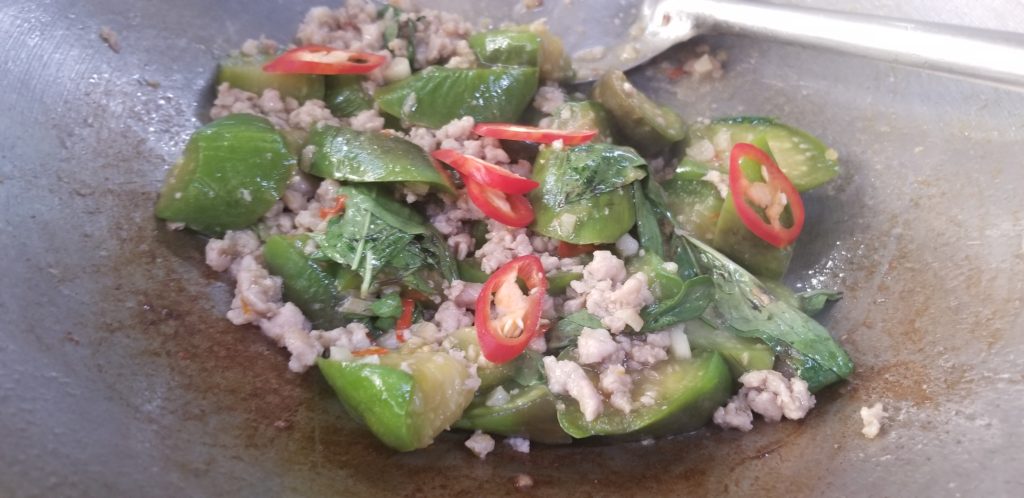
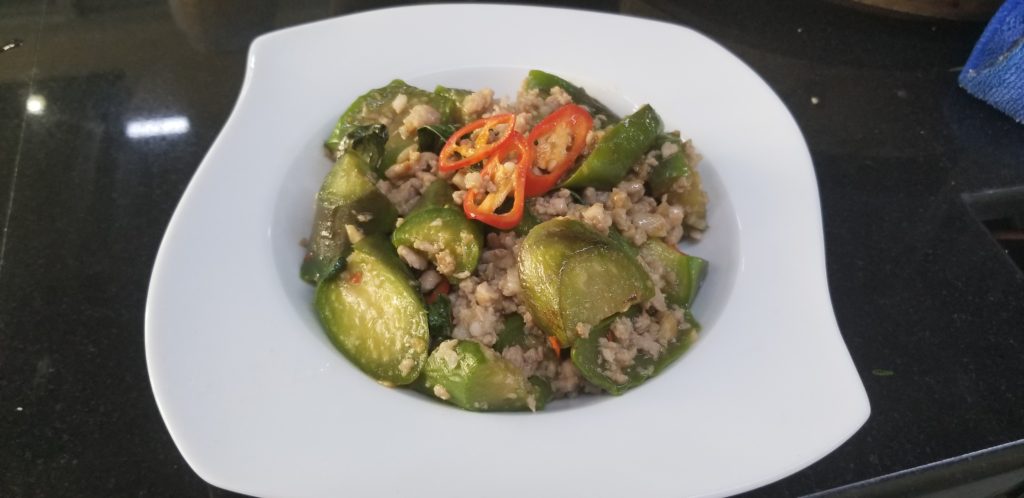
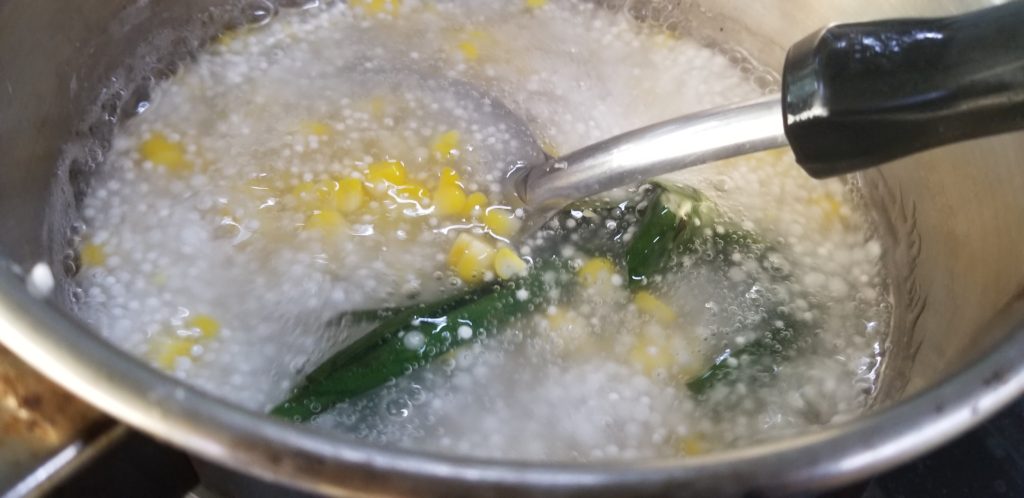
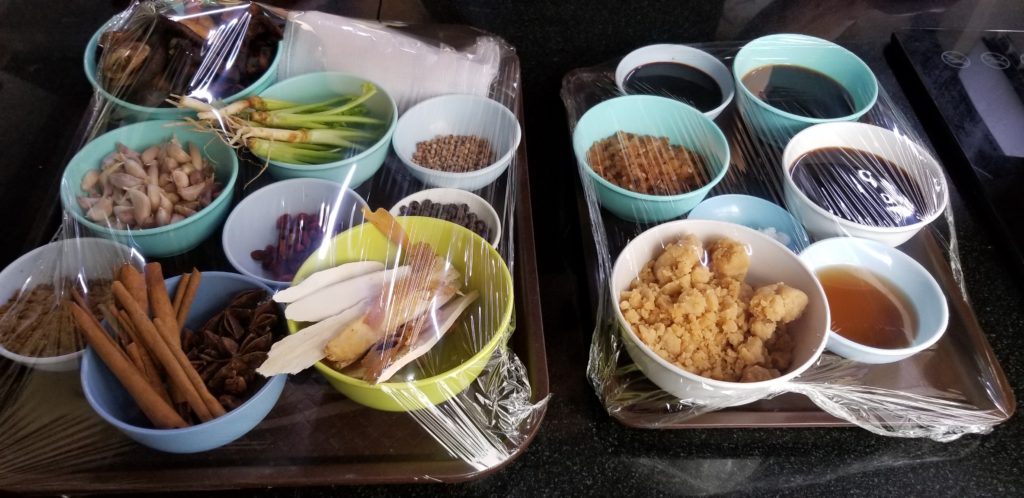
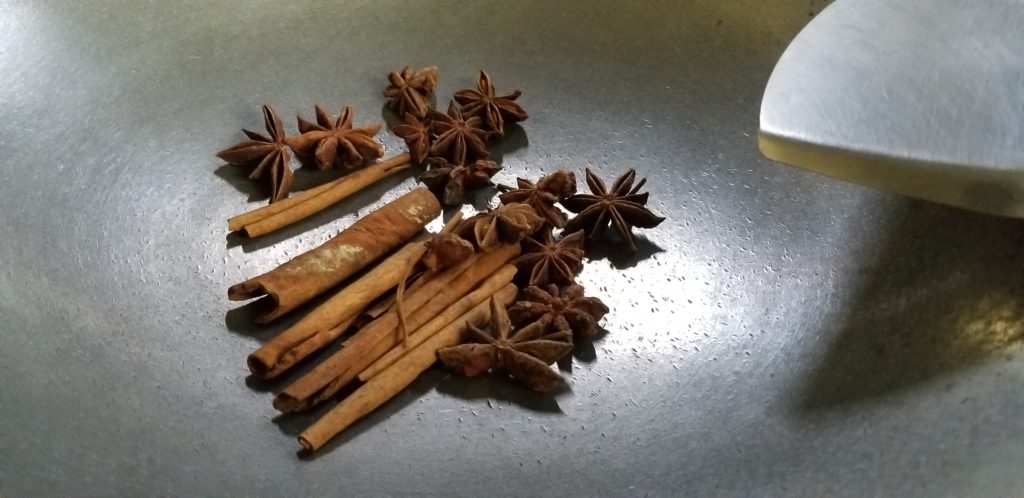
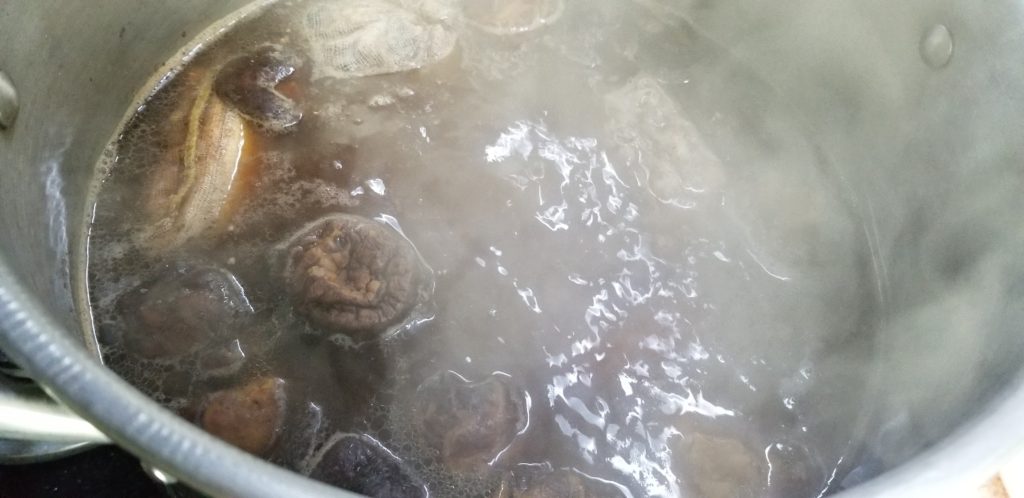
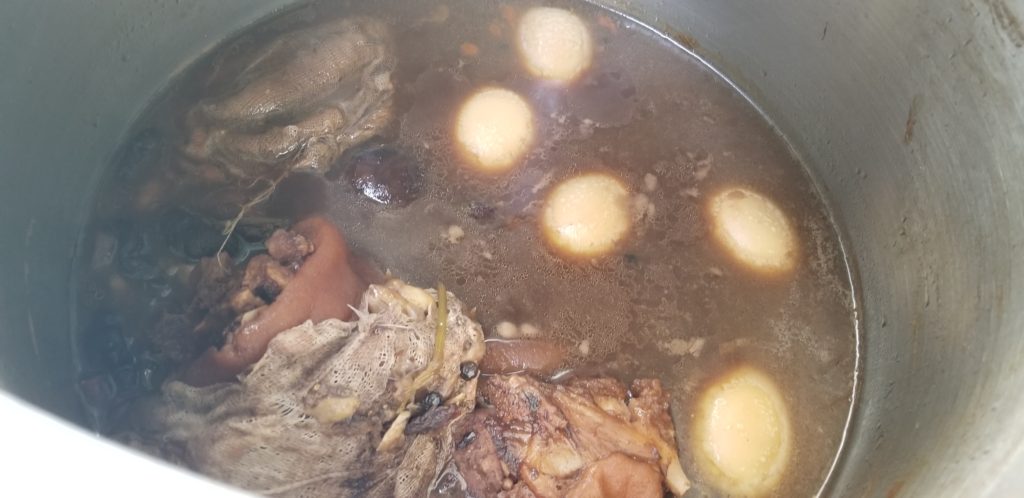
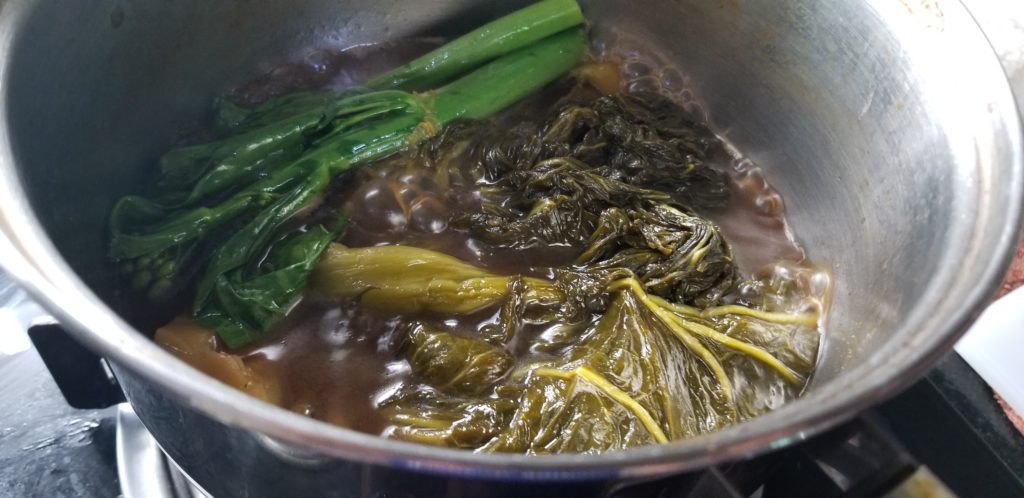
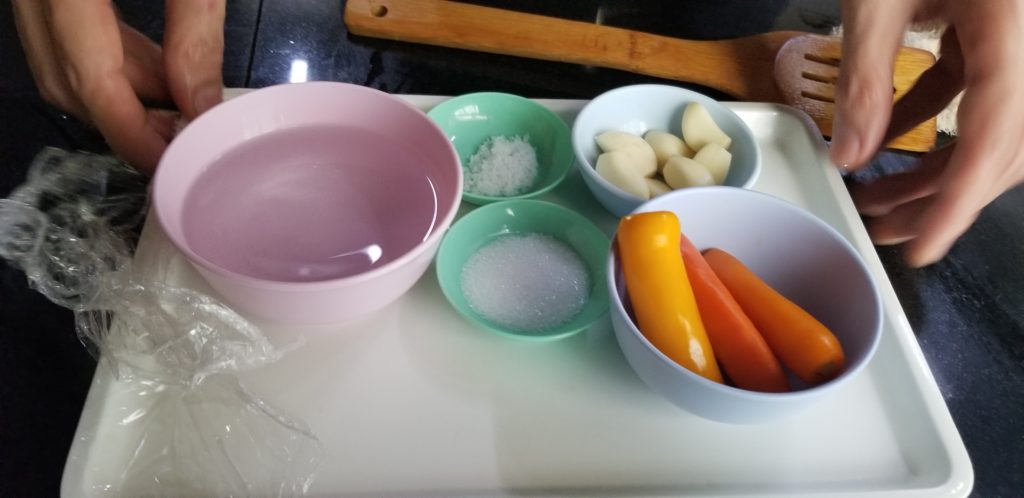
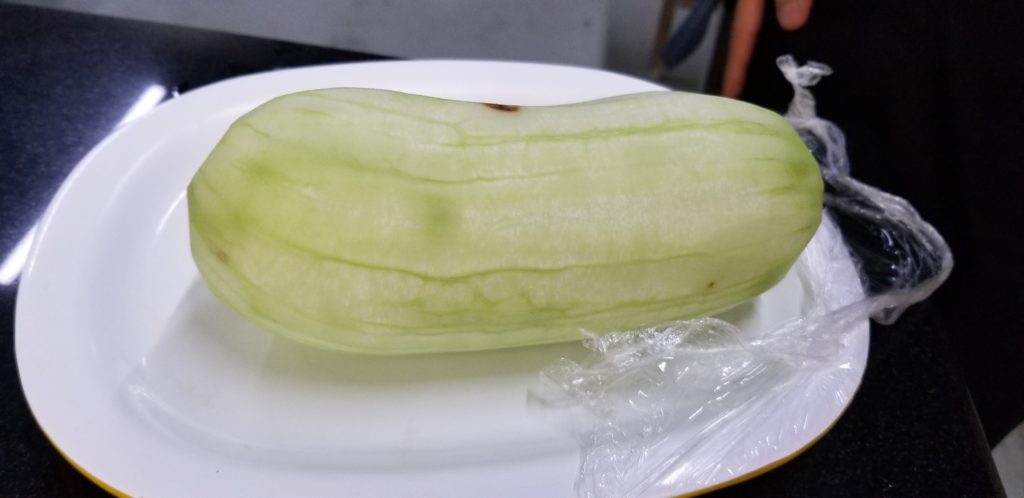
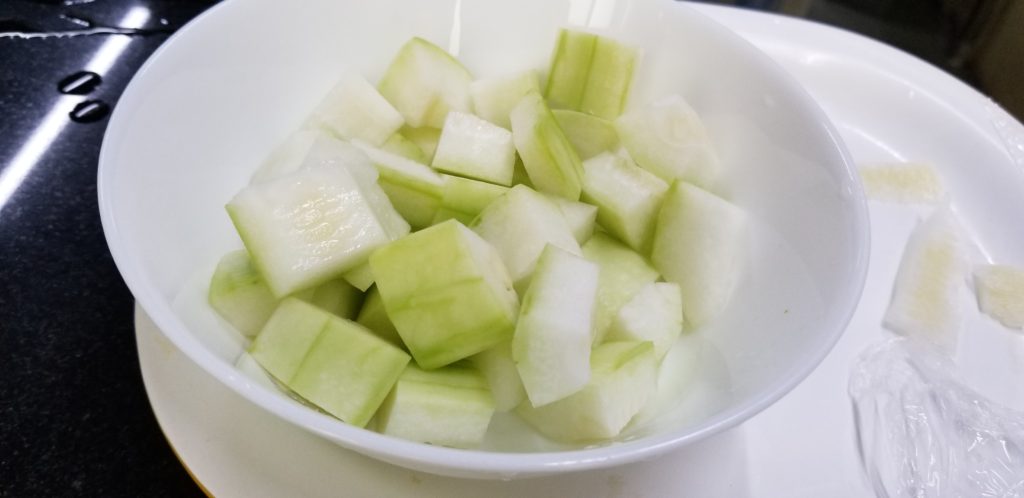
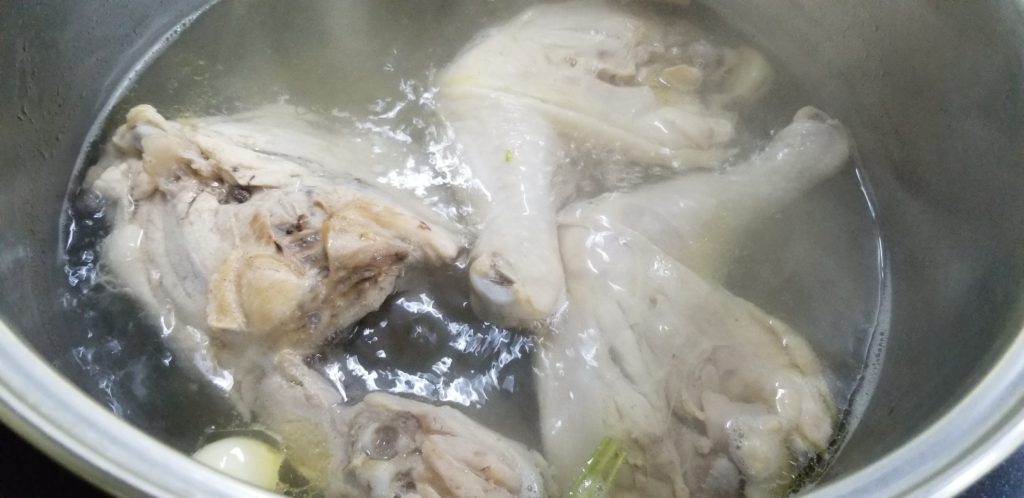
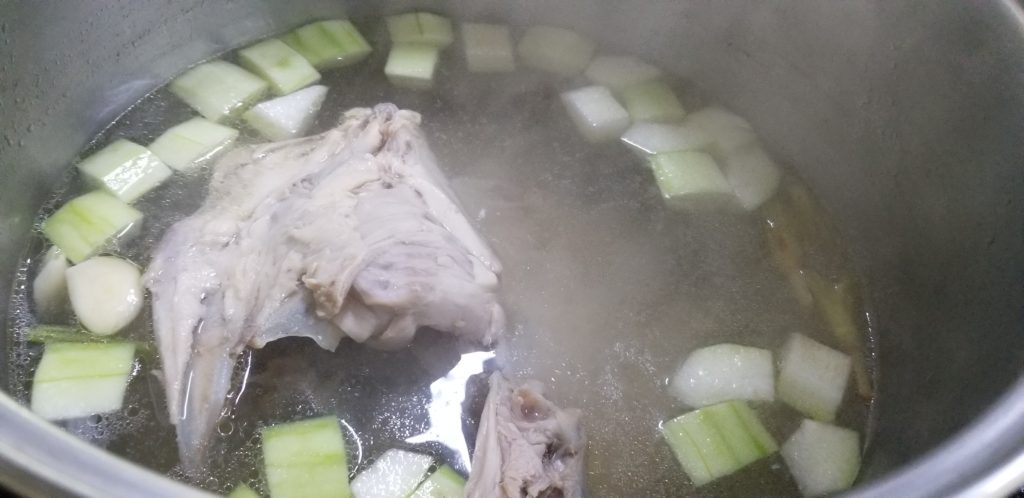
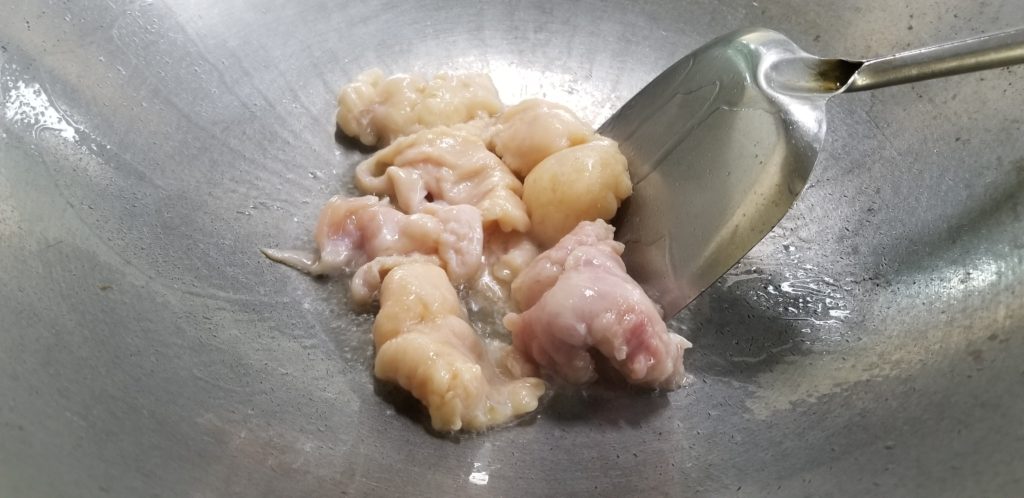
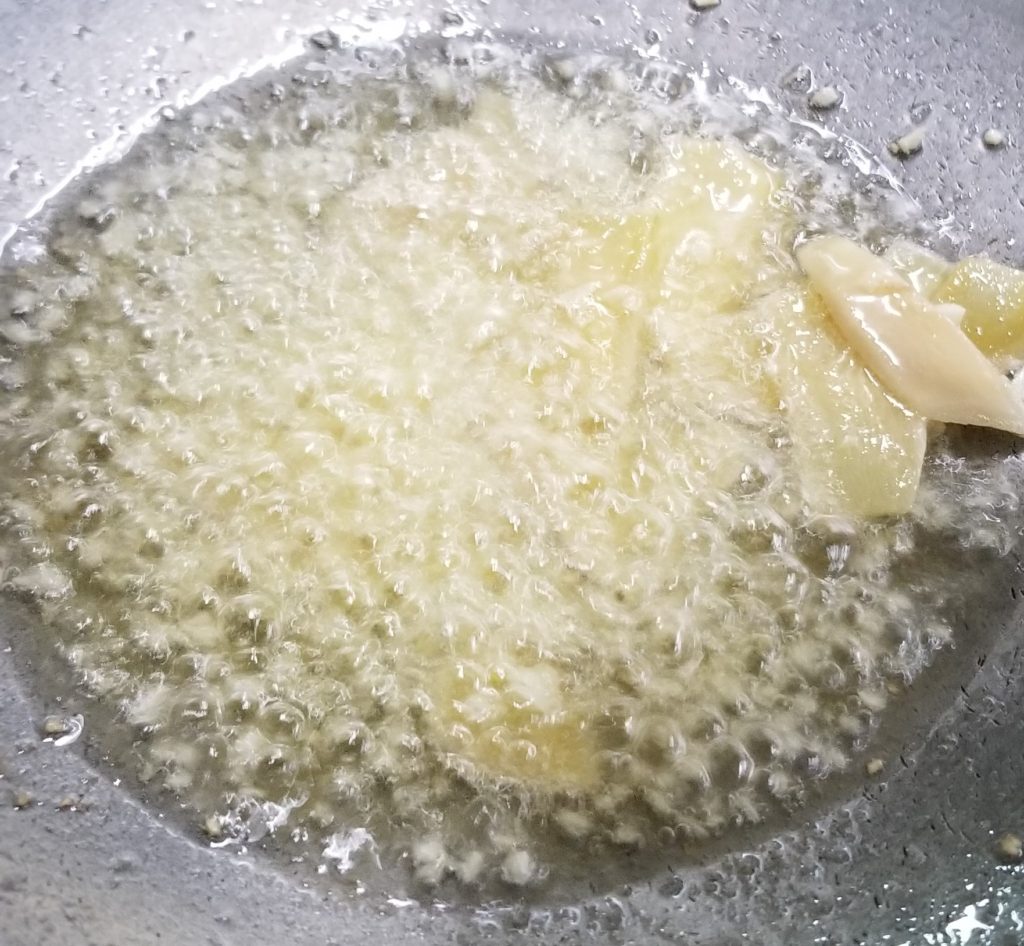
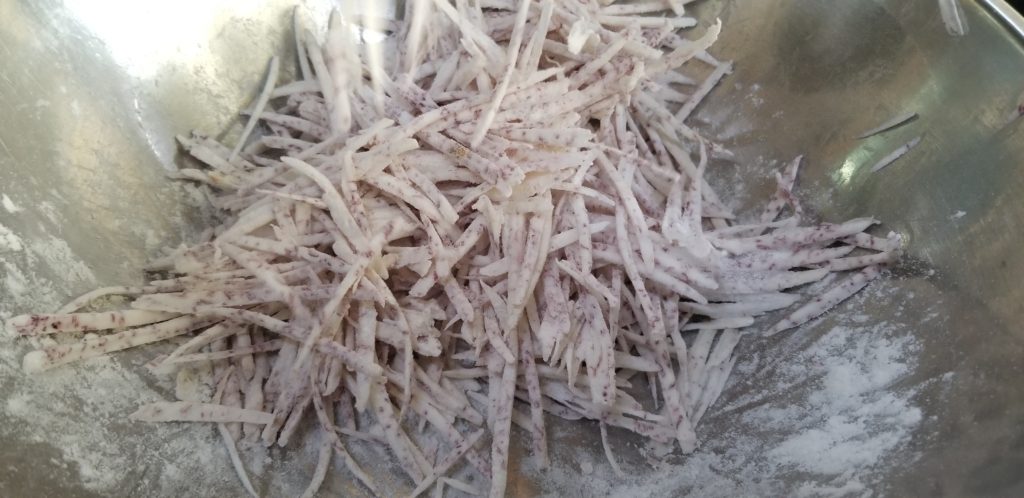
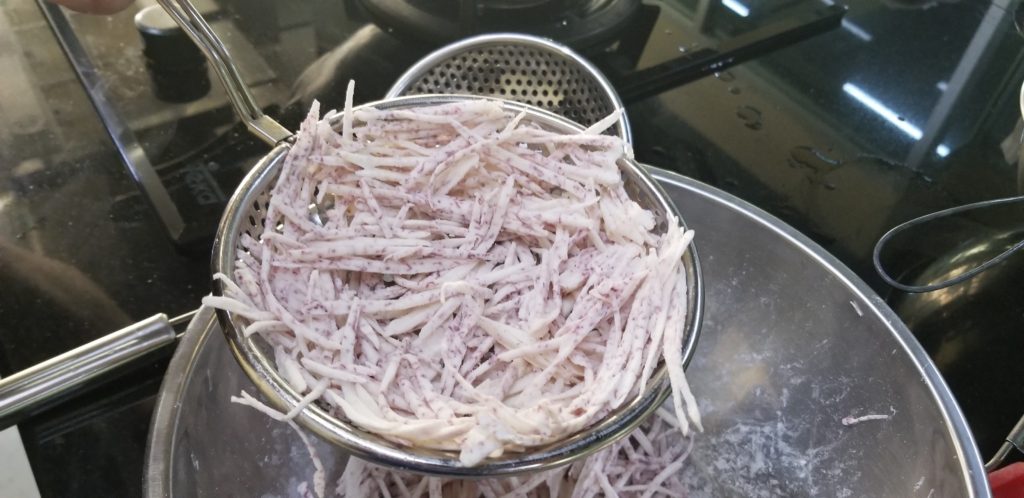
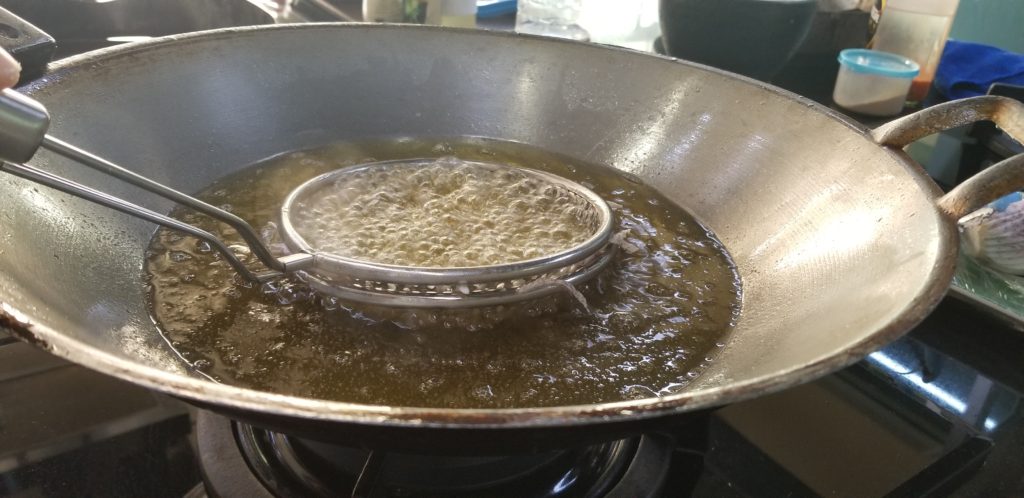
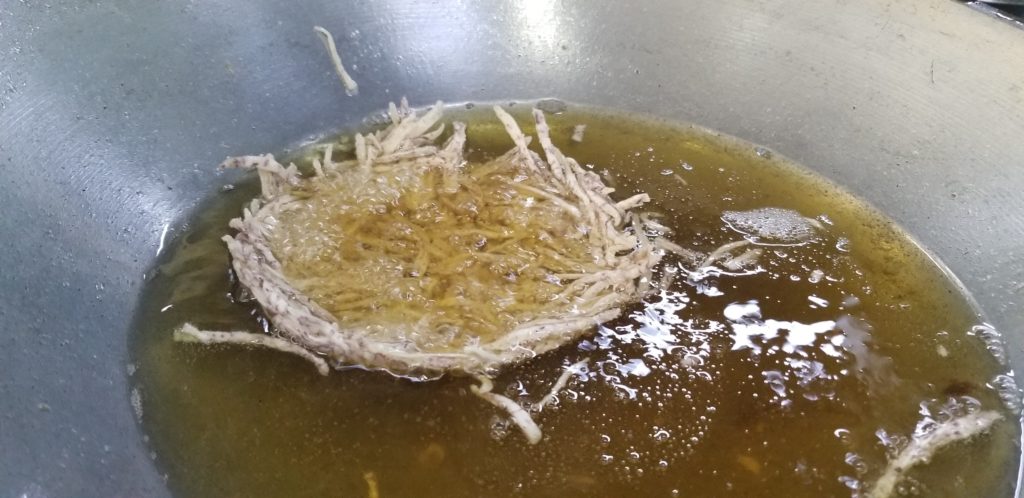
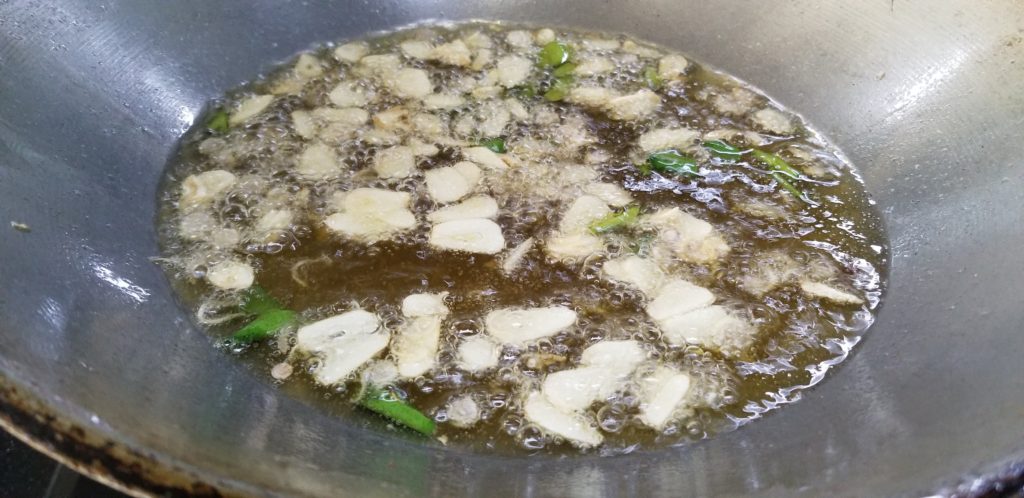
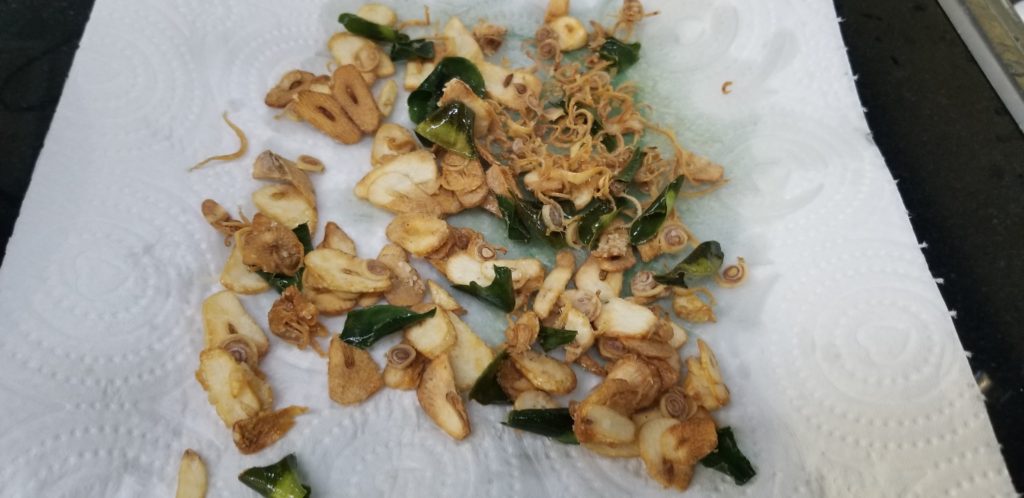
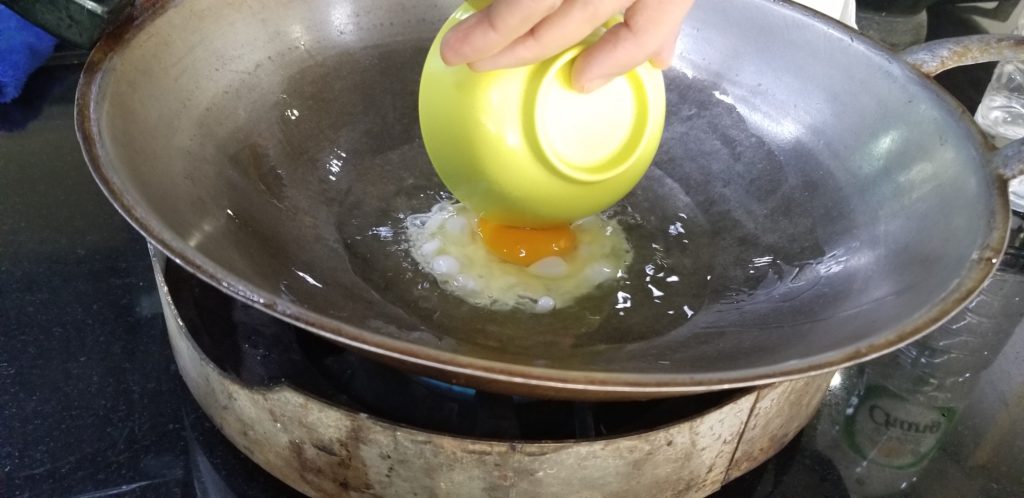
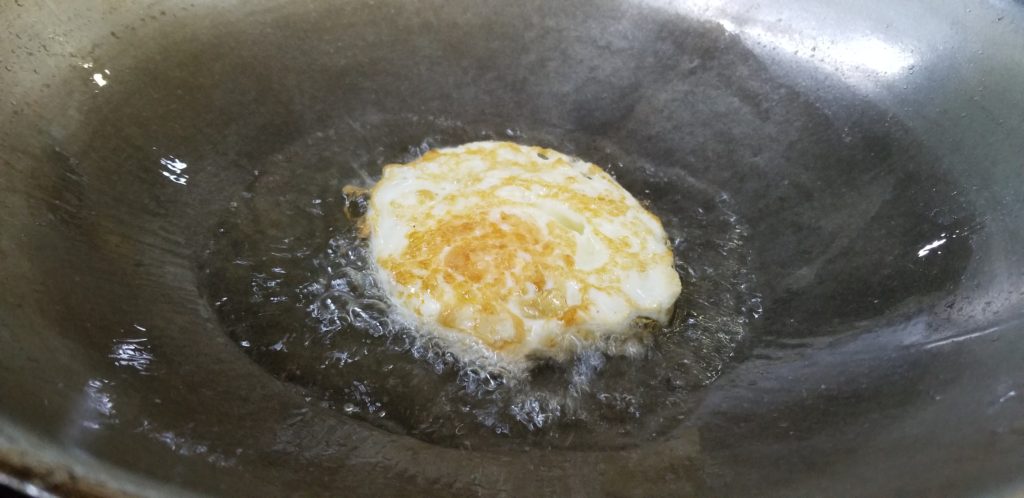
A couple of the recipes were soup/stew related so had a long process to get that wonderful tasting broth happening. A couple new ingredients I worked with today included preserved mustard greens and wax gourd. Some of my work stations today:

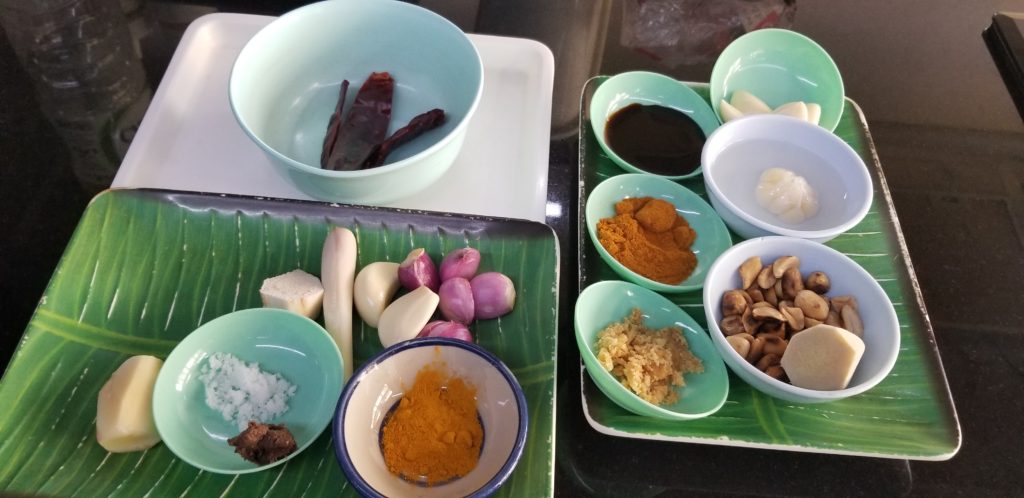
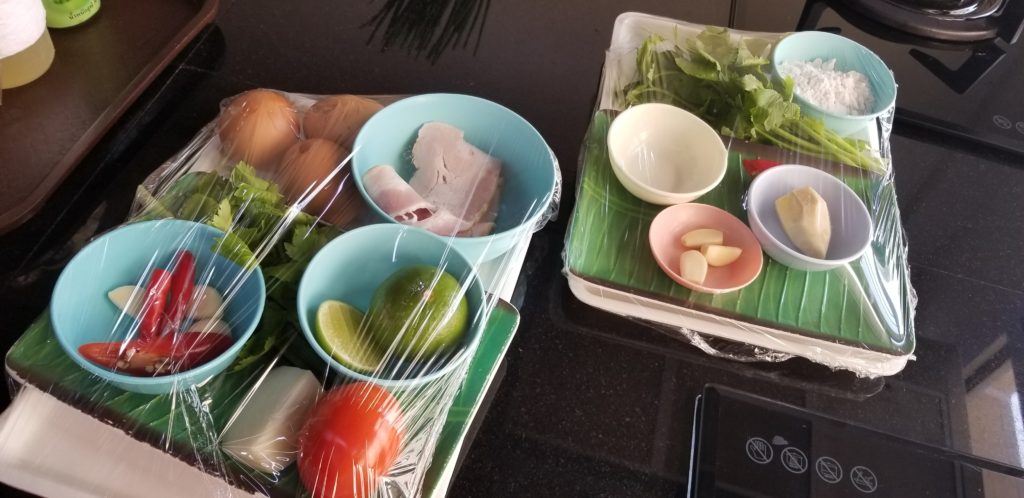
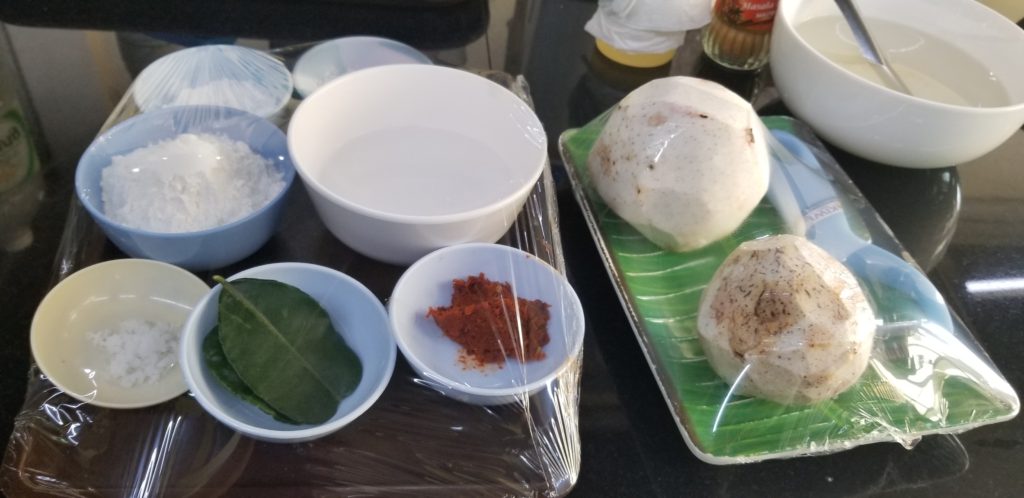
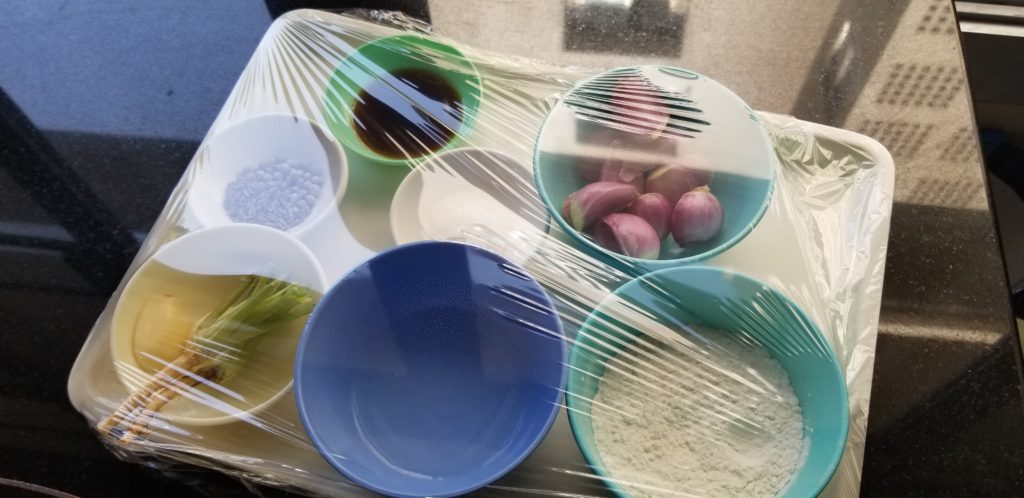
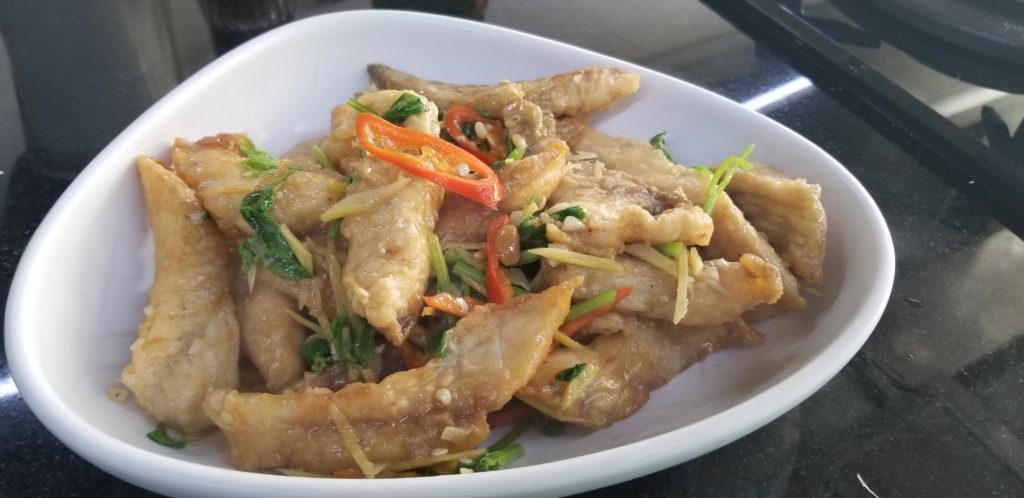
So the dishes I made today were:

  • Stewed pork leg with chili vinegar dip (Khao Kha Moo)
  • Chicken and rice with soybean paste dip (Khao Man Gai)
  • Northern curry paste with pork (Kaeng Hung Lay)
  • Deep fried prawn and herbs salad in taro basket (Goong Thod Katong Pheuak)
  • Stir fried fish with Chinese celery (Pla Pad Kun Chai)
  • Southern style fried chicken (Gai Thot Had Yai)
  • Spicy egg salad with bacon (Yum Kai Dao Bacon)

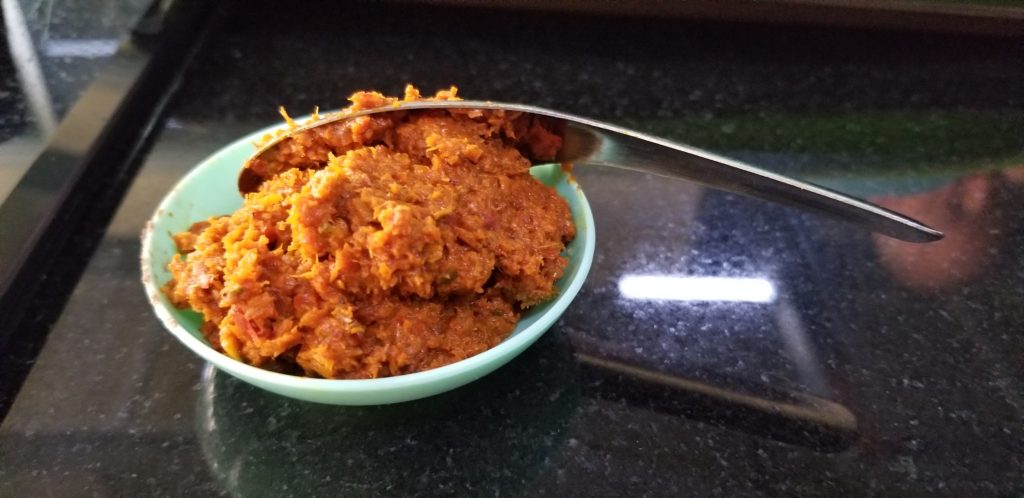
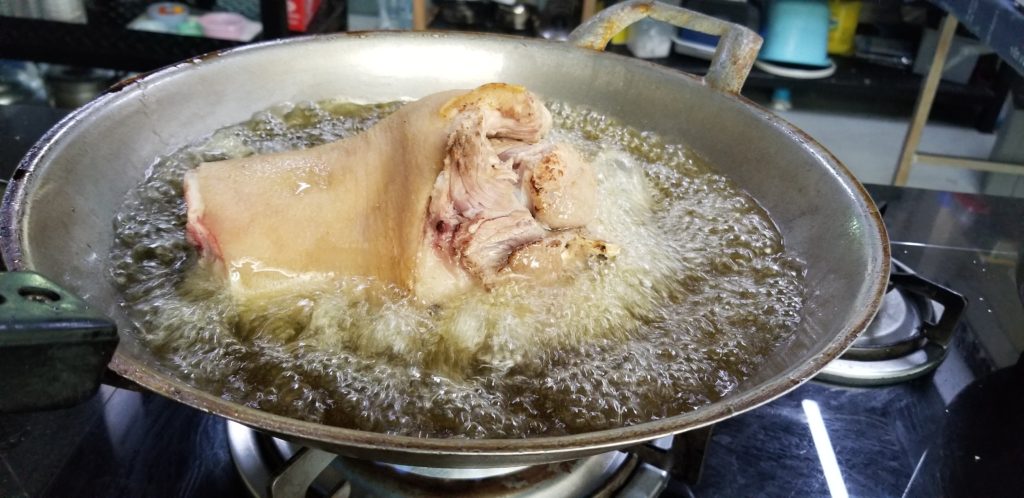
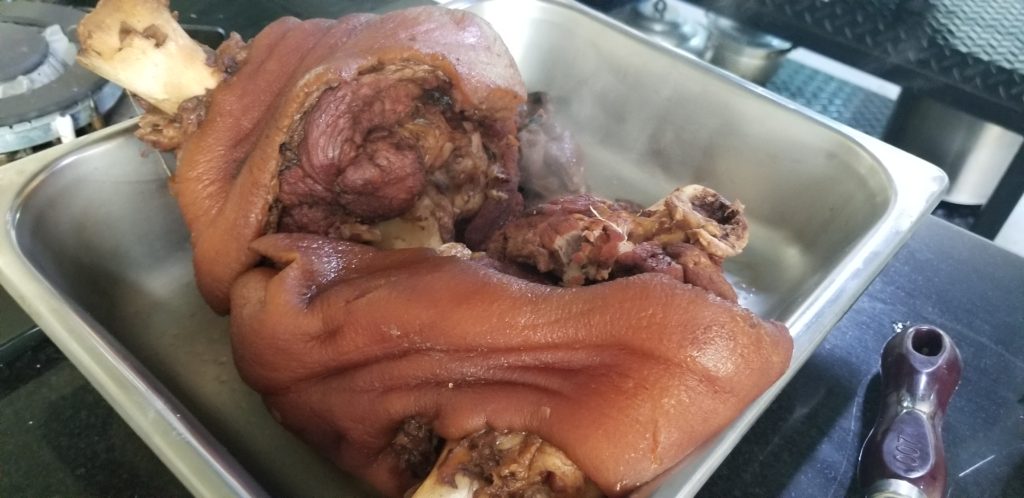
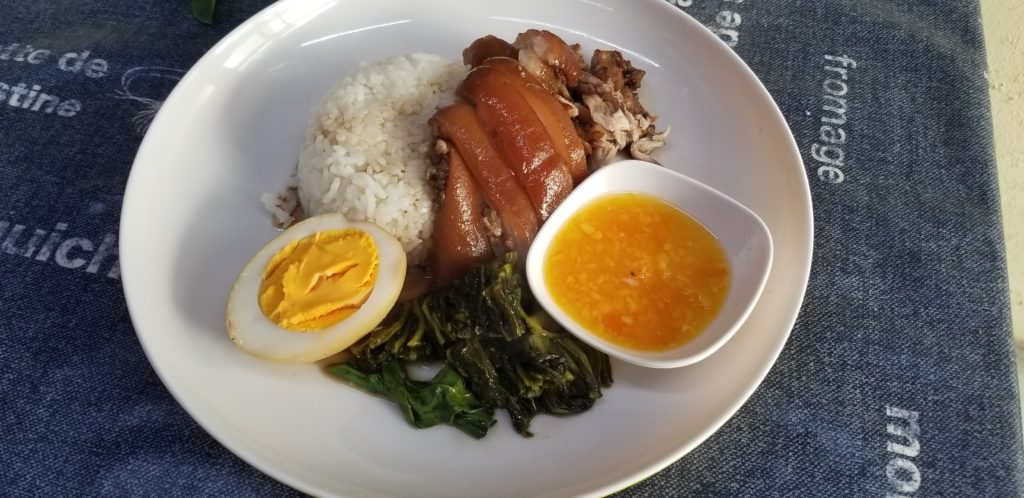
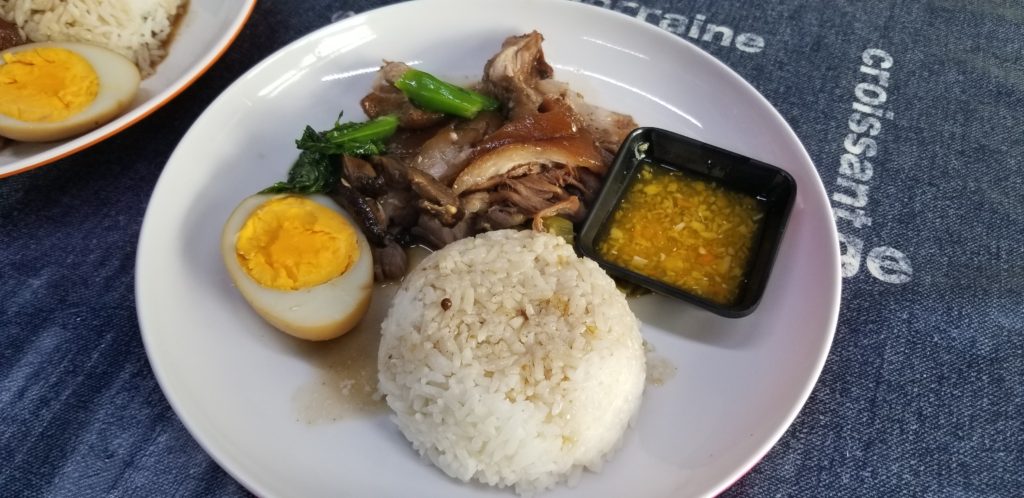
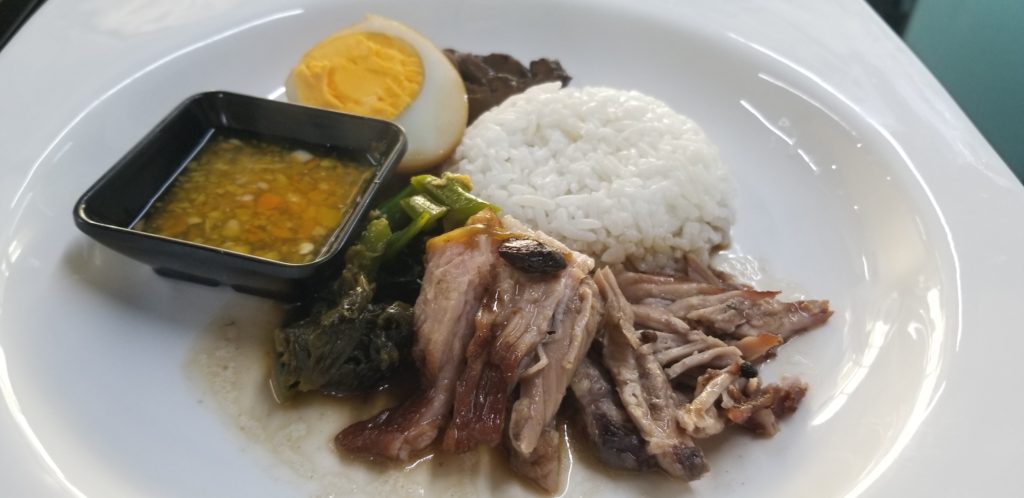
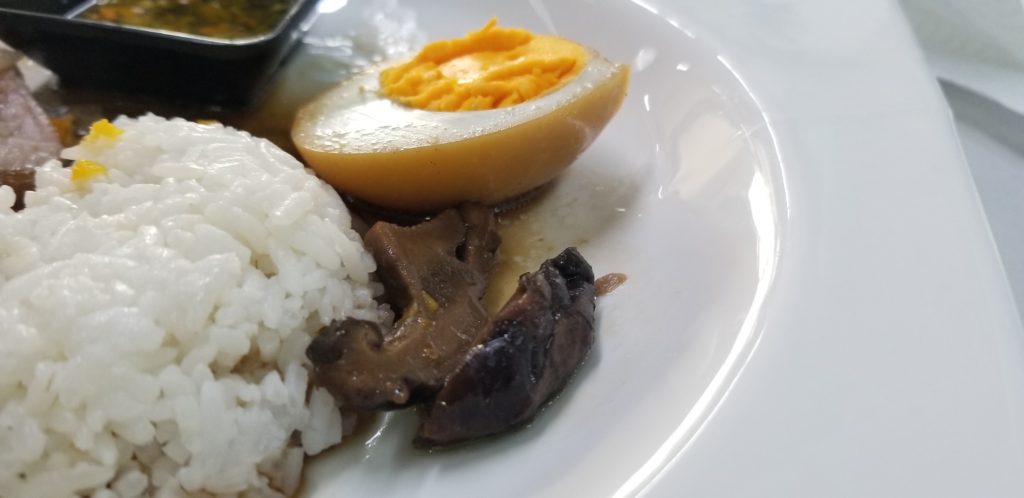
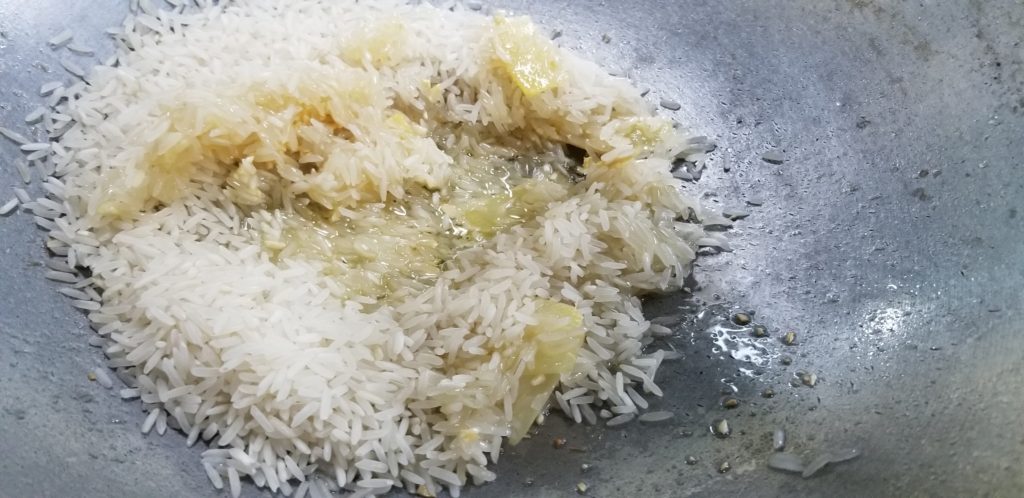
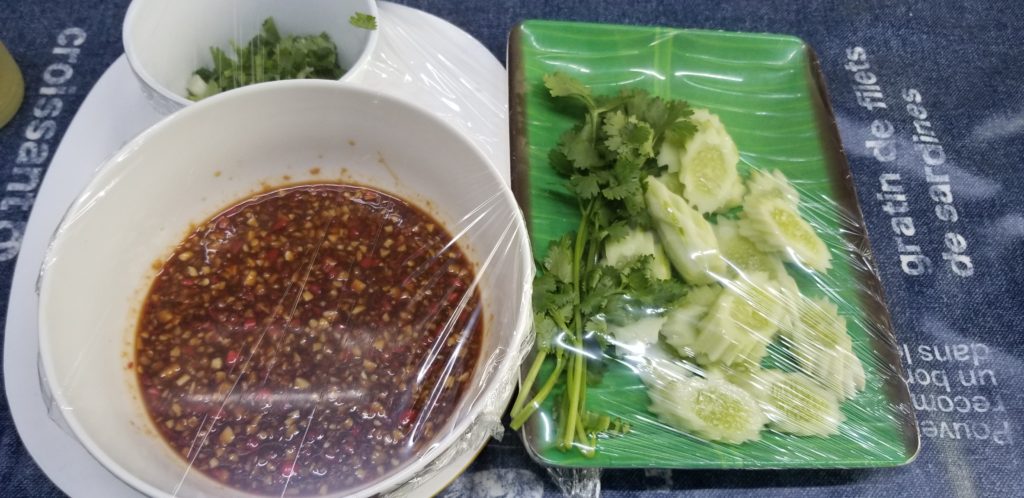
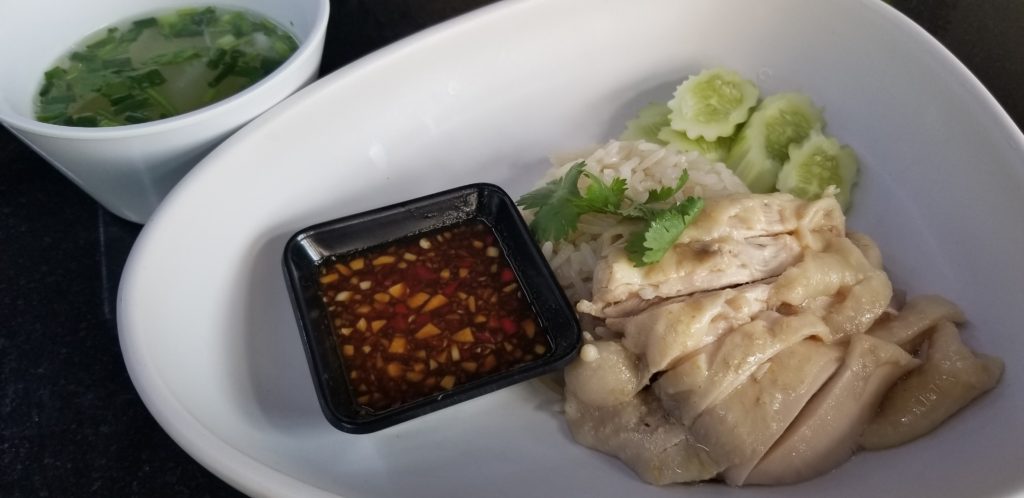
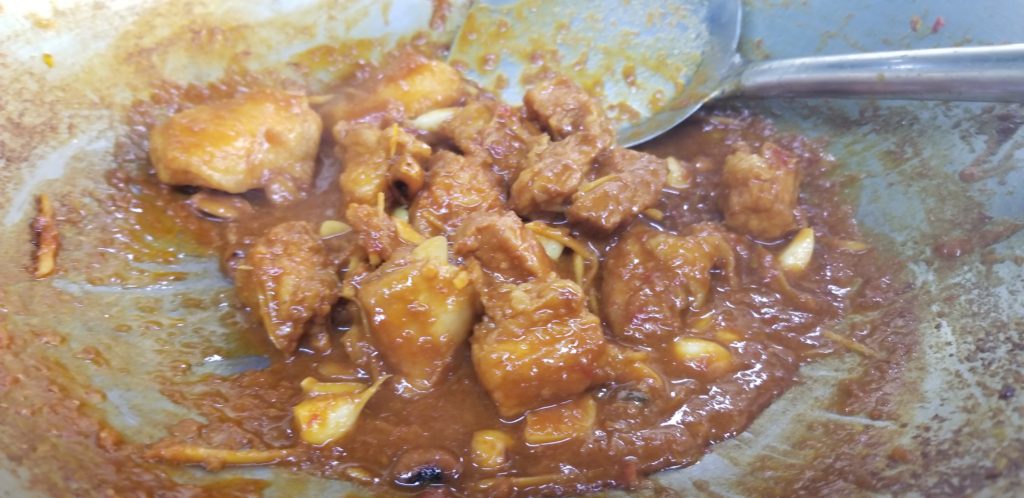
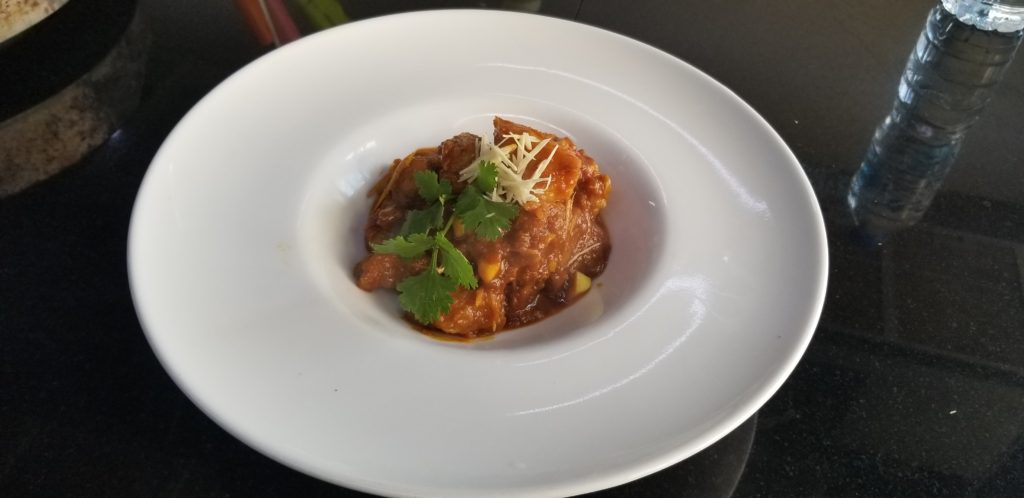
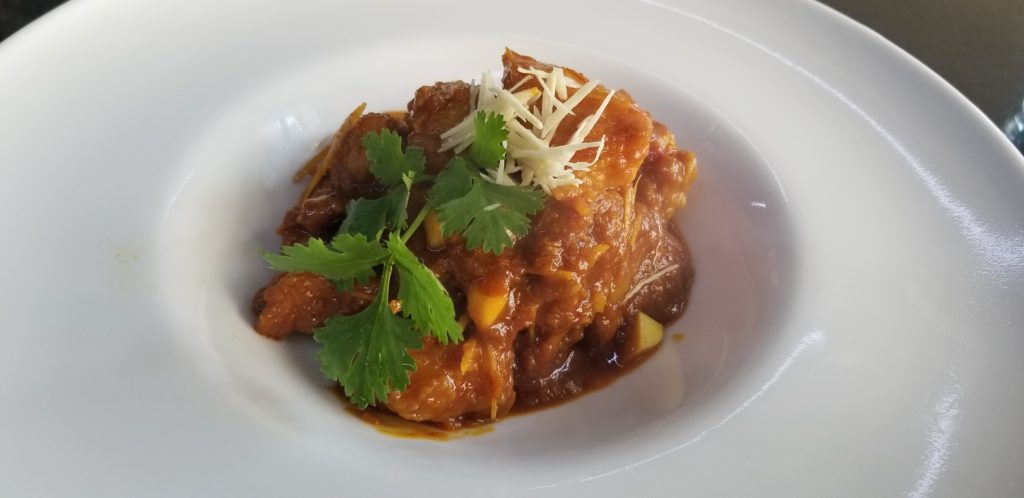
I have to say, I loved everything today, I don’t think I have not liked something so far, but I did have my favorites. If I only had to choose my top three they would be the stewed pork leg, the chicken and rice, the northern curry paste with pork and the southern style fried chicken…okay, top 4!

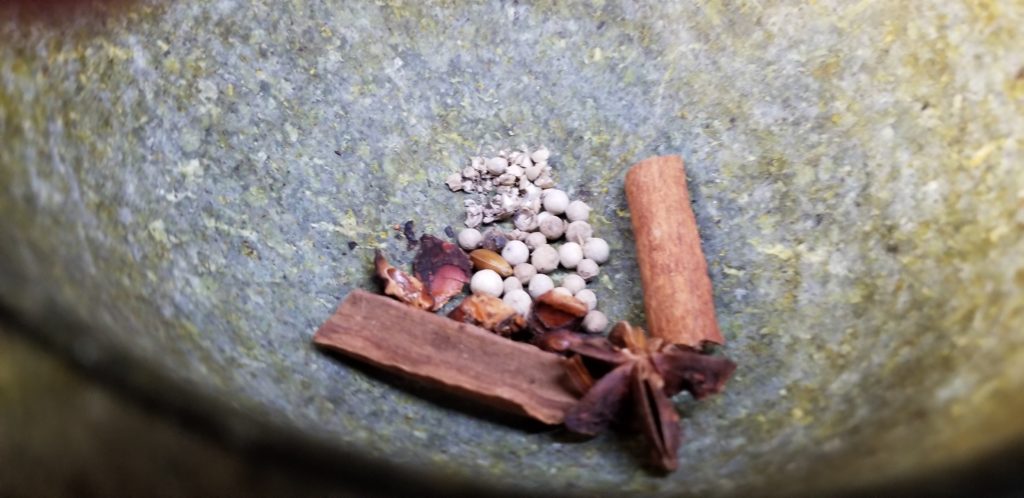
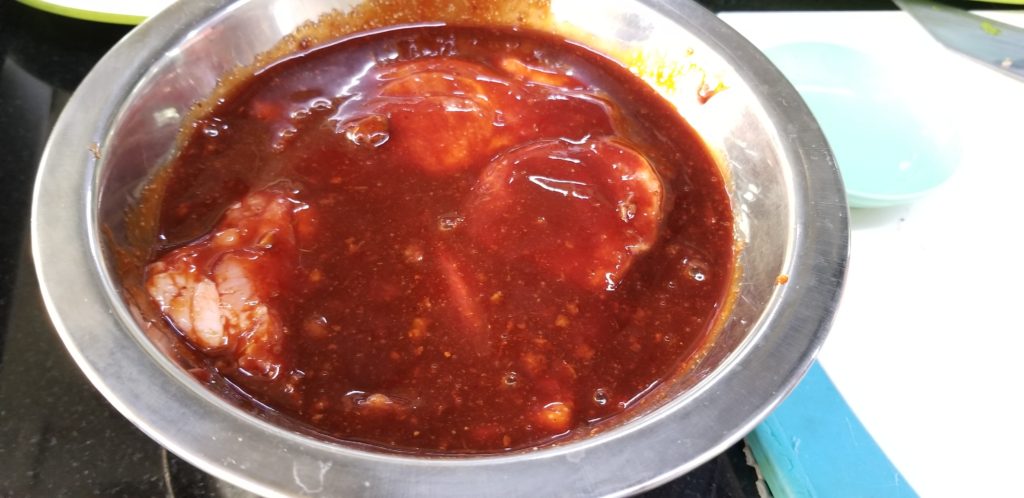
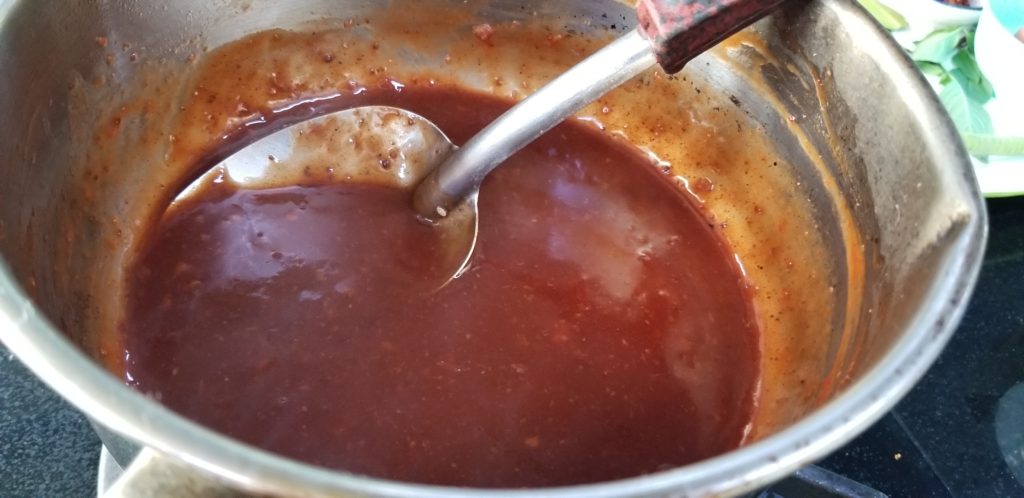
Such a complexity of flavors in the stewed pork leg, which had about 28+ ingredients in it to get those flavors. The chicken and rice was less complex but had that simple healthy flavor that made you feel good when you ate it. Both of those definitely are good soups/stews to eat if you have a cold!

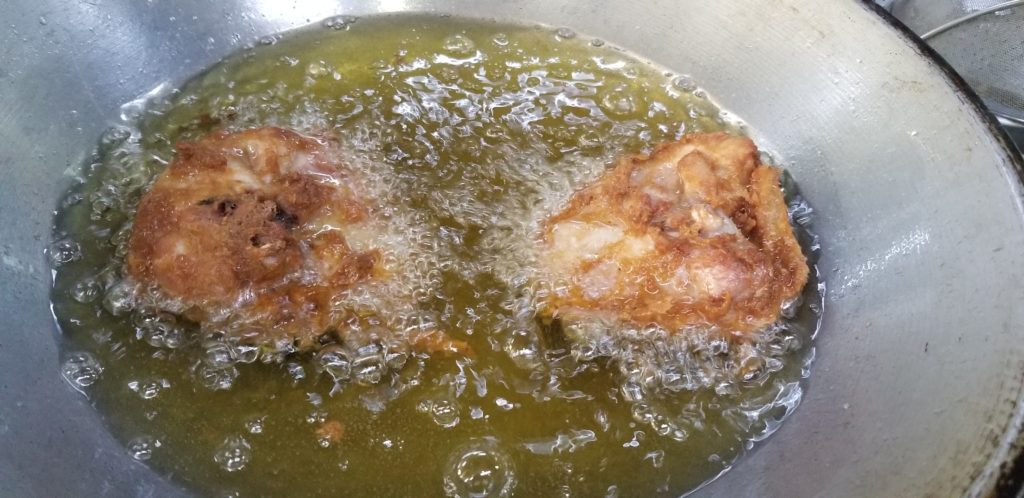
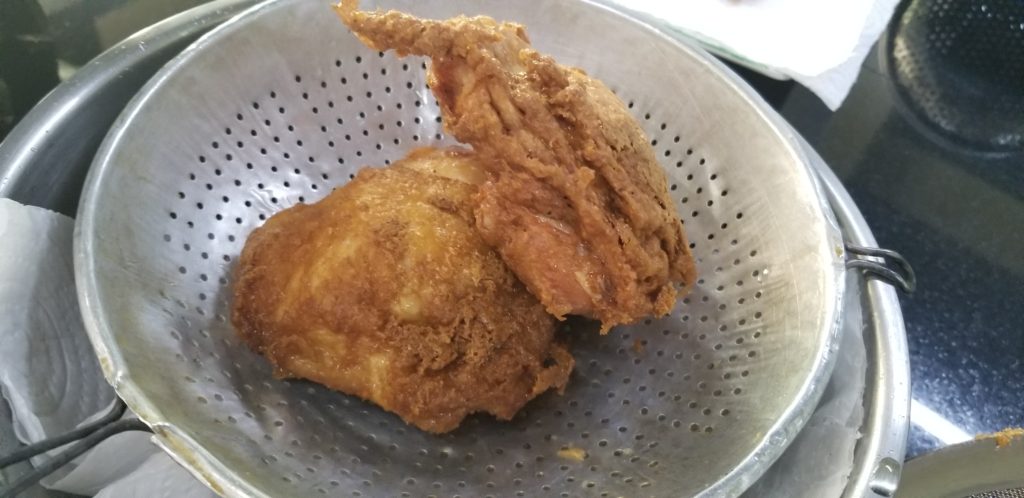
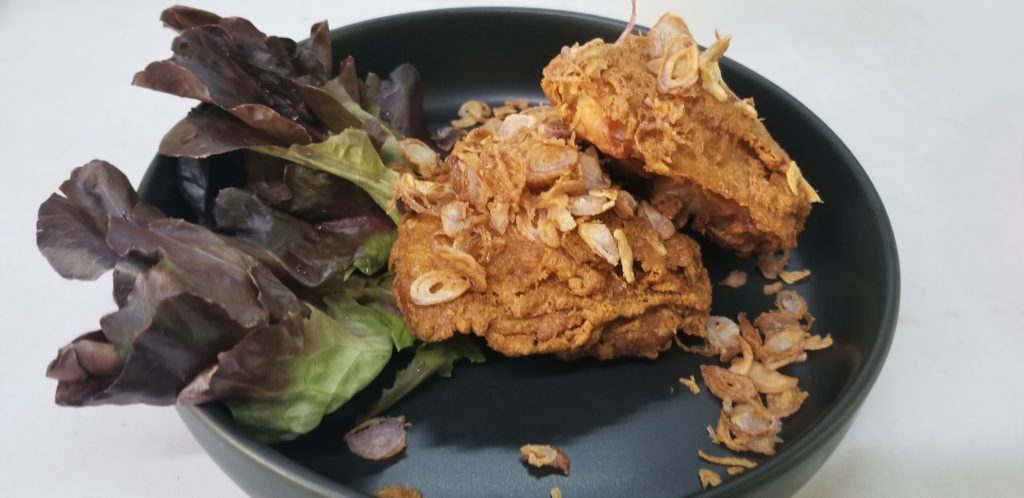
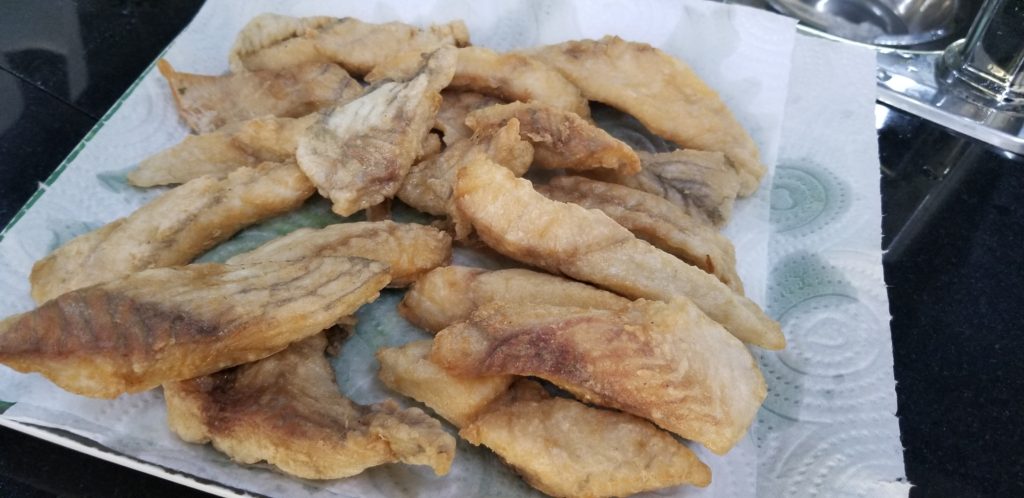
On the other hand, the Northern curry paste with pork and the southern style fried chicken…not as healthy, ha, ha…but ohhhhh so good. To narrow it down even more, I believe these two are my top two choices. That being said, I have to go with the fried chicken. I have never really made a southern fried chicken and always wanted to learn how to get that awesome crunch…then fast forward to Thailand and eating that street food fried chicken that smells so good and has a wonderful crunch I wanted to learn how to make that…well, I know now! It is a simple recipe but sooo good. The chicken is moist inside and crunchy on the outside!

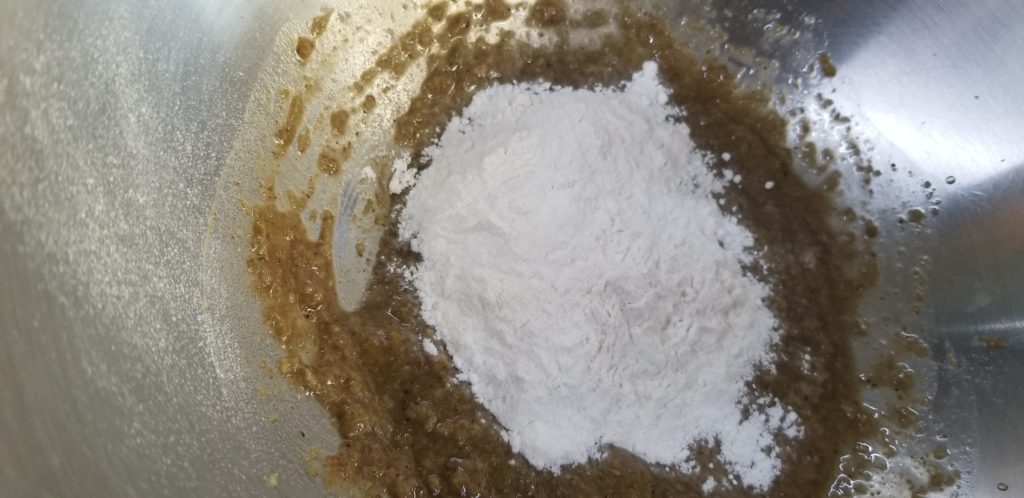
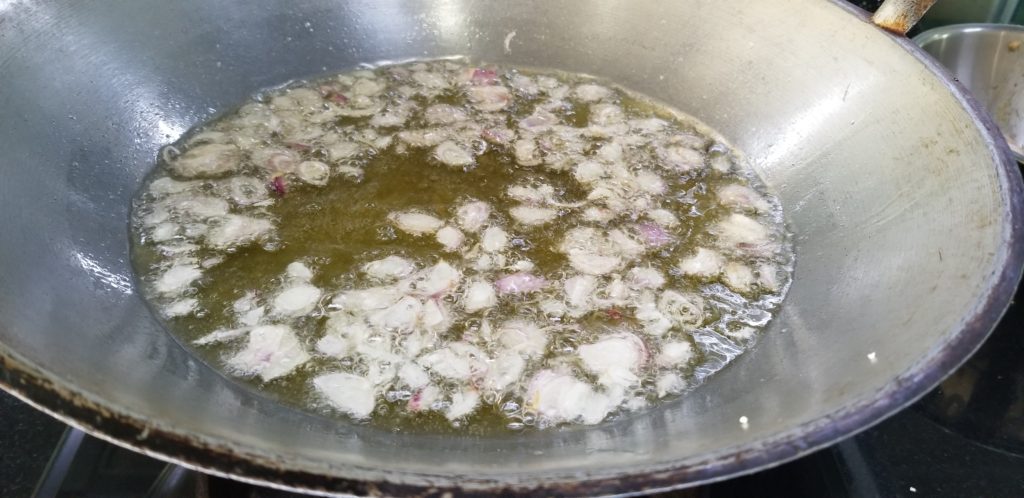
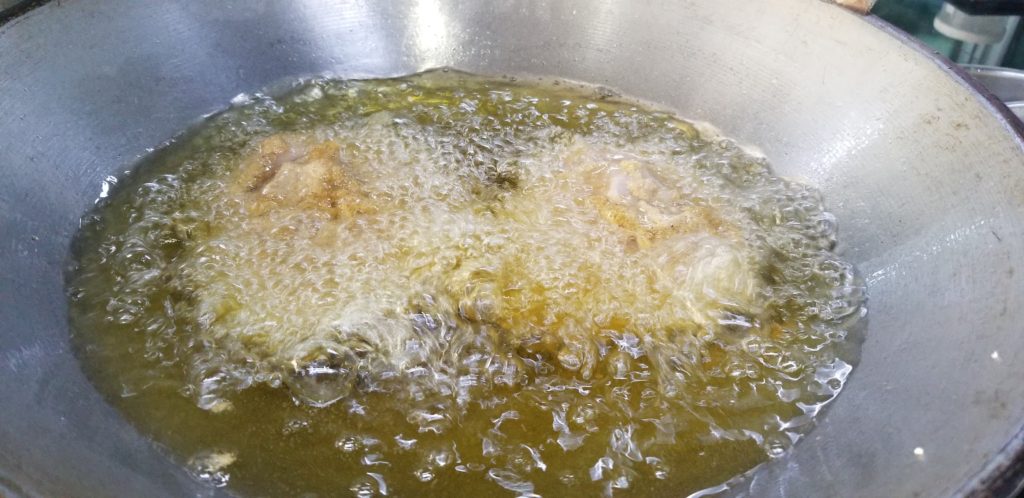
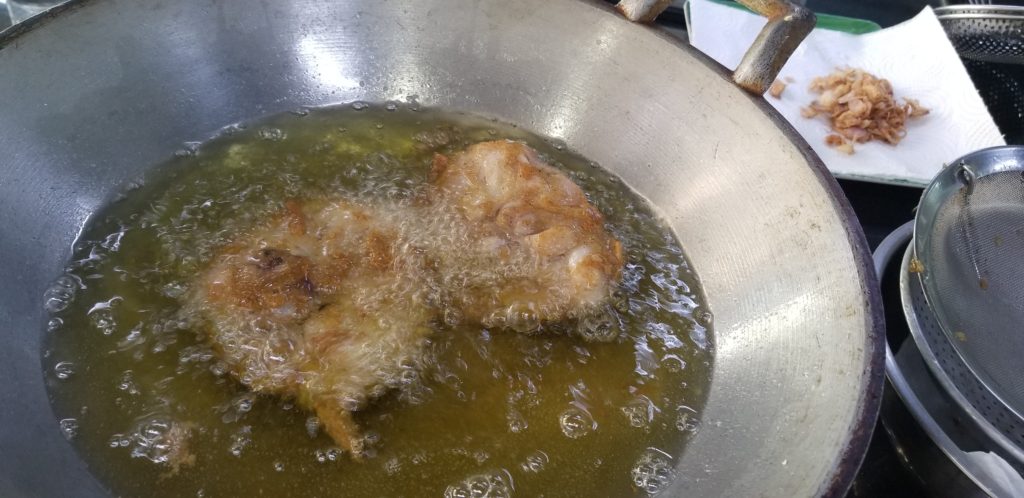
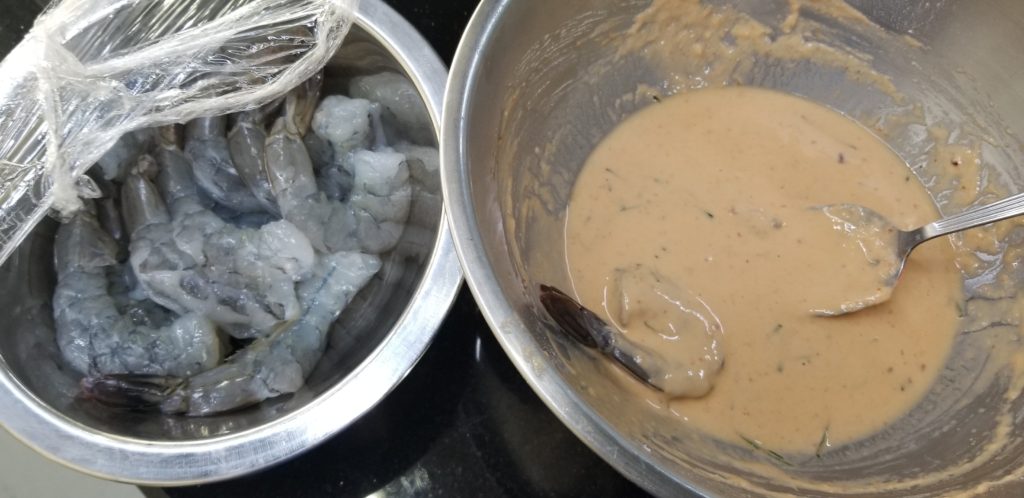
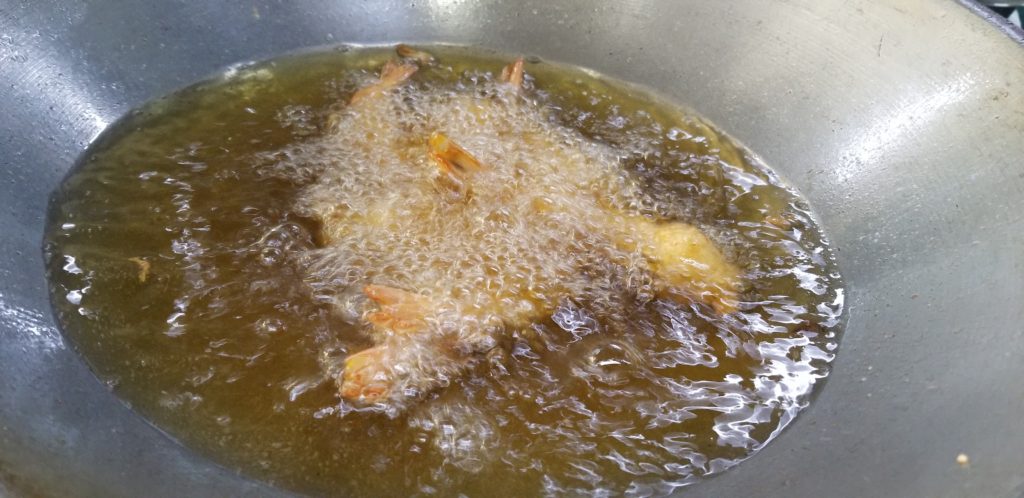
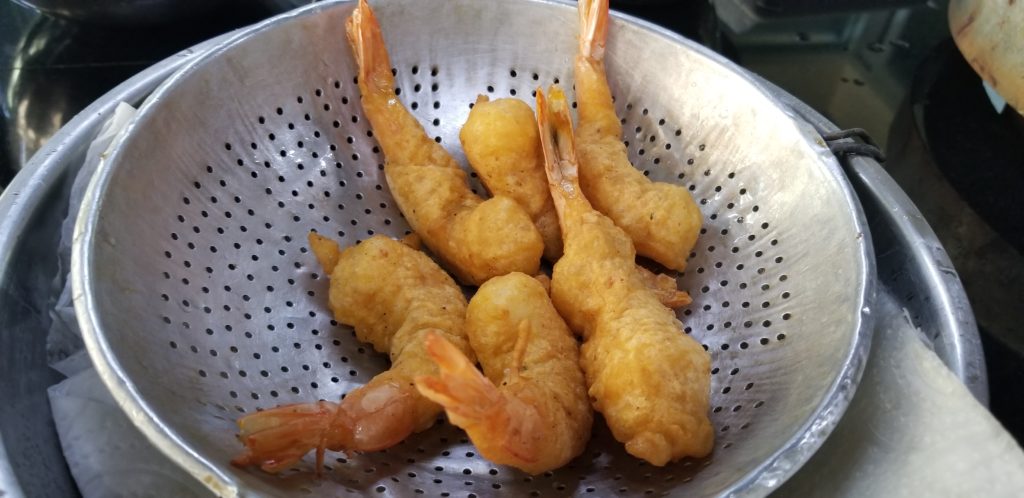
For the fried chicken, you will need:

  • 2 chicken thighs (you can use any cut of chicken but dark meat tends to stay more moist)
  • 1 coriander root, finely chopped
  • 2 garlic cloves, finely chopped
  • 1 teaspoon white pepper corn
  • 1/2 teaspoon cumin seed
  • 1 tablespoon coriander seed
  • 2 tablespoons tempura flour
  • 2 tablespoons limestone water or soda water
  • 2 tablespoons deep fried shallots for topping
  • 1/4 teaspoon salt
  • 1 teaspoon sugar
  • 1 to 1 1/2 tablespoon seasoning sauce
  • 1 teaspoon oyster sauce
  • Palm oil for frying

Steps:

  1. Pound (in a mortar) the peppercorn, cumin and coriander seeds then add coriander root and garlic and pound between rough and smooth. Add to a mixing bowl.
  2. Combine all the other ingredients into the mixing bowl, except for chicken and fried shallots (shallots are a topping), with the tempura flour being added last and mix well.
  3. Add chicken and let marinate for at least 30 minutes. In the meantime slice your shallots thin, cover with some all purpose flour and fry to make deep fried shallots for topping.
  4. Deep fry chicken in wok on medium heat for about 10 minutes, turning half way through.
  5. Turn wok to high and cook for another 3-5 minutes, turning once in between, until you have a golden color and is crispy. Take out and set in a strainer to rest about 10-15 minutes.
  6. Right before you are ready to eat, re-fry chicken for about another 3 minutes, turning in between, to get it extra crispy.
  7. Can serve with sticky rice.

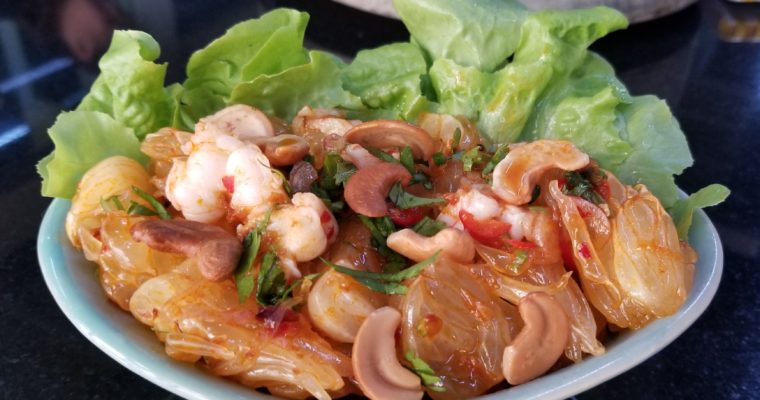
Pictures of the other dishes I made:


Well, that is it for today, sorry my post was a little later than usual. More to come on Monday!

Bangkok Thai Cooking Academy-Day 17

Bangkok Thai Cooking Academy-Day 17

Day 17 today. A lot of good and refreshing dishes. Made the last type of curry today, panang. It was good, but I still like the yellow curry we made the best and than the massaman curry second best. The difference with the panang was…


Facebook
Youtube
Pinterest
Instagram